Get Creative with 10 DIY Standing Desk Ideas: Step-by-Step Guide
Table of Contents
Building your standing desk allows you as an office worker to take personal needs and budget into account. There are plenty of reasons why you should create a standing desk yourself. Fortunately, there are several different creative methods on how to make a standing desk. You are going to need the tools, the time, the materials, and the mindset to begin your DIY adjustable standing desk project.
Why take on the project of building a standing desk? What are the advantages of a DIY adjustable standing desk? Where do you begin with making a DIY workstation? If you are interested in a sit-stand workstation, there are simple, cheap, and creative ways on how to make a standing desk. Building your desk takes effort and dedication; however, the rewards of this DIY project are plentiful. This is the complete guide in helping you make your standing desk.
Choosing Your Standing Desk Types to DIY
There are plenty of creative ways on how to make a standing desk to construct your own. Your choice of desk depends on how often you spend time in your office and your budget. Let us discuss some DIY office desk ideas and designs that you can have in your home.
1. Electric Standing Desk
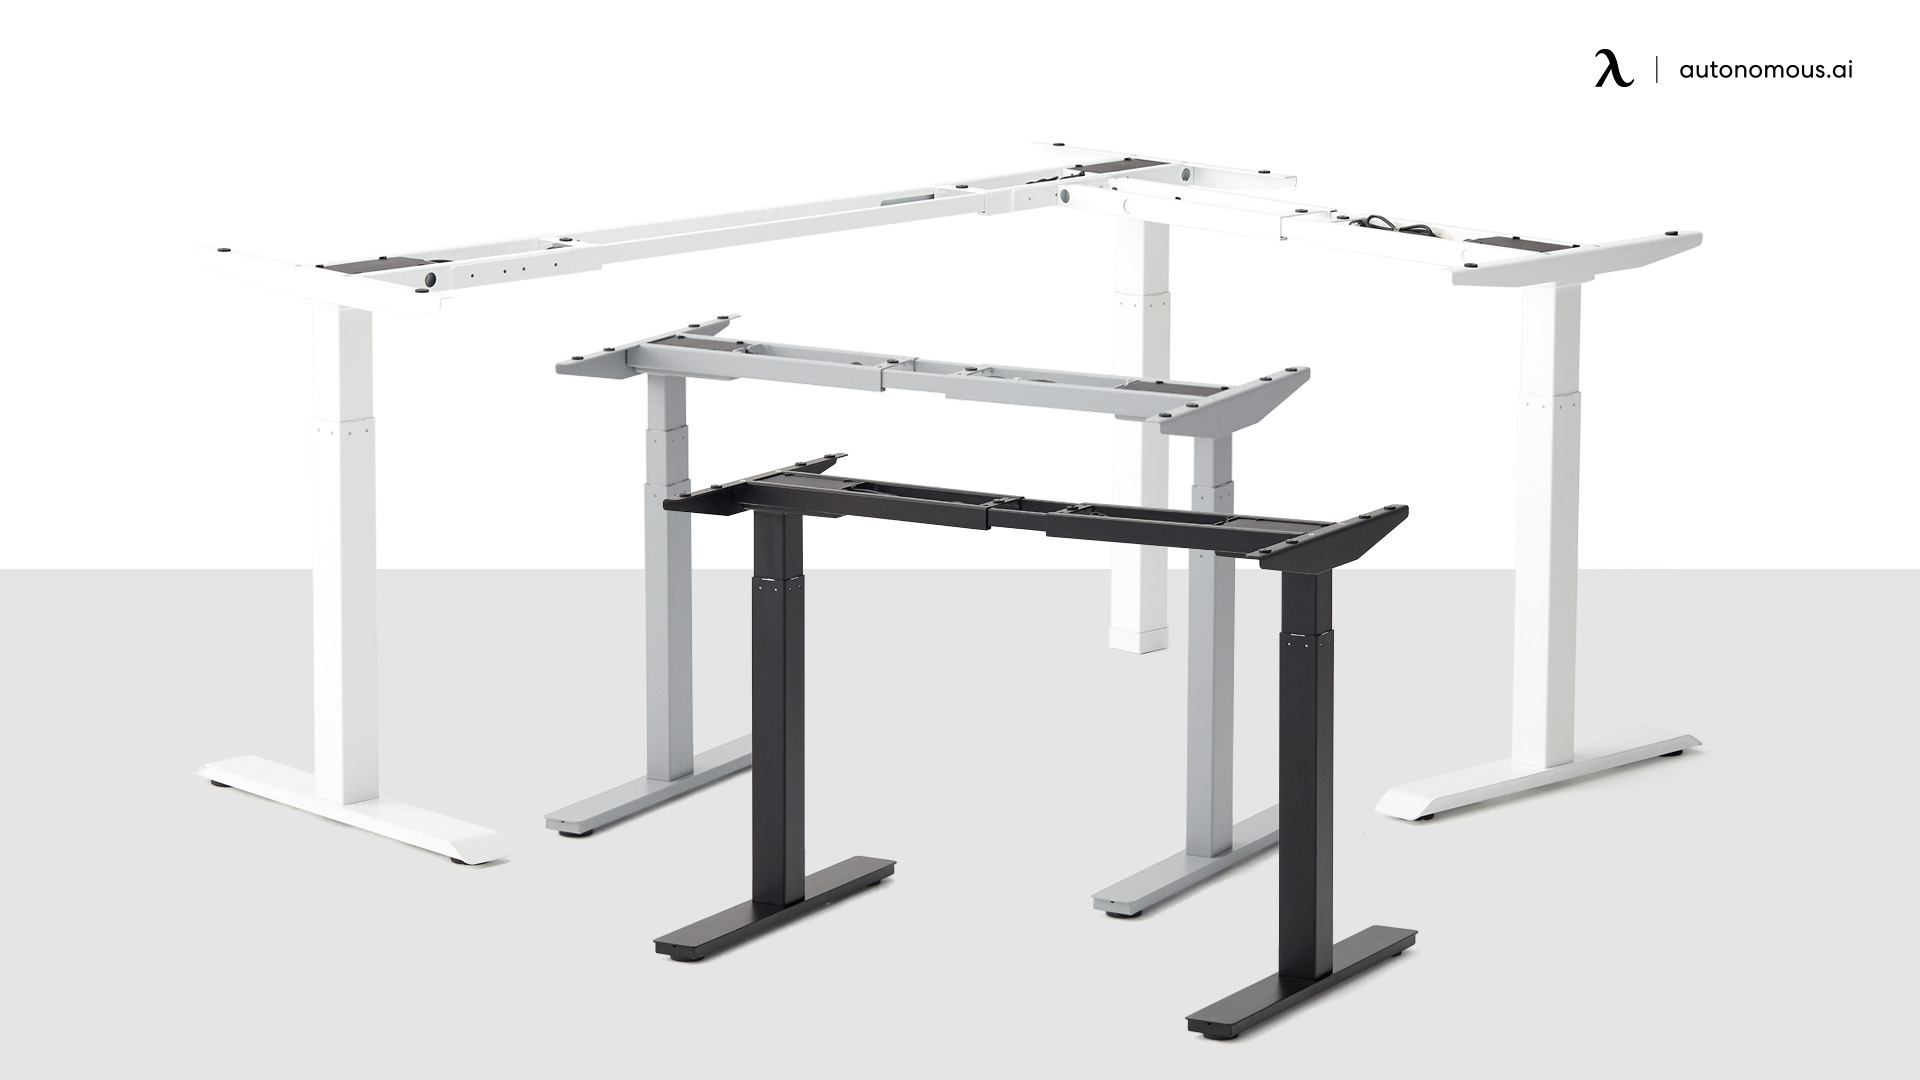
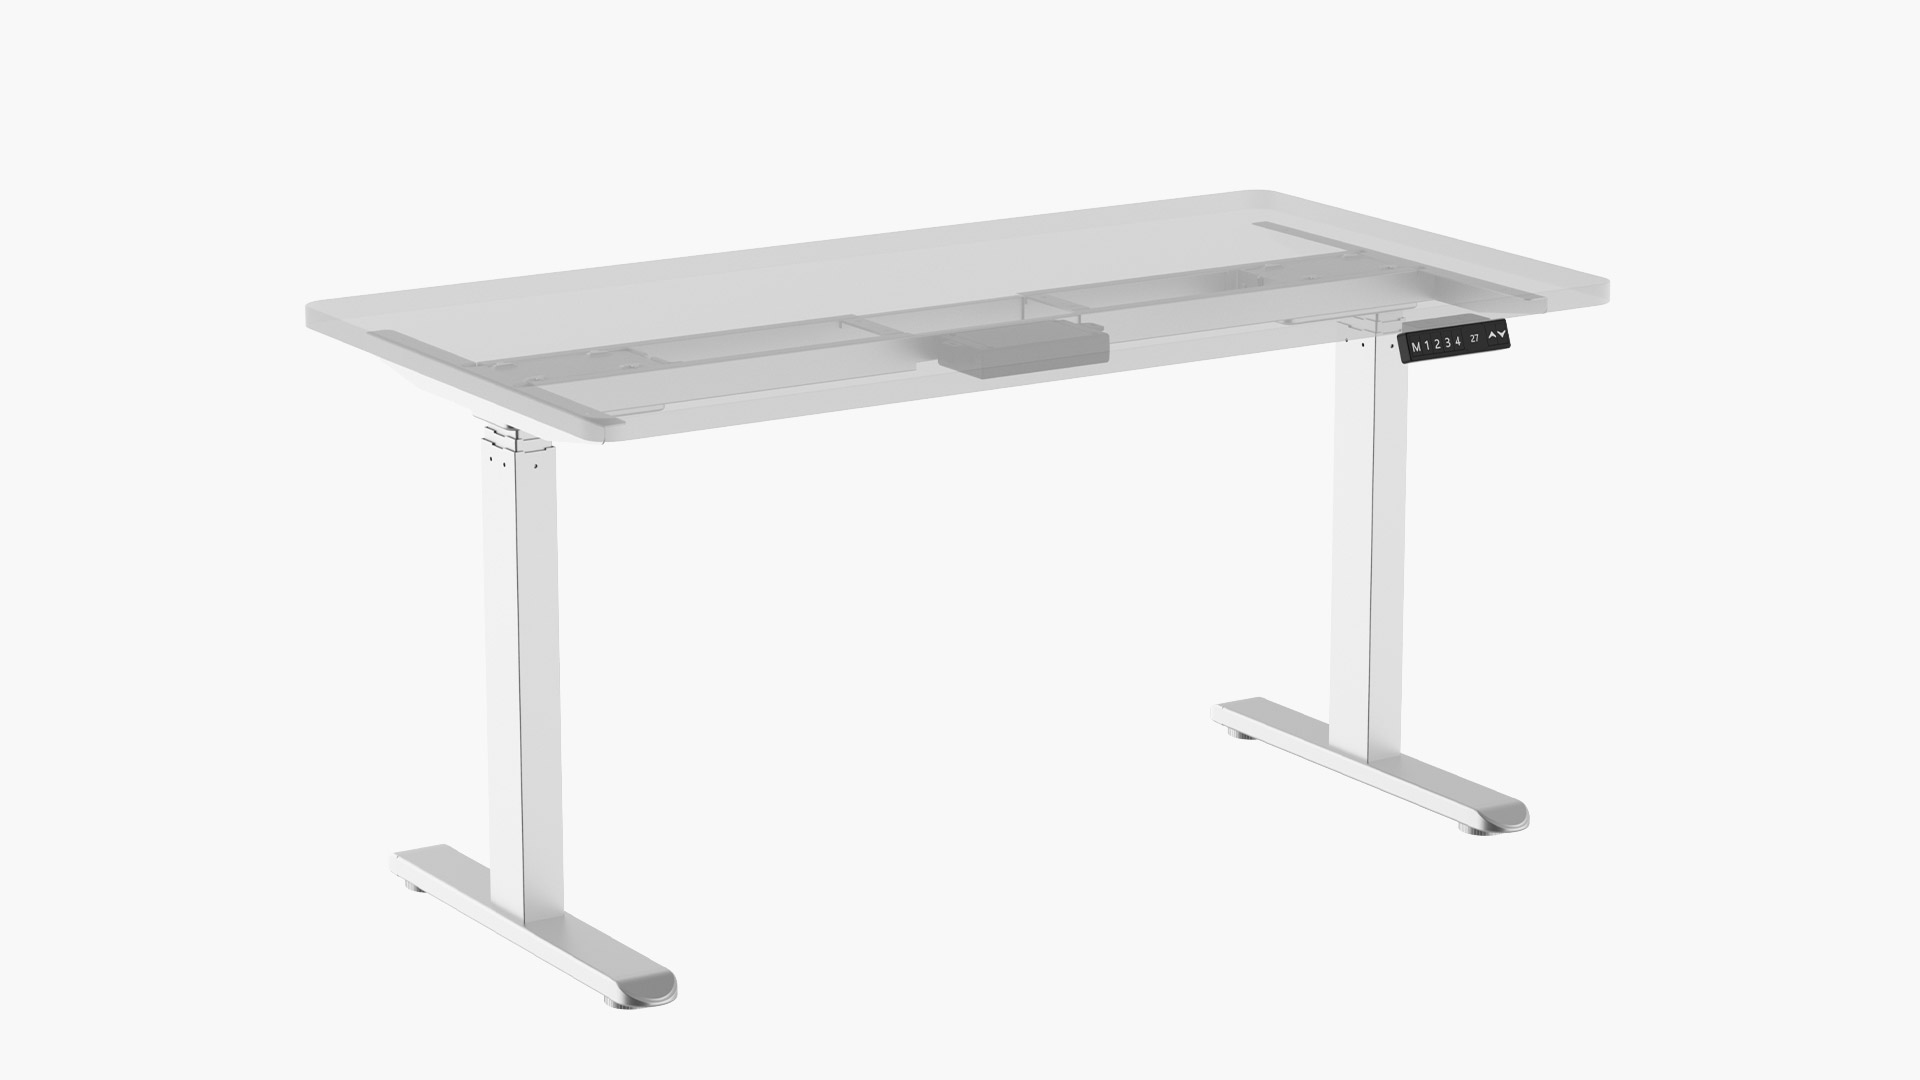
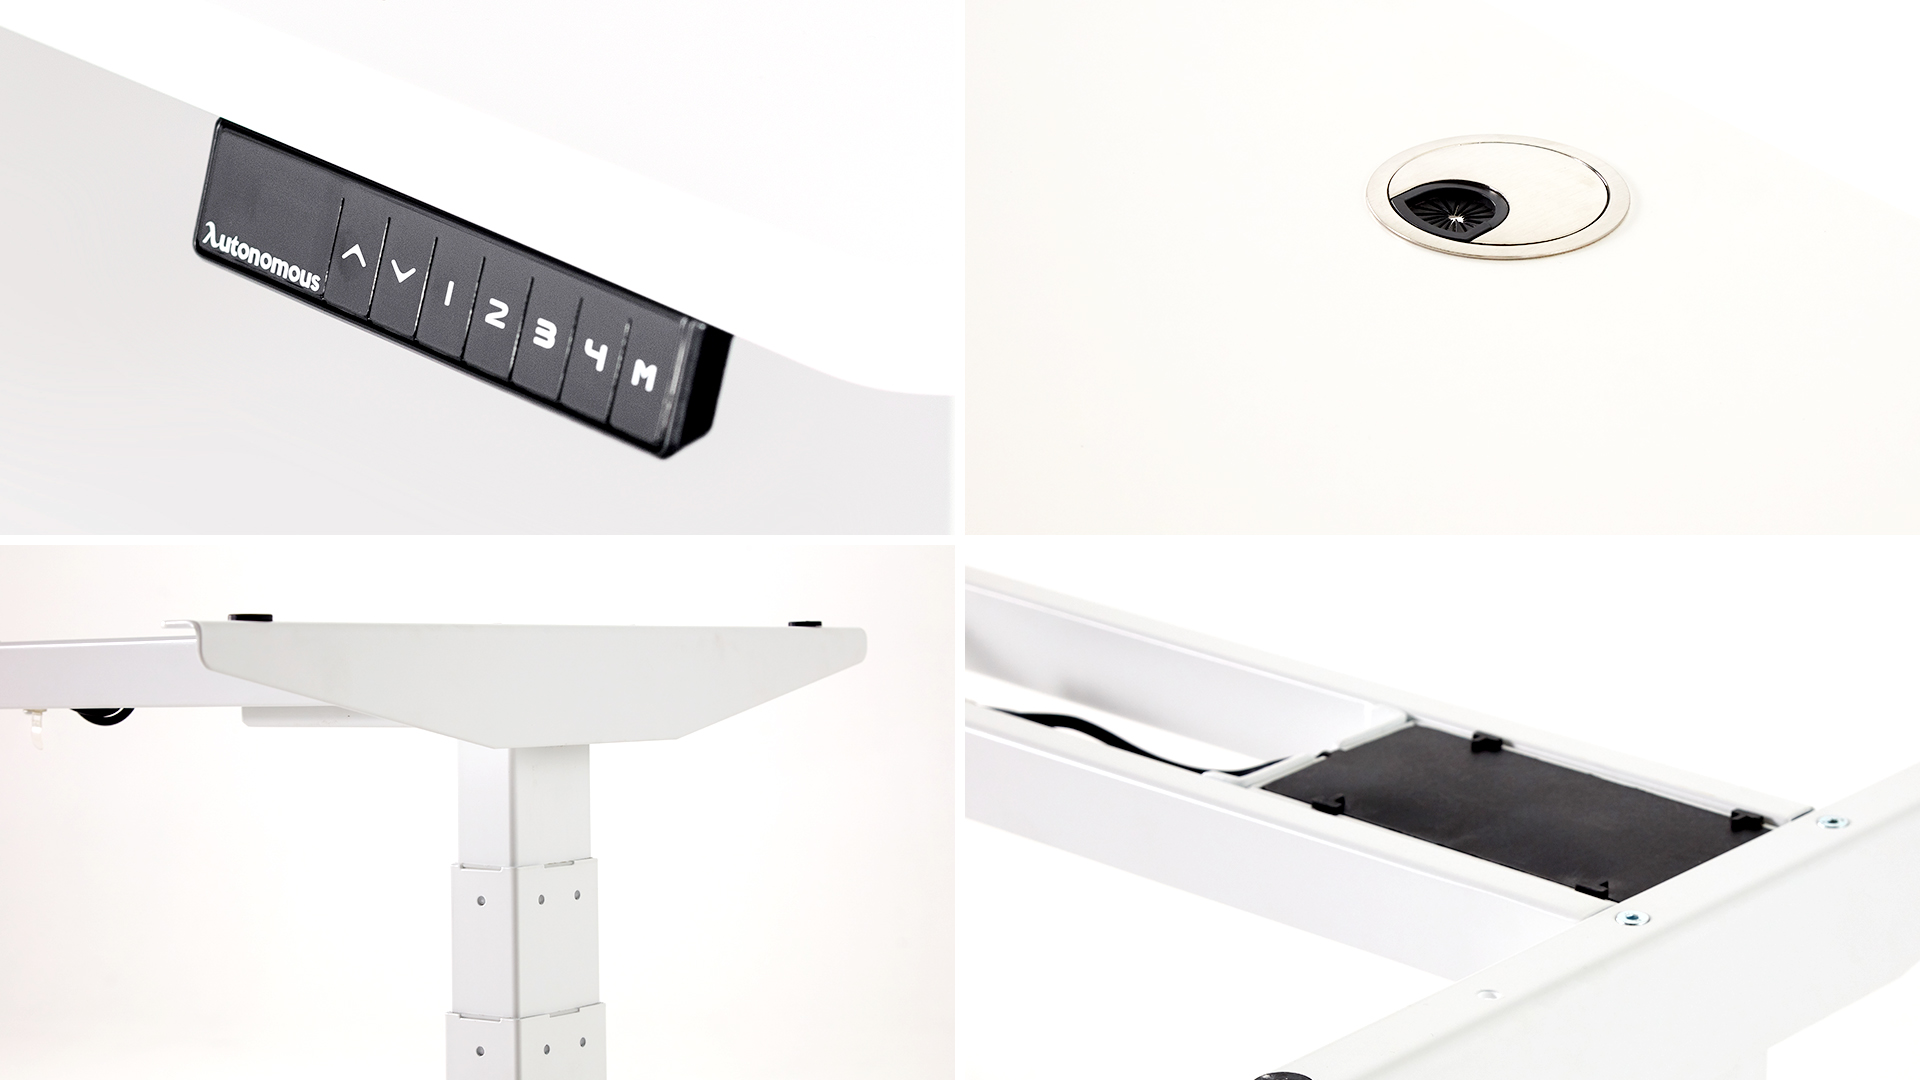
The DIY desk frame serves as the perfect starting point for your DIY sit-stand workstation project. The kit provides all the necessary requirements to build an electric and adjustable standing desk. An industry-leading kit that is going to enable you to take one step closer to your dream workstation.
Curious about converting your current desk? Check out this guide on how to convert an existing desk into a standing desk for tips and inspiration!
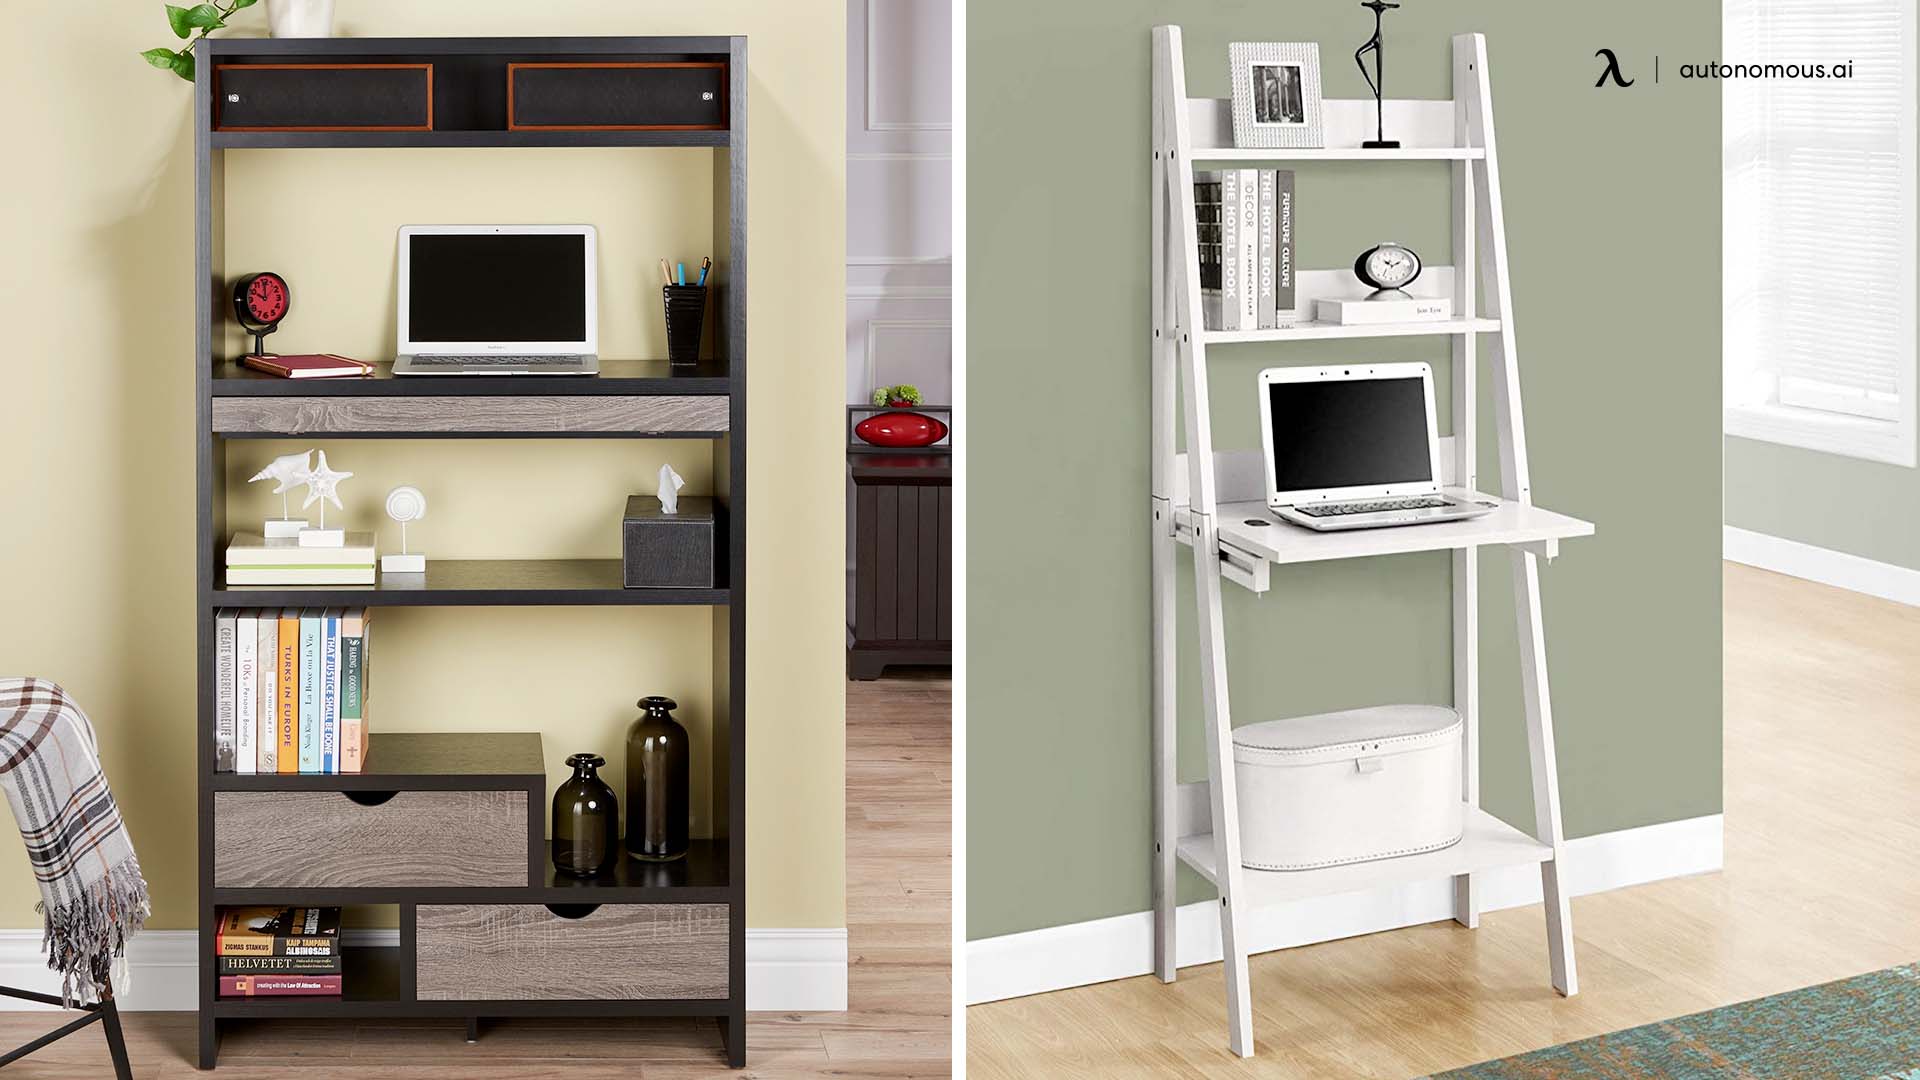
2. Bookcase standing desk
It transforms a humble bookcase into a practical and well-designed workstation. This DIY workstation idea does not need any tools or assembly. All you are going to do is remove some of the bookshelves and designate your workspace.
A DIY bookcase standing desk offers affordability and customization as its primary advantages. It allows you to design a workspace tailored to your needs, with built-in storage for organization. These DIY adjustable standing desk are typically stable and sturdy, making them suitable for a variety of tasks.
However, they come with limitations. The fixed height of most bookcases means limited adjustability, which may not meet ergonomic needs. Additionally, they are primarily designed for standing work, lacking the flexibility for sitting, and may not have the same sleek aesthetics or durability as commercial standing desks. Ultimately, a DIY bookcase standing desk can be a practical and budget-friendly option if its pros align with your workspace requirements, but it may not provide the same level of versatility as other solutions.
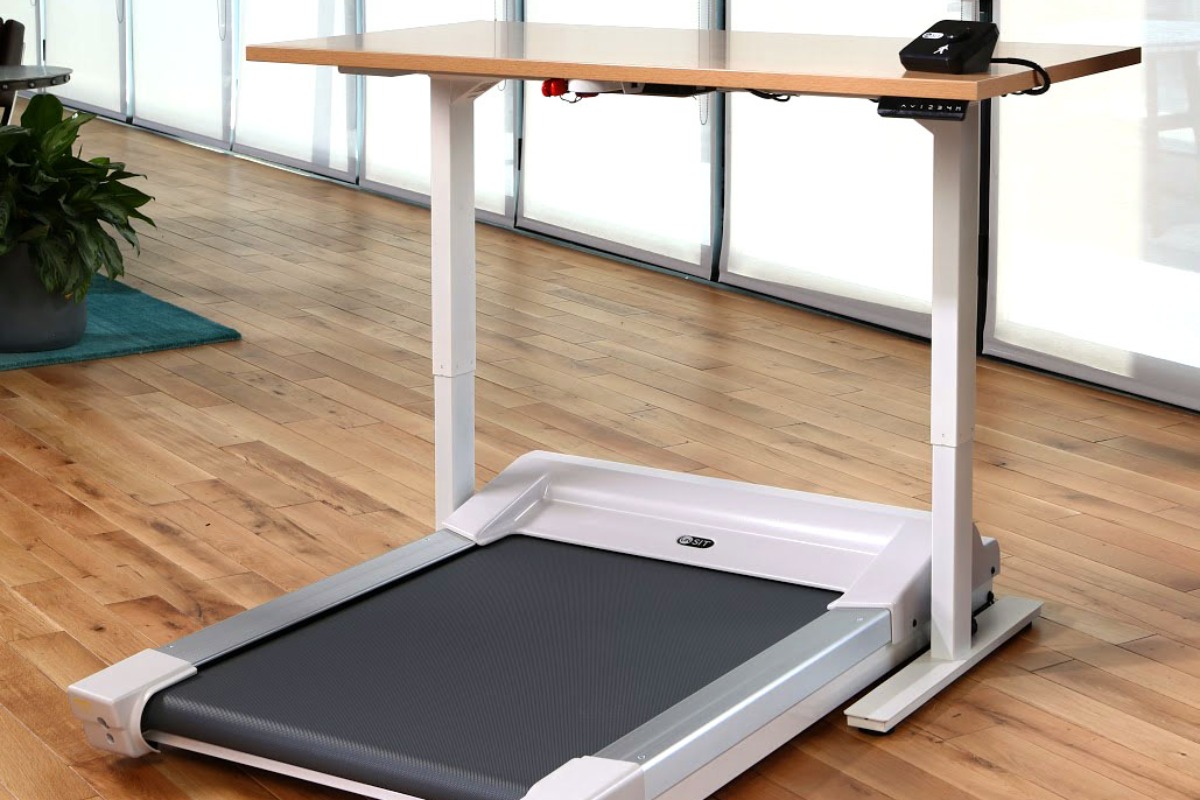
3. Treadmill standing desk
Through building this DIY project, you are going to keep mentally engaged and physically engaged too. This DIY idea means you can incorporate daily desk exercise into your work routine. Attach a platform for your keyboard and desk to the treadmill. When you have a bit of relaxation time from your office work – turn up the treadmill and work off some calories.
Creating a DIY treadmill standing desk offers the benefit of staying active while working. It can improve health and is customizable to your preferences.
However, it can be costly, requires space, may cause distractions due to noise, and has a learning curve for typing and mouse use. Safety and ergonomics should be a priority when setting up this workspace.
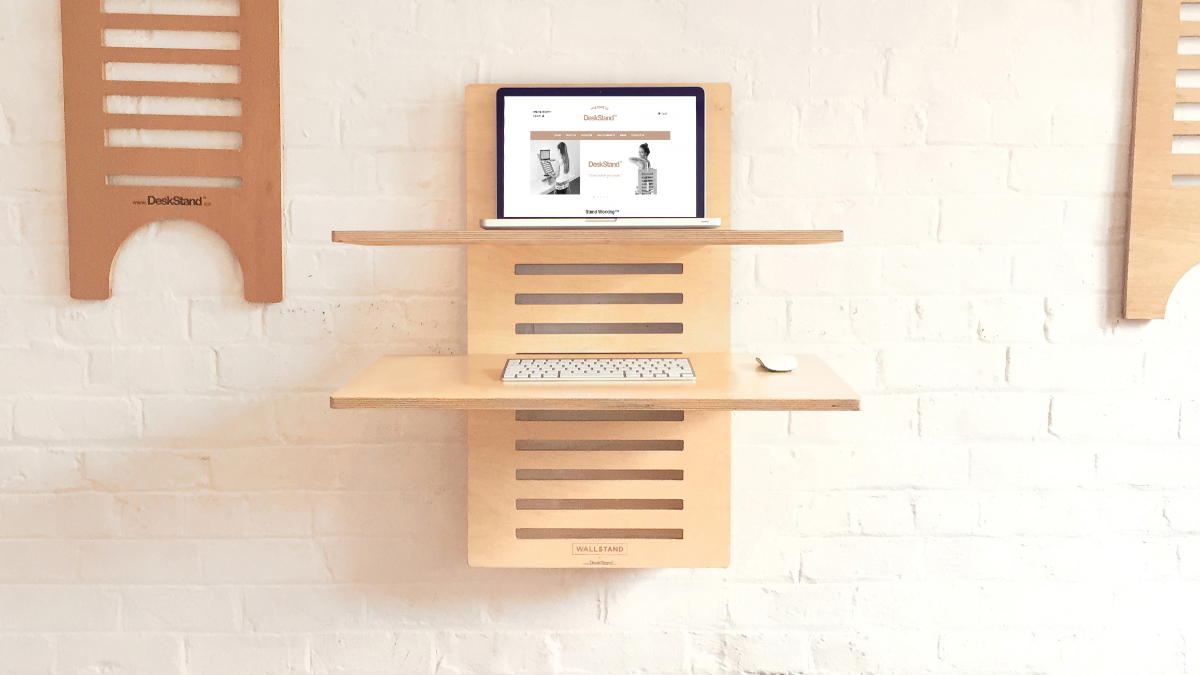
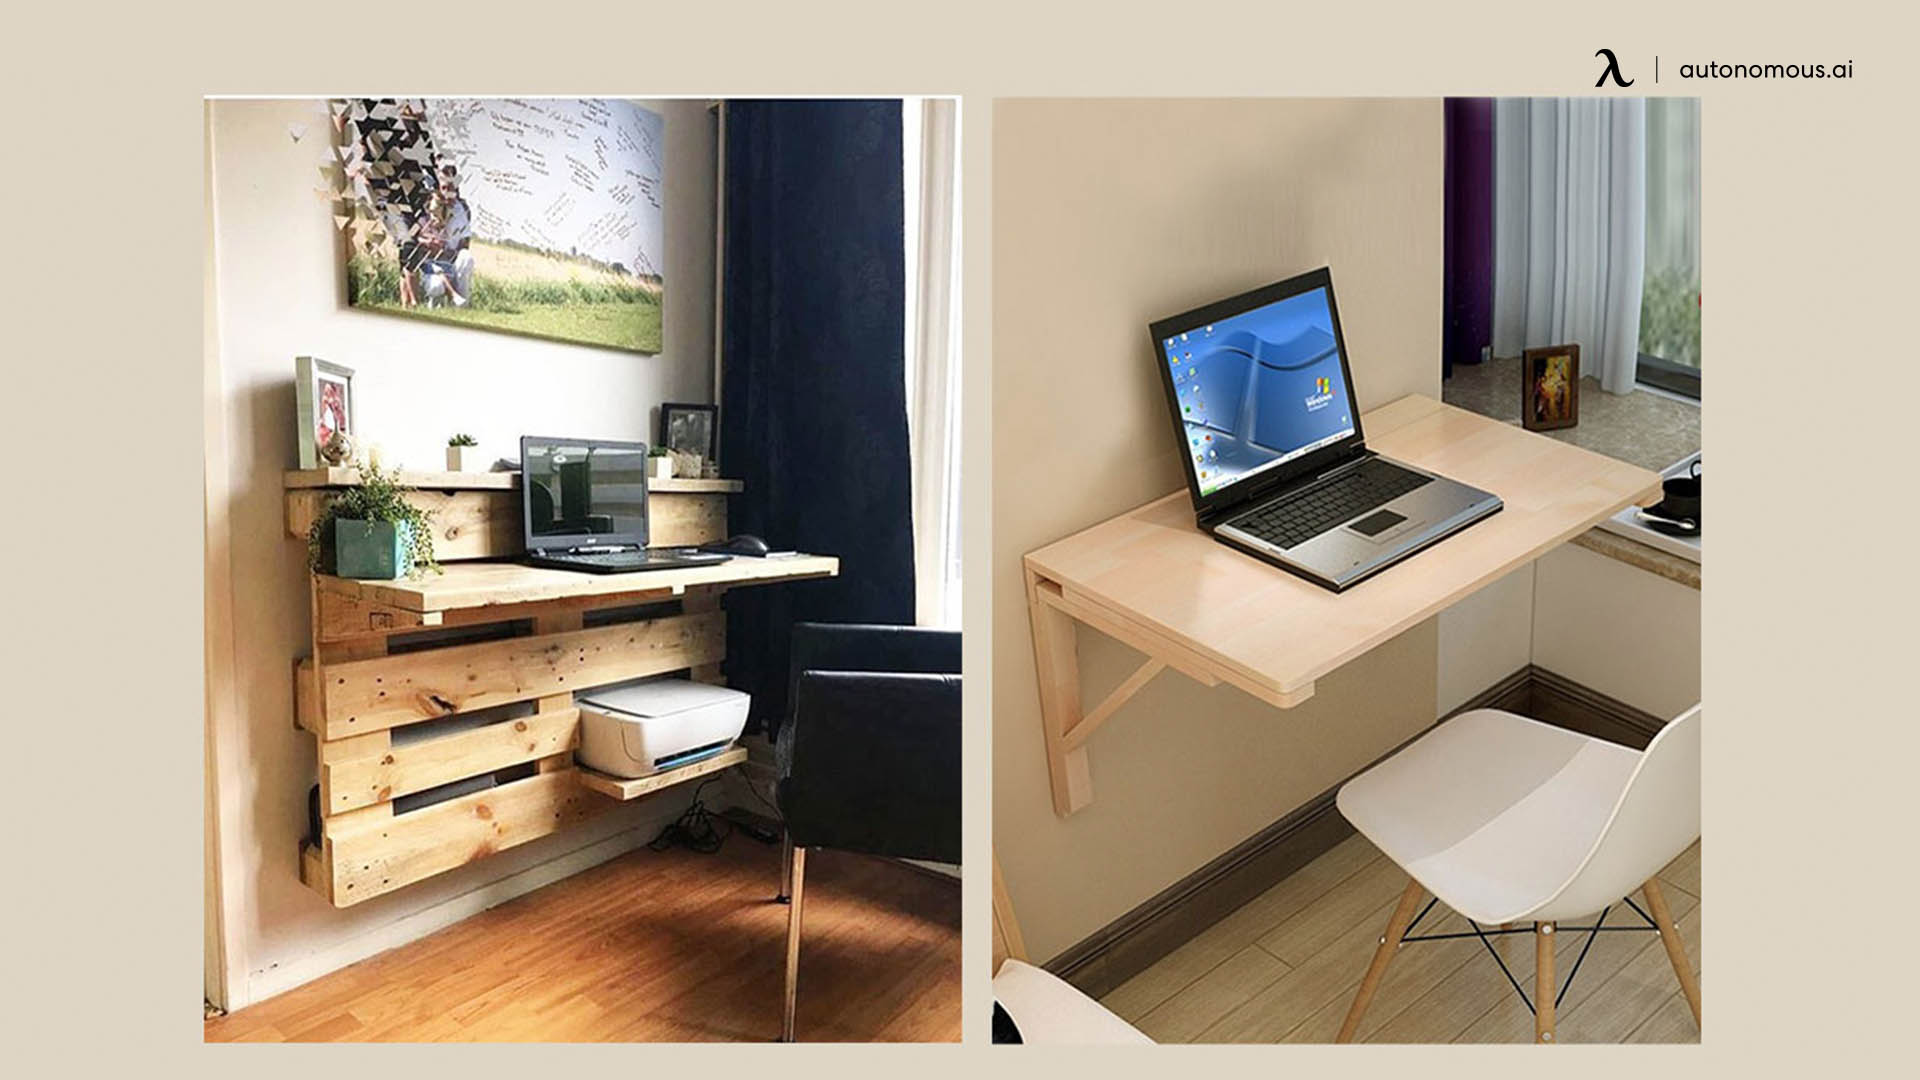
4. Wooden pallet wall desk
A wooden pallet can be converted into numerous DIY projects because of the pallet’s flexibility and cost-effectiveness. By constructing the tabletop from cardboard and supporting its weight against the wall with a string, as well as making your own standing desk shelf from the wooden pallet, you can create a floating workstation. It is a good idea for your modern office design.
Creating a wooden pallet wall desk is a budget-friendly and customizable DIY standing desk project. It's eco-friendly but may require extra effort for strength and aesthetics. Consider its rustic style and limited weight capacity before starting.
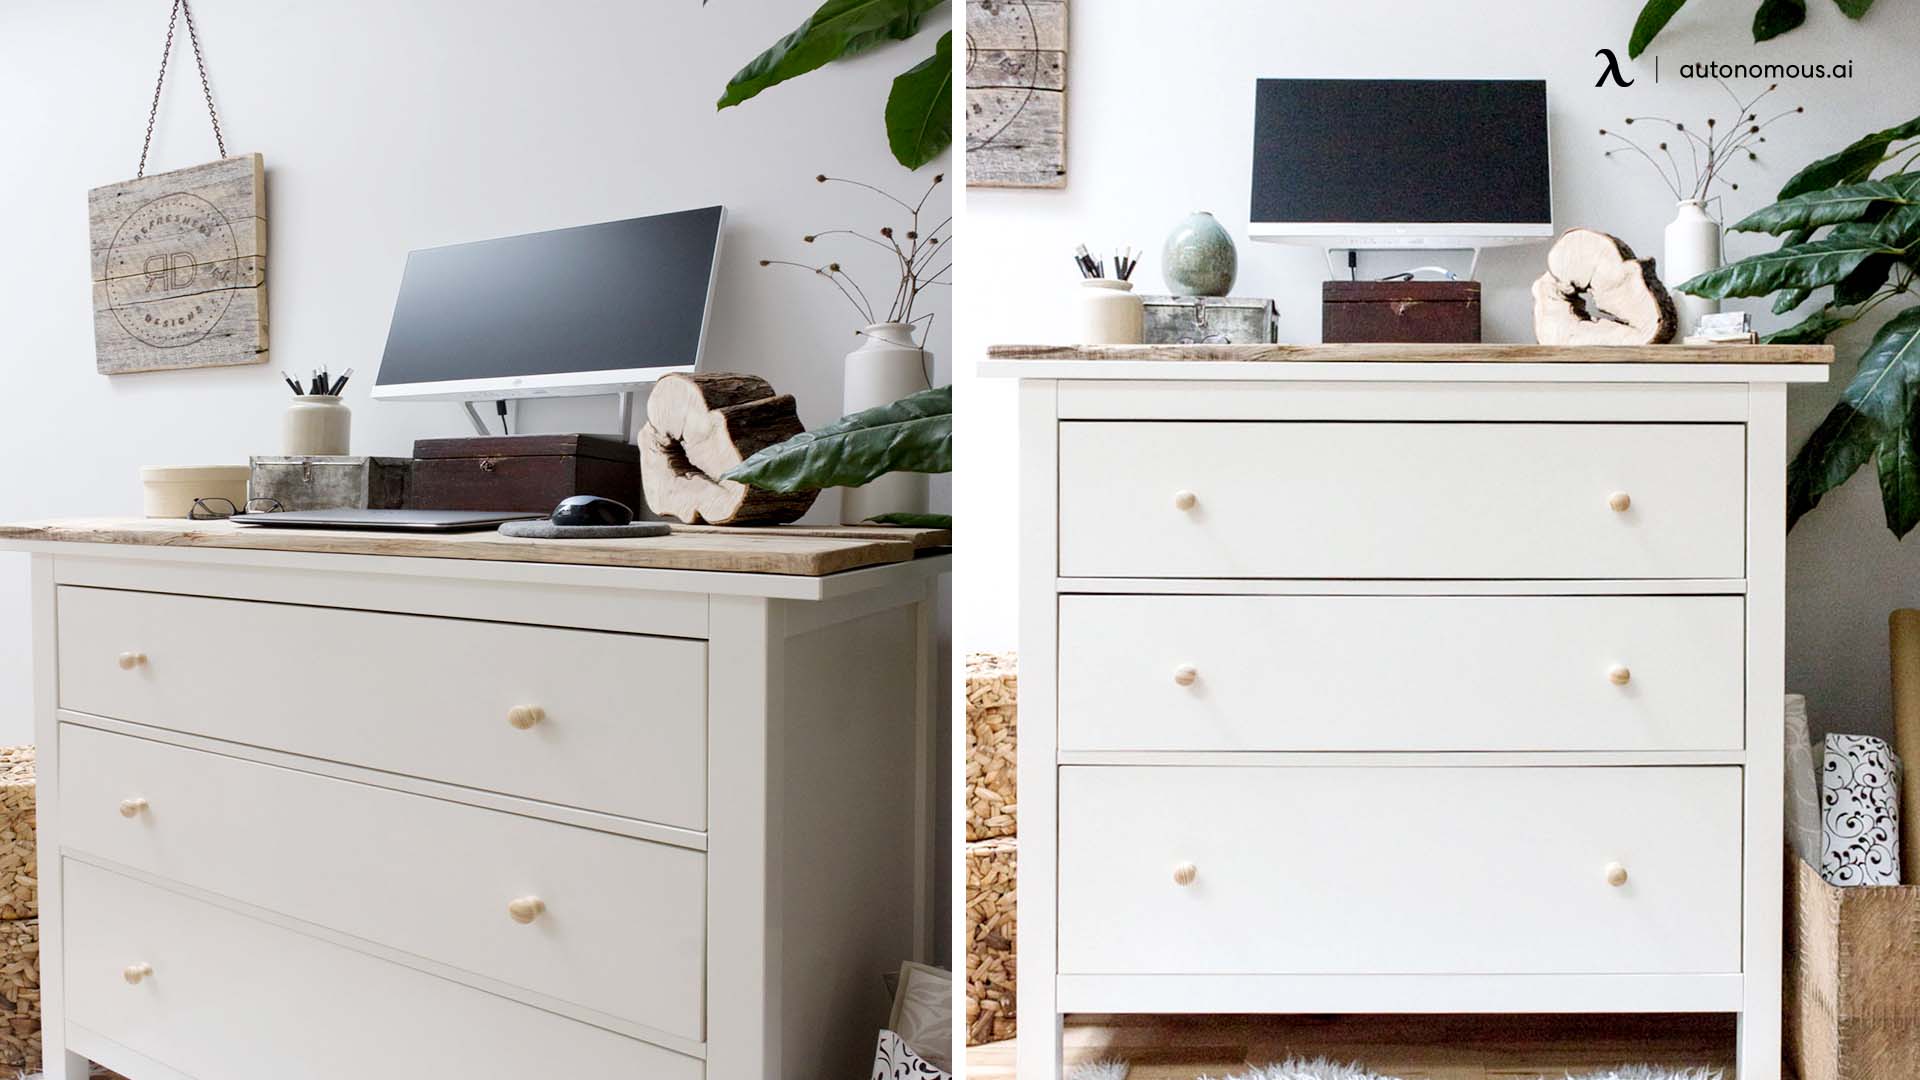
5. A standing dresser
You can convert an old piece of furniture or dresser into a standing desk. This is as simple as placing your monitor on the top of the table and transforming your drawers into bookshelves or bookcases.
Crafting a standing dresser provides an elegant and space-saving storage solution, ideal for bedrooms or small spaces. You can repurpose an existing dresser or construct one from scratch, customizing its size, finish, and design to suit your needs and décor.
However, DIY adjustable standing desk from dressers can be time-consuming to build, may require advanced woodworking skills, and need careful attention to detail for stability and functionality. Proper planning and craftsmanship are essential for creating a functional and aesthetically pleasing piece of furniture.
6. A standing sawhorse desk
This DIY standing desk idea is an excellent way to get stability and style in one. By using two sawhorses as the frame and a wooden top as the base, you can use the wooden features to create a vintage and industrial design for you to craft.
Materials:
- Two sawhorses
- A tabletop
- Screws
- Screwdriver
- Sandpaper
- Paint or stain (optional)
Instructions:
Step 1: Choose your sawhorses. Sawhorses come in a variety of sizes and styles, so select two that are sturdy and tall enough for you to stand comfortably at your desk.
Step 2: Prep the tabletop. Choose a tabletop that is the right size for your needs and cut it to size if necessary. Sand the surface of the tabletop to make it smooth, and apply paint or stain if desired.
Step 3: Attach the sawhorses. Turn the tabletop upside down and place the sawhorses at each end. Use screws and a screwdriver to attach the sawhorses to the tabletop securely. Make sure the screws are long enough to go through the tabletop and into the sawhorse.
Step 4: Test your desk. Turn your standing sawhorse desk right-side up and test it to ensure it is sturdy and at the right height for comfortable use.
Step 5: Optional: Finish the sawhorses. If desired, you can sand and paint or stain the sawhorses to match the tabletop and give your desk a more polished look.
7. A portable sit/stand desk
This DIY desk idea is exceptionally affordable. All you are going to need to get this project started is a shelf, two brackets, and a side table. Although it is not adjustable, it is simple to make and an affordable standing desk.
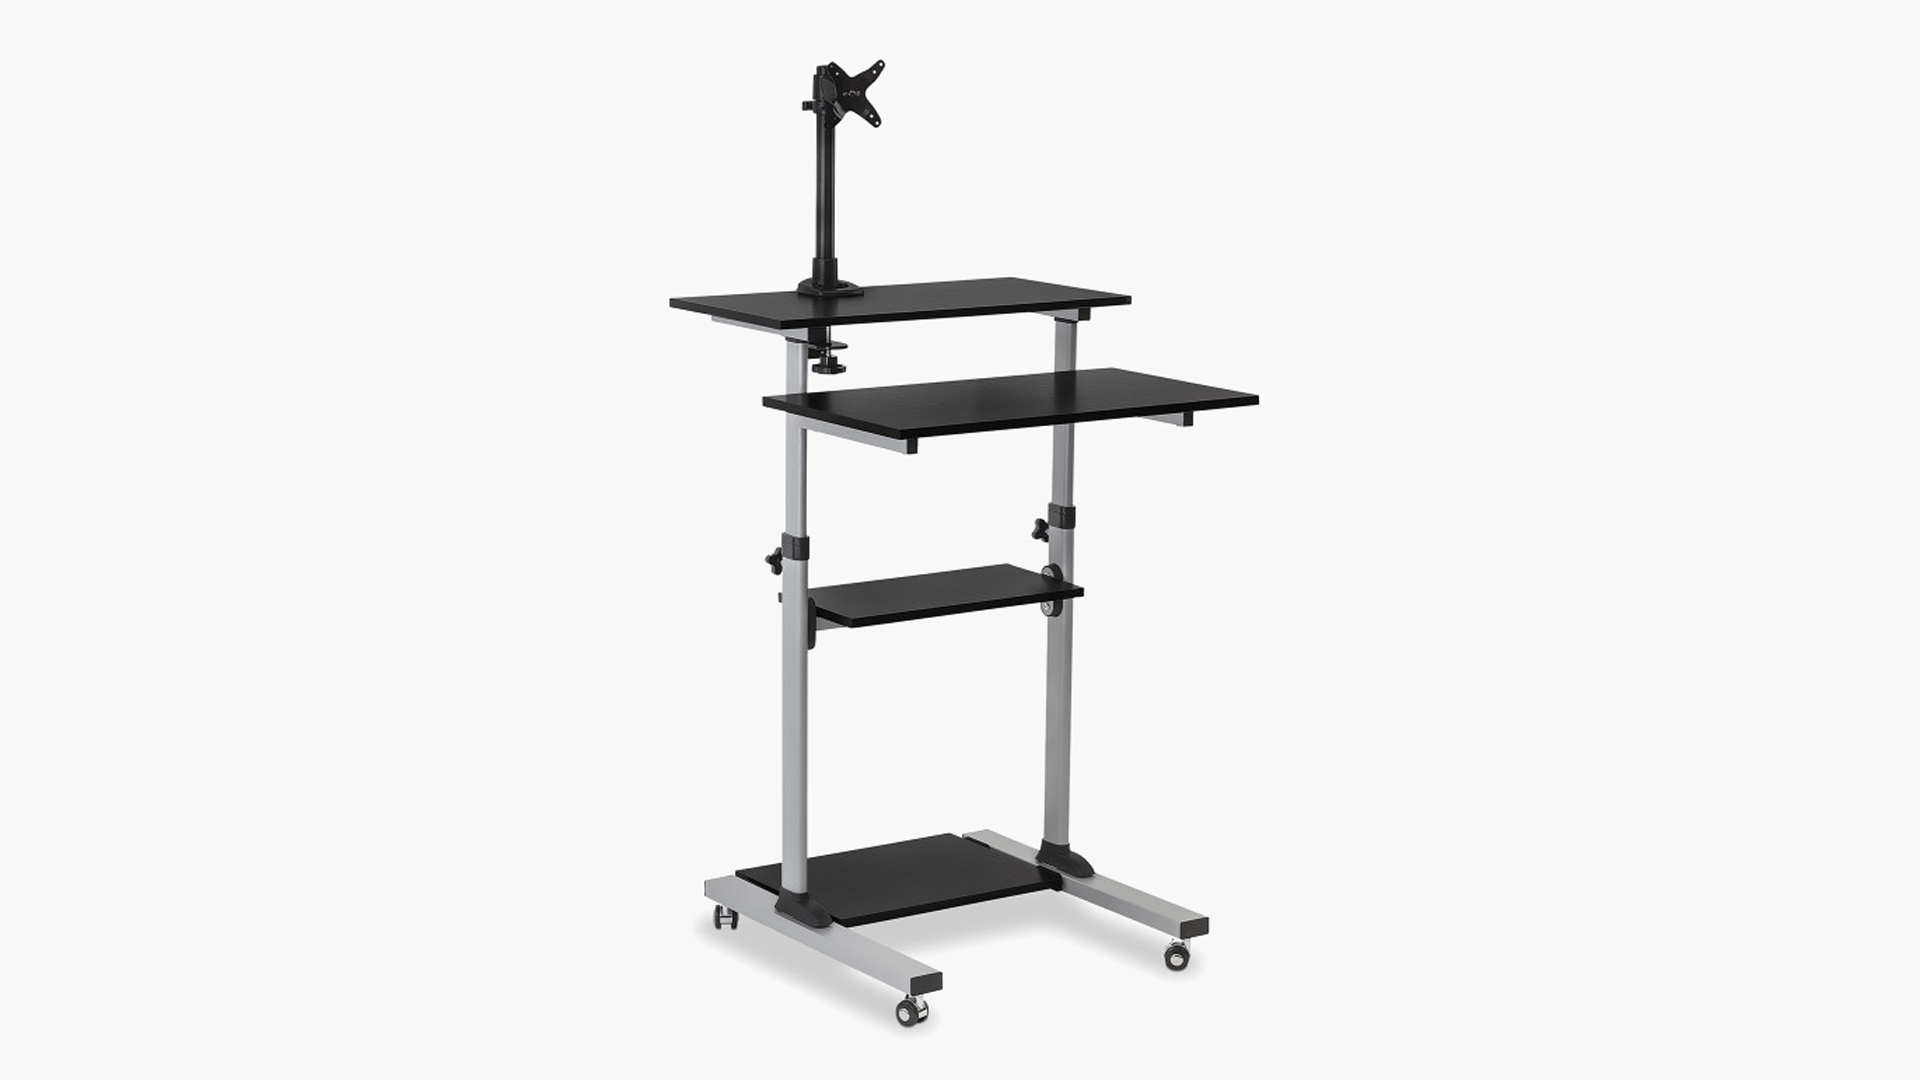
Mount-It! Rolling Computer WorkStation
| Dimension | 28”W x 27.5”D |
| Material | Steel |
| Height range | 37" - 54” |
| Weight capacity | Total 132 lbs (33 lbs. per shelf) |
| Color | Black, Silver |
| Warranty | 10 years |
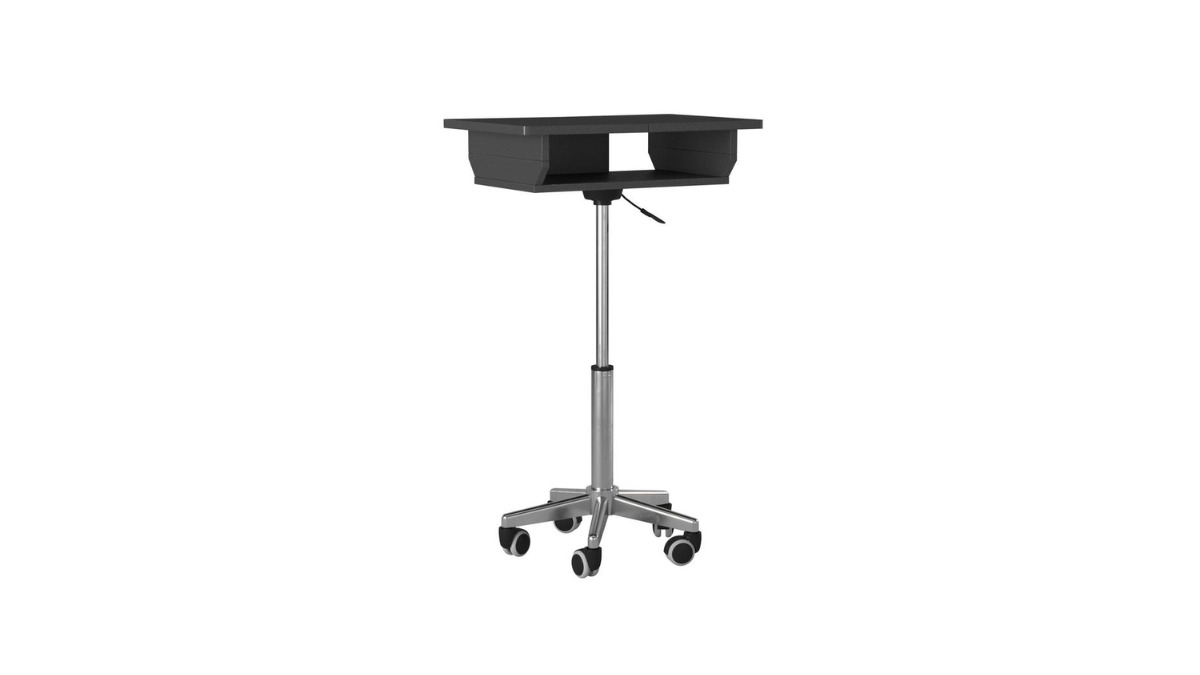
Trio Supply House Folding Table Laptop Cart: Graphite
| Chromed steel frame | adjusts from 26 up to 35.75 inches |
| Unfolded panels | 14 inches |
| Laptop size | up to 16.5 inches wide |
| Folded Panels | 22lbs Weight Capacity |
| Material | MDF Panels with PVC Laminate Surface |
| Height | 35.75 |
8. Cardboard standing desk
A DIY cardboard standing desk is a type of standing desk that is made entirely out of cardboard and can be constructed at home using simple materials and tools. These desks are often designed for people who work from home and want an affordable and customizable option for their workspace.
To make a DIY cardboard standing desk, you will need several large pieces of cardboard, a utility knife or box cutter, a ruler or straight edge, and some glue or tape. The basic process involves cutting out the various pieces of cardboard to size, assembling them into a sturdy frame, and then adding a desktop surface at the desired height for standing use.
There are many different designs and tutorials available online for DIY cardboard standing desks, each with their own unique features and benefits. Some are more elaborate and may include shelves, storage compartments, or even built-in lighting, while others are more minimalist and focus on the simple functionality of the desk.
9. A two-tier desk
This DIY desk design is a comfortable homemade ergonomic standing desk workstation to build. With this style of a standing desk, you have a frame and a tabletop across it. The second tier is the same thing as the back of the first tier.
Designing a two-tier desk for DIY standing desk offers the advantage of increased workspace and organization. The upper tier is perfect for monitors or displays, while the lower tier can house a keyboard, mouse, and other accessories, promoting a more ergonomic setup. If you want extra durability for long-term use, pairing this design with the sturdy frame of a metal standing desk can provide added stability and strength.
However, building a two-tier desk requires precise measurements and attention to detail to ensure both tiers are at the right height and angle for comfortable use. Additionally, it might be more complex to construct than a single-tier desk, especially if you want an adjustable second tier.
Nevertheless, a well-designed two-tier desk can enhance productivity and organization in your workspace, providing designated areas for various tasks and equipment.
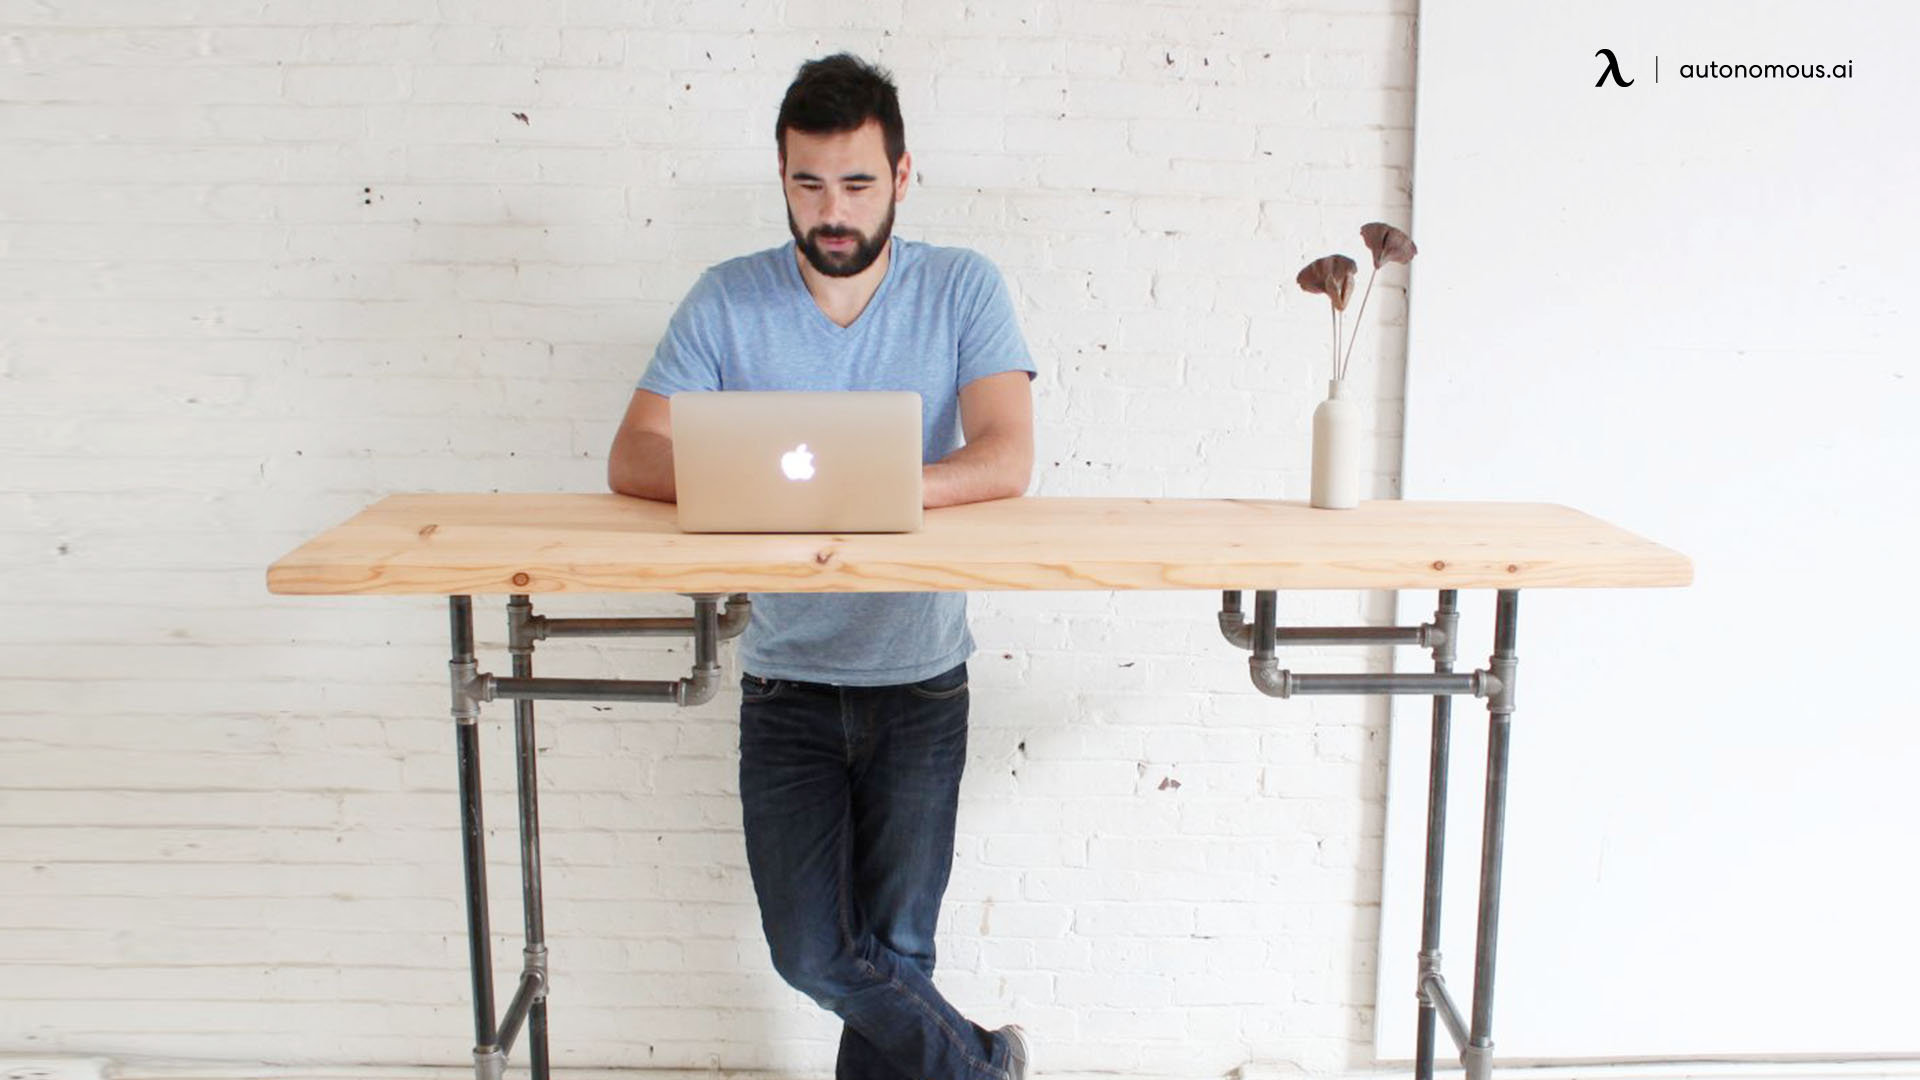
10. An industrial steel pipe DIY standing desk
For vintage and urban sit-stand workstation, try this DIY desk idea. The desk can be adjusted to any height through the shuffling of the piping around.
Building an industrial steel pipe DIY standing desk offers a robust and unique workspace solution with a distinct industrial aesthetic. By using steel pipes for the desk legs and supports, you can create a sturdy frame that accommodates height adjustability.
However, this DIY adjustable standing desk project requires some welding or threading skills to connect the pipes securely. Additionally, while it provides a rugged and stylish appearance, it might not be as budget-friendly as other DIY options, as steel pipes can be relatively expensive.
Nevertheless, with careful planning and execution, it can result in a durable and eye-catching standing desk that fits your space and ergonomic needs.
Step-by-step Guide for DIY Standing Desk
Building your own standing desk can be an exciting and rewarding project, especially when using the Autonomous Desk DIY frame. It offers flexibility, durability, and simplicity, making it an excellent choice for anyone looking to enhance their workspace. Follow this step-by-step guide to create a personalized standing desk that suits your style and needs.
1. What You Need to Build a Standing Desk
Before diving in, gather all the necessary tools and materials. Here’s what you’ll need:
Autonomous Desk DIY frame: Choose between the 2-Stage, 3-Stage, or L-Shape frame depending on your height, workspace requirements, and desktop size.
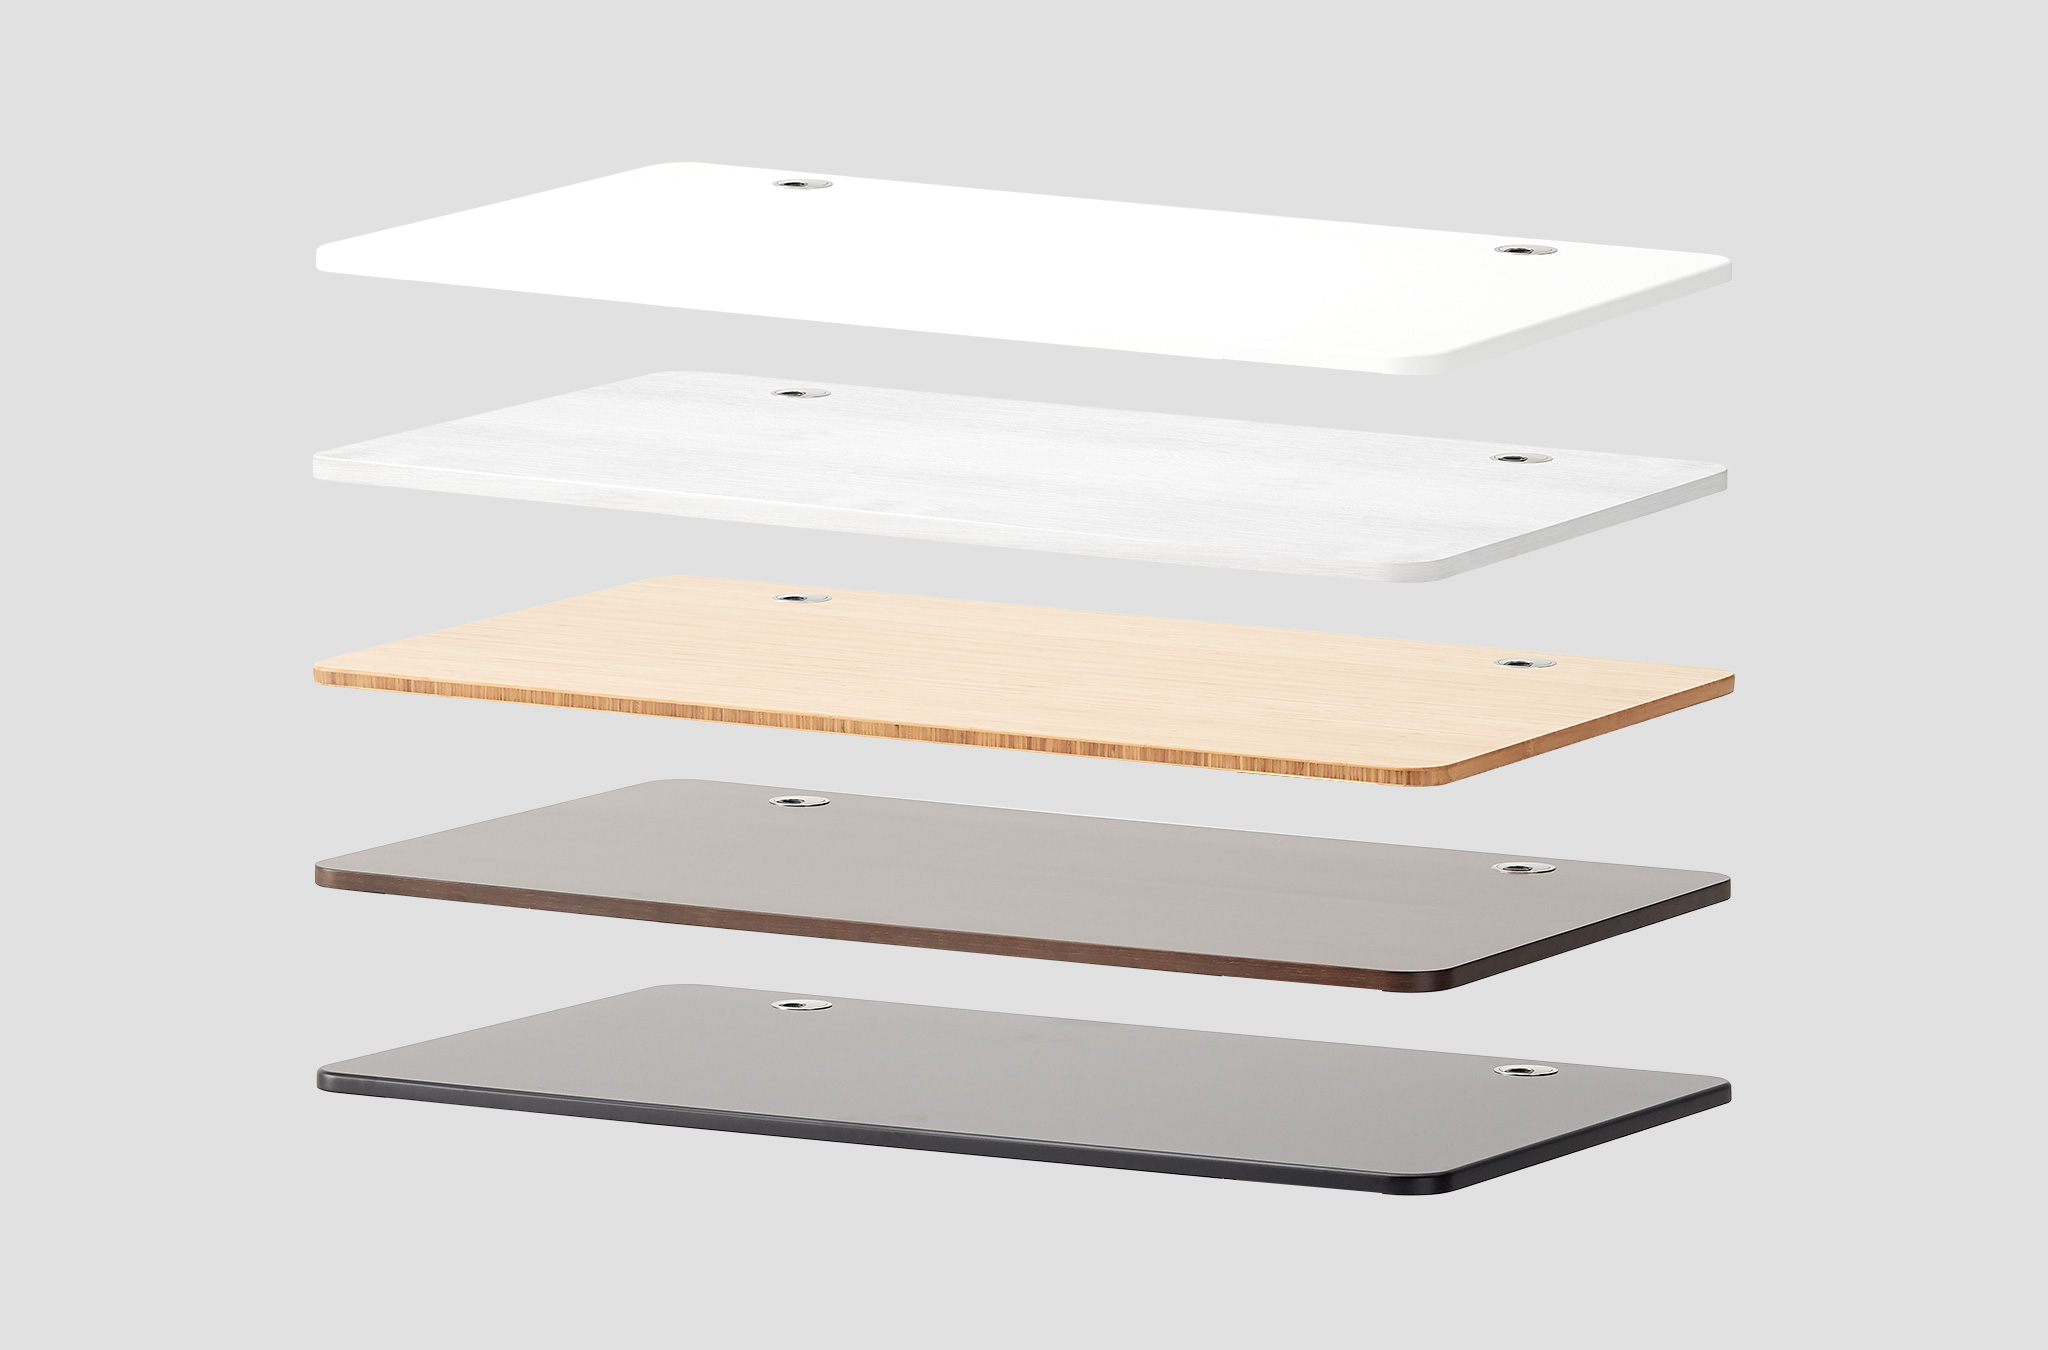
Desktop: Ensure it matches the recommended dimensions for your frame model. For instance:
- 3-Stage: 45” – 80” (L) x 26” – 32” (W)
- 2-Stage: 48” – 60” (L) x 26” – 32” (W)
- L-Shape: Custom corner desktops with lengths ranging from 42” – 71”
Tools: A screwdriver, power drill, and any additional tools included with the Autonomous Desk DIY package.
Optional Tools: Table saw, hammer, wood finish, or strap clamps for custom adjustments or additional stability.
2. Measurements
Accurate measurements are crucial for a comfortable and ergonomic setup:
Determine Your Ideal Desk Height:
- Stand up straight with your arms relaxed by your sides. Your wrists should be at or just below elbow height.
- Measure from the floor to your elbow to determine the approximate height of your DIY standing desk surface.
Calculate Desk Surface Dimensions:
- Consider the available space in your room. Measure the width and depth of the area where you plan to place your desk.
- Decide on the shape of your desk (rectangular, L-shaped, corner desk, etc.) and ensure it fits comfortably within your space.
Keyboard and Monitor Placement:
- Your keyboard and monitor(s) should be at comfortable heights to avoid strain.
- Measure the height of your keyboard and monitor(s) from the floor.
- Plan where you want your keyboard and monitor(s) on the desk surface. Consider monitor arm mounts for flexibility in adjusting the monitor's height and angle.
Safety and Stability:
- Ensure that your DIY standing desk design provides stability and can support the weight of your equipment.
- Use appropriate hardware and reinforcements as needed.
3. Materials
Choosing the right materials for your DIY standing desk is essential for both its functionality and appearance. Below is a table for each key material consideration, detailing options and their features for easy comparison:
Desk Surface
| Material | Features |
|---|---|
| Plywood | Strong, durable, and affordable. Ideal for a budget-friendly option. |
| MDF (Medium Density Fiberboard) | Smooth, consistent surface. Easy to paint and customize. Budget-friendly alternative. |
| Hardwood | Premium aesthetic with elegant finish. Durable but heavier and more expensive. |
Desk Frame and Legs
| Material | Features |
| Steel | Extremely sturdy and durable. Offers excellent support for heavy loads. |
| Aluminum | Lightweight and resistant to corrosion. Easier to move or adjust when needed. |
| Wood | Provides a classic aesthetic. Can be reinforced for stability with brackets or additional hardware. |
Adjustable Mechanism
| Type | Features |
| Electric Motor | Quiet, reliable, and allows preset heights for convenience. |
| Manual Crank | Cost-effective option requiring manual effort to adjust height. |
| Hydraulic/Pneumatic | Advanced systems with smooth height transitions, ideal for premium setups. |
Finish and Coating:
- Paint: You can paint plywood or MDF surfaces with your preferred color or finish. Use a primer and high-quality paint for durability.
- Varnish or Lacquer: For hardwood surfaces, consider using varnish or lacquer to protect and enhance the wood's natural beauty.
- Powder Coating: If you have a steel or aluminum frame, powder coating provides a durable and attractive finish. It's available in various colors.
If you’re exploring different motor types, this complete guide to the standing desk motor offers valuable insight into how motor systems affect performance, stability, and user experience.
4. Assembling
Assembling your standing desk is the most hands-on step in the process. With the materials and measurements prepared, follow these steps to put everything together seamlessly:
- Unbox and Organize Components
Start by unboxing the Autonomous Desk DIY frame and all its components. Lay them out on a flat surface to ensure that you have everything listed in the instruction manual. Gather your tools and position your workspace in a well-lit area with enough room to maneuver.
- Frame Assembly
Begin assembling the frame by attaching the legs to the base. Secure them using the screws provided, following the instructions in the package. Add crossbars for stability and double-check that all fasteners are tight. If you’re using the L-Shape frame, install the corner brackets and support bars during this step to reinforce the structure.
- Motor Installation and Wiring
Position the motor(s) on the frame in the designated slots. Connect the wiring to the motor and control panel, ensuring cables are securely attached according to the manual. Tuck away loose wires using the cable ties or trays provided, as this will keep your setup clean and functional.
- Desktop Attachment
Flip the desktop upside down on a soft, protective surface. Align the assembled frame with the pre-drilled holes in the desktop. If the desktop doesn’t have pre-drilled holes, measure and mark the appropriate spots for drilling. Attach the frame to the desktop using the screws included, ensuring everything is tightly secured.
- Height Adjustment and Calibration
Once assembled, plug in the motorized frame and test its height adjustment capabilities. Using the control panel, check that the desk moves smoothly across its height range. Adjust the desk height to your ideal standing and sitting positions to confirm ergonomic functionality.
- Final Touches
Organize cables and cords using the cable management system. Attach any additional accessories, such as monitor arms, to complete your setup. Ensure the desk is stable and positioned correctly in your workspace.
Why You Should Build a Standing Desk Yourself
Before we get into the 10 DIY ideas for your DIY adjustable desk, it is essential to understand why you should build a standing desk in the first place. There are a few factors to consider about standing desks. Cost, height adjustment, ergonomics, and your personal style and design are a few of these factors.
Without a doubt, most jobs for an office worker require you to sit at a desk for long periods. This can hurt your physical and mental activity and carries a risk to specific health issues. In comparison, when you introduce a standing desk that is adjustable in height and shape, it can help boost your energy levels. A sit-stand workstation is known to assist in boosting your metabolism as well as keeping your core and body motivated throughout the day.
- Cost
If you are attracted to the idea of a standing desk and have done some research, you have probably found that a sit-stand workstation does not come cheap. This might lead you to ask yourself the question, "Should I build my standing desk?". The first thing to recognize is that building your sit-stand workstation does take effort and commitment on your part; however, the incentive at the end is well worth it.
While building your own desk is a great option, standing desk converters can be a simpler, more affordable alternative. Available online, these converters are less time-consuming and cost-effective compared to building a custom desk.
- Ergonomics features
Considering the ergonomics features of your workstation is also essential. Standing desk companies such as Autonomous have spent a considerable amount of time on the research and development of ergonomics for their products. This is to understand ergonomics better so that their products help maintain worker's postures and are comfortable.
- Height adjustment factors
Taking the height adjustment factors into account when making your own standing desk, it is essential to note the importance of transitioning between standing and sitting. Shifting from sitting and standing offers numerous health and productivity benefits.
Lastly, consider what the ideal desk height should be. The general rule of thumb is that your elbows should be just above the typing surface of the desk.
FAQs
How Can I Turn My Regular Desk into a Standing Desk?
You can add an adjustable lap desk on top of your regular desk and adjust its height as per your requirement. In addition, you can also think of using the coffee table method where you add another short heighted table on top of your regular desk to get more surface to work and an increased height that allows you to change your position. A stack of books would work as well.
Is it Cheaper to Make Your Own Standing Desk?
It is often cheaper to make your own standing desk. This is because you select the equipment on your own upon evaluating your budget and try to keep costs at their minimum. However, building your own standing desk is more time-consuming.
How Tall Should a Standing Desk Be?
The height of your DIY adjustable standing desk should be such that your monitor’s screen is within your eye level. It should not be more than 2-3 inches above your eye level. In addition, your elbows should rest at ninety degrees with your desk, ensuring there is no stress on your arms while you work on your PC.
Are DIY Standing Desks Ergonomic?
DIY adjustable standing desks are ergonomic. However, if you wish to judge whether a standing desk do it yourself is ergonomic or not, check for the features that it offers. If the height adjustment is such that you can do it easily and it does not create any strain, it is for sure an ergonomic piece of furniture in your office.
How Long Should You Stand with a Standing Desk?
Although everyone recommends active sitting where you should stand while working as well, ensure that you do not stand for too long, as that can be equally harmful. You are advised to stand for around 15-30 minutes per hour. Standing too long with a DIY standing desk can create muscle stiffness and soreness, so it is vital that you use your time standing as stretching time mainly and avoid standing for hours without alternating it with sitting.
The Final Verdict
Starting your own DIY adjustable standing desk project may seem like a daunting task at first, but with the right tools, measurements, and materials, it proves to be an enjoyable and creative task. Once you have set up and finished building your sit-stand workstation, you are going almost to feel the benefits of transitioning instantly between sitting and standing.
There are numerous creative DIY desk design ideas on how to make a standing desk to choose from. Best of luck with building your DIY standing desk, and let us know if you have any DIY questions or queries, and feel free to comment below.
Spread the word
.svg)



/https://storage.googleapis.com/s3-autonomous-upgrade-3/static/upload/images/customer/jumbo-deskstand-standing-desk-sit-stand-compact-desk-height-adjustable-retrofit22-7_1680866824.jpg)
