.svg)

A Comprehensive Guide to ADU Permits in the US
Table of Contents
Welcome to our guide on ADU permits! If you're intrigued by the idea of ADUs in Houston (one of the most famous places with ADUs) or exploring the convenience of a prefab ADU, you're in the right place. This article will walk you through the essential steps, costs, and benefits of acquiring the necessary permits for your ADU project. Whether you're considering a prefab ADU or traditional construction, let's embark on this journey together to unlock the secrets of making your ADU dreams a reality.
What Is An ADU and What Are Its Types?
An accessory dwelling unit (ADU) is a secondary residential unit located on the same property as a single-family home. ADUs can be attached to the main house, detached, or converted from existing structures, such as garages, basements or attics.
Here are the different types of ADUs:
- Attached ADUs: Attached ADUs are connected to the main house by a shared wall or roof. They are often located above the garage or in the basement.
- Detached ADUs: Detached ADUs are stand-alone units that are located on the same property as the main house. They can be built from scratch or converted from existing structures, such as sheds or cottages.
- Converted ADUs: Converted ADUs are created by converting an existing structure, such as a garage, basement, or attic into a residential unit.

The Role of Permits in the ADU Construction Process
Permits are the cornerstone of the ADU (Accessory Dwelling Unit) construction process, an essential requirement that extends to prefab ADUs in Los Angeles. Their role is paramount in ensuring the safety and adherence to local building codes and zoning regulations. Here's an in-depth look at the permits typically necessary for prefab ADU construction:
Building Permit
This permit is an all-encompassing necessity for any construction project, including prefab ADUs. It serves as a guardian, ensuring that your ADU complies with all relevant building codes and safety standards. The building permit process involves a meticulous review to guarantee the structural integrity and safety of your prefab ADU.
Zoning Permit
Los Angeles, like many cities, has precise zoning regulations that dictate factors such as ADU size, placement, and type. A zoning permit is indispensable to ensure your prefab ADU aligns with local zoning laws, fostering harmony within your neighborhood and adherence to property stipulations.
Electrical Permit
All electrical work associated with your prefab ADU, including wiring, outlets, and fixtures, requires an electrical permit. This permit ensures that your ADU's electrical systems are installed safely and comply with established standards.
Plumbing Permit
To cover all plumbing aspects of your prefab ADU, including water and sewer lines, fixtures, and appliances, a plumbing permit is essential. It helps guarantee that your ADU's plumbing is both functional and safe.
Mechanical Permit
Mechanical work, which includes heating, cooling, and ventilation systems, necessitates a mechanical permit. This ensures that your prefab ADU's climate control systems meet safety and efficiency standards.
A Step-By-Step Guide to Preparing a Permit Application
1. Research Local Regulations
Begin by researching and understanding the specific zoning and building regulations for ADUs in San Diego and San Jose. Local regulations may vary, so ensure you're familiar with the requirements in your area.
2. Consult Professionals
Consider consulting with professionals such as architects or ADU experts who are knowledgeable about the permitting process in San Diego and San Jose. Their expertise can be invaluable in navigating the local requirements.
3. Gather Required Documents
Collect all necessary documents, including detailed architectural plans, site plans, and engineering specifications for your Prefab ADU project. Ensure they adhere to local regulations.
4. Complete the Application
Obtain the permit application form from the respective city's building department or website. Fill out the application accurately, providing all requested project details, property information, and your contact information.
5. Pay the Application Fee
Be prepared to pay the required application fee, which can vary based on your location and the complexity of your project.
6. Submit the Application
Submit your completed application, along with all required documents and fees, to the building department (read prefab ADUs in San Diego or prefab ADUs in San Jose). Check their preferred submission method, whether in person, by mail, or electronically.
7. Review and Await Response
Your application will undergo a review process, which may take several weeks. Be prepared for potential revisions or requests for additional information from the building department.
8. Schedule Inspections
If your application is approved, schedule inspections at different construction stages as required by the building department. These inspections ensure compliance with local building codes.
Autonomous ADU: A Smart, Permit-Friendly Solution
For homeowners looking to add functional living or workspace to their property, ADUs are an attractive option. However, the permit process, zoning restrictions, and construction complexities can make traditional ADU projects time-consuming and expensive. That’s where Autonomous WorkPods come in—offering a fast-assembly, permit-friendly alternative that simplifies the entire process.
The Autonomous ADU lineup is specifically designed to bypass common permitting hurdles while still providing a fully functional, modern, and comfortable space. Whether you need a backyard office, guest room, creative studio, or personal retreat, Autonomous WorkPods deliver fast installation, minimal site preparation, and high-quality construction—all without the headaches of traditional ADU permits.
How It Simplifies the ADU Permit Process
One of the biggest challenges of building an ADU is securing the necessary permits. Many cities impose strict zoning regulations, parking requirements, and setback rules that complicate the approval process. However, the Autonomous WorkPod series is specifically designed to comply with most backyard structure regulations, making it a much easier and faster alternative to a full-scale ADU.
1. Designed to Meet Zoning Compliance for Backyard Structures
Traditional ADUs often require homeowners to navigate complex zoning laws, which dictate:
- Minimum lot size and ADU square footage restrictions.
- Setback requirements from property lines.
- Maximum height limits.
- Parking and utility connection mandates.
Autonomous WorkPods comply with the most common backyard structure zoning requirements, meaning they can be installed without triggering lengthy permit approvals in many areas. Since they are detached backyard structures, they do not interfere with the primary residence's zoning constraints.
Additionally, because WorkPods are designed to function as a workspace or personal retreat rather than a full living unit, they often avoid the stricter building codes that apply to ADUs intended for full-time residency. This makes them a hassle-free alternative for homeowners who need extra space without dealing with local bureaucracy.
2. No Need for Complex Plumbing and Major Foundation Work
One of the biggest permit challenges with traditional ADUs is the need for new plumbing and sewage connections. Many cities require ADUs to have:
- Full plumbing installation, including water, sewage, and drainage.
- Compliance with municipal sewer system requirements.
- Additional utility connection fees, impact fees, or infrastructure upgrades.
The Autonomous WorkPod series eliminates these complexities by providing a self-contained, non-plumbed structure that does not require new plumbing permits. Instead, WorkPods are designed to function as electrified backyard offices, studios, or flex spaces, allowing them to bypass many ADU plumbing requirements.
Additionally, traditional ADU construction often requires pouring a foundation, which triggers additional permitting, soil testing, and engineering approvals. WorkPods, on the other hand, are prefabricated units that can be installed on existing surfaces (such as patios, decks, or concrete slabs) without major excavation or foundation work. This drastically reduces the cost, installation time, and permitting requirements.
3. Fast Installation Compared to Traditional ADU Construction
Building a standard ADU from scratch can take anywhere from months to over a year, depending on the complexity of the project and the local permitting process. Between architectural planning, permit approvals, construction delays, and inspections, homeowners often face significant wait times before they can actually use their ADU.
Autonomous WorkPods, in contrast, offer an ultra-fast installation process:
- WorkPods are prefabricated and delivered as modular design, significantly cutting down on construction time.
- Unlike traditional ADUs, which require weeks or months of foundation work, framing, electrical, and finishing, WorkPods can be fully installed within days.
- Since WorkPods are designed as modular backyard units, they eliminate many of the common construction setbacks that delay ADU projects.
For homeowners who need quick, efficient solutions—whether for a home office, guest room, or creative space—the Autonomous WorkPod series provides an immediate, high-quality alternative to waiting months for a traditional ADU to be built.
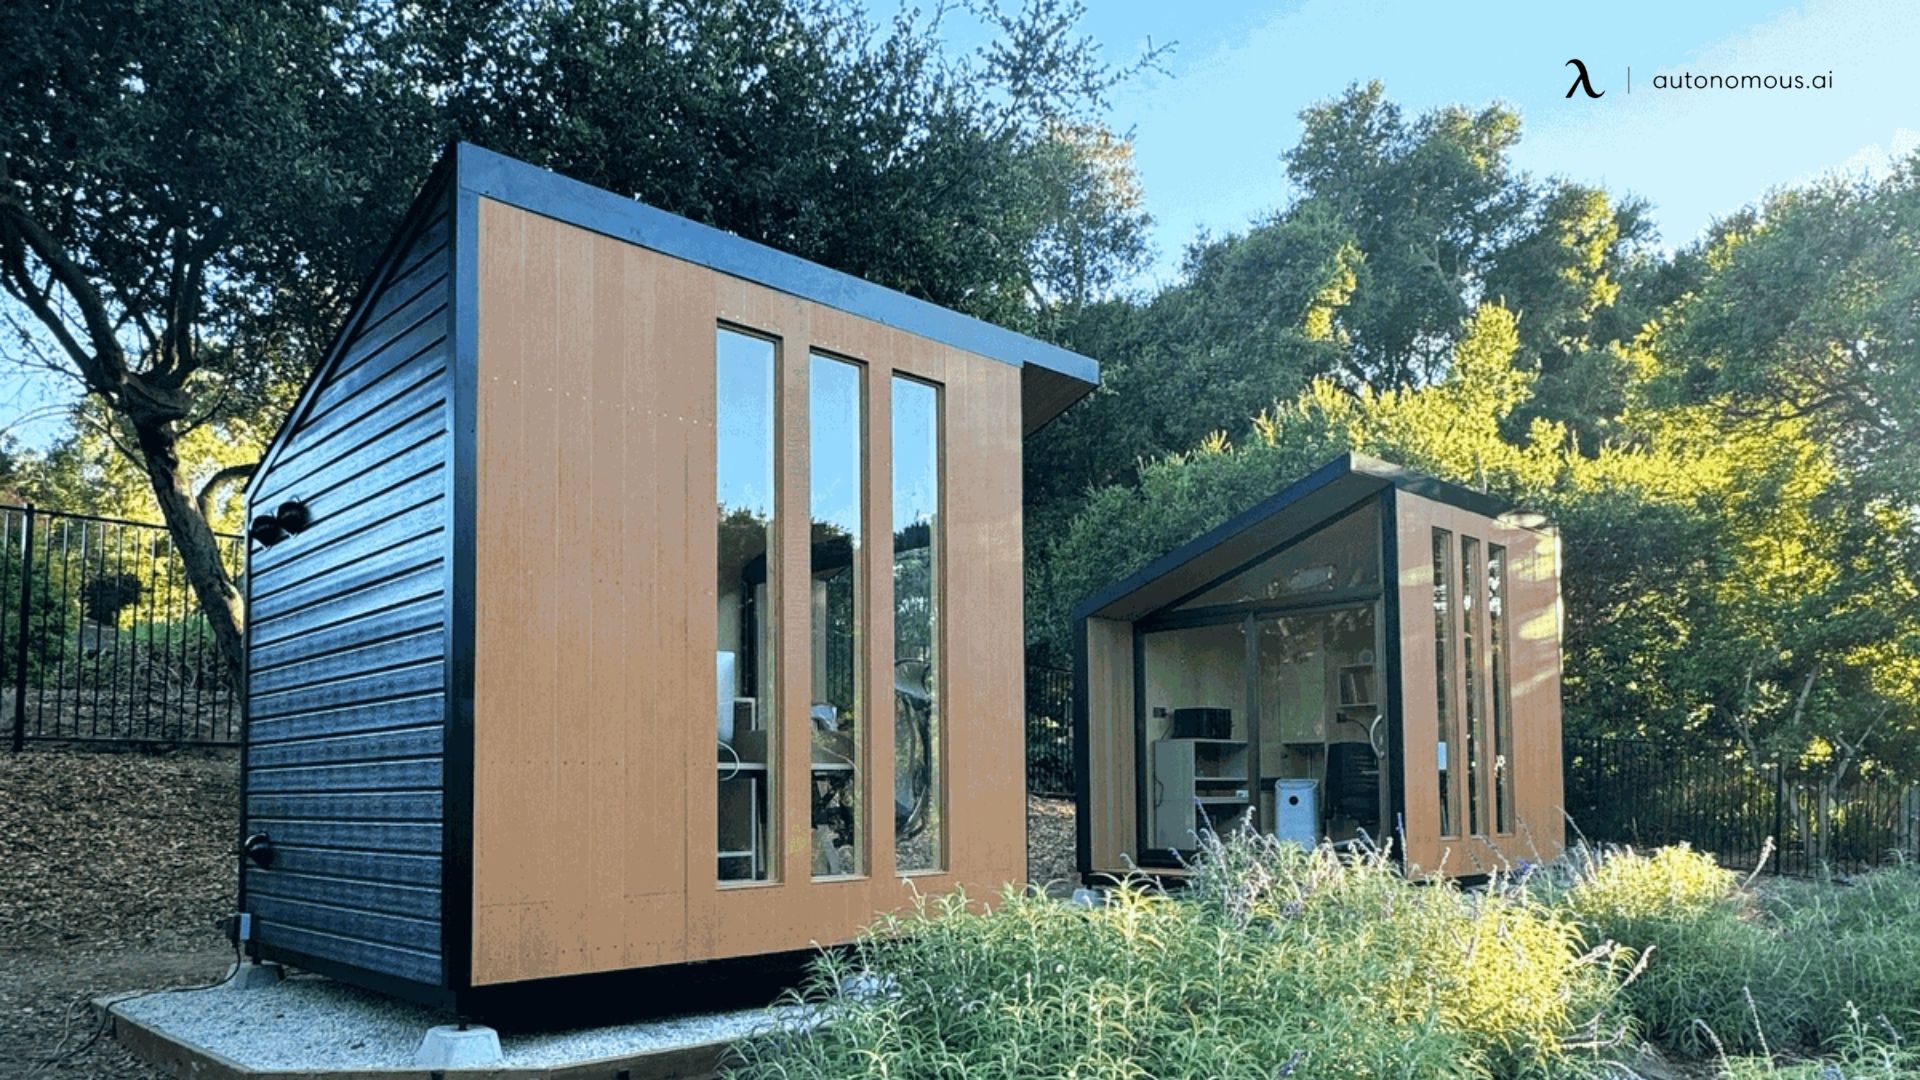
The Autonomous WorkPod Series
Autonomous offers different WorkPod models, each designed to suit different space, function, and budget needs. Below is a breakdown of each model and its key features.
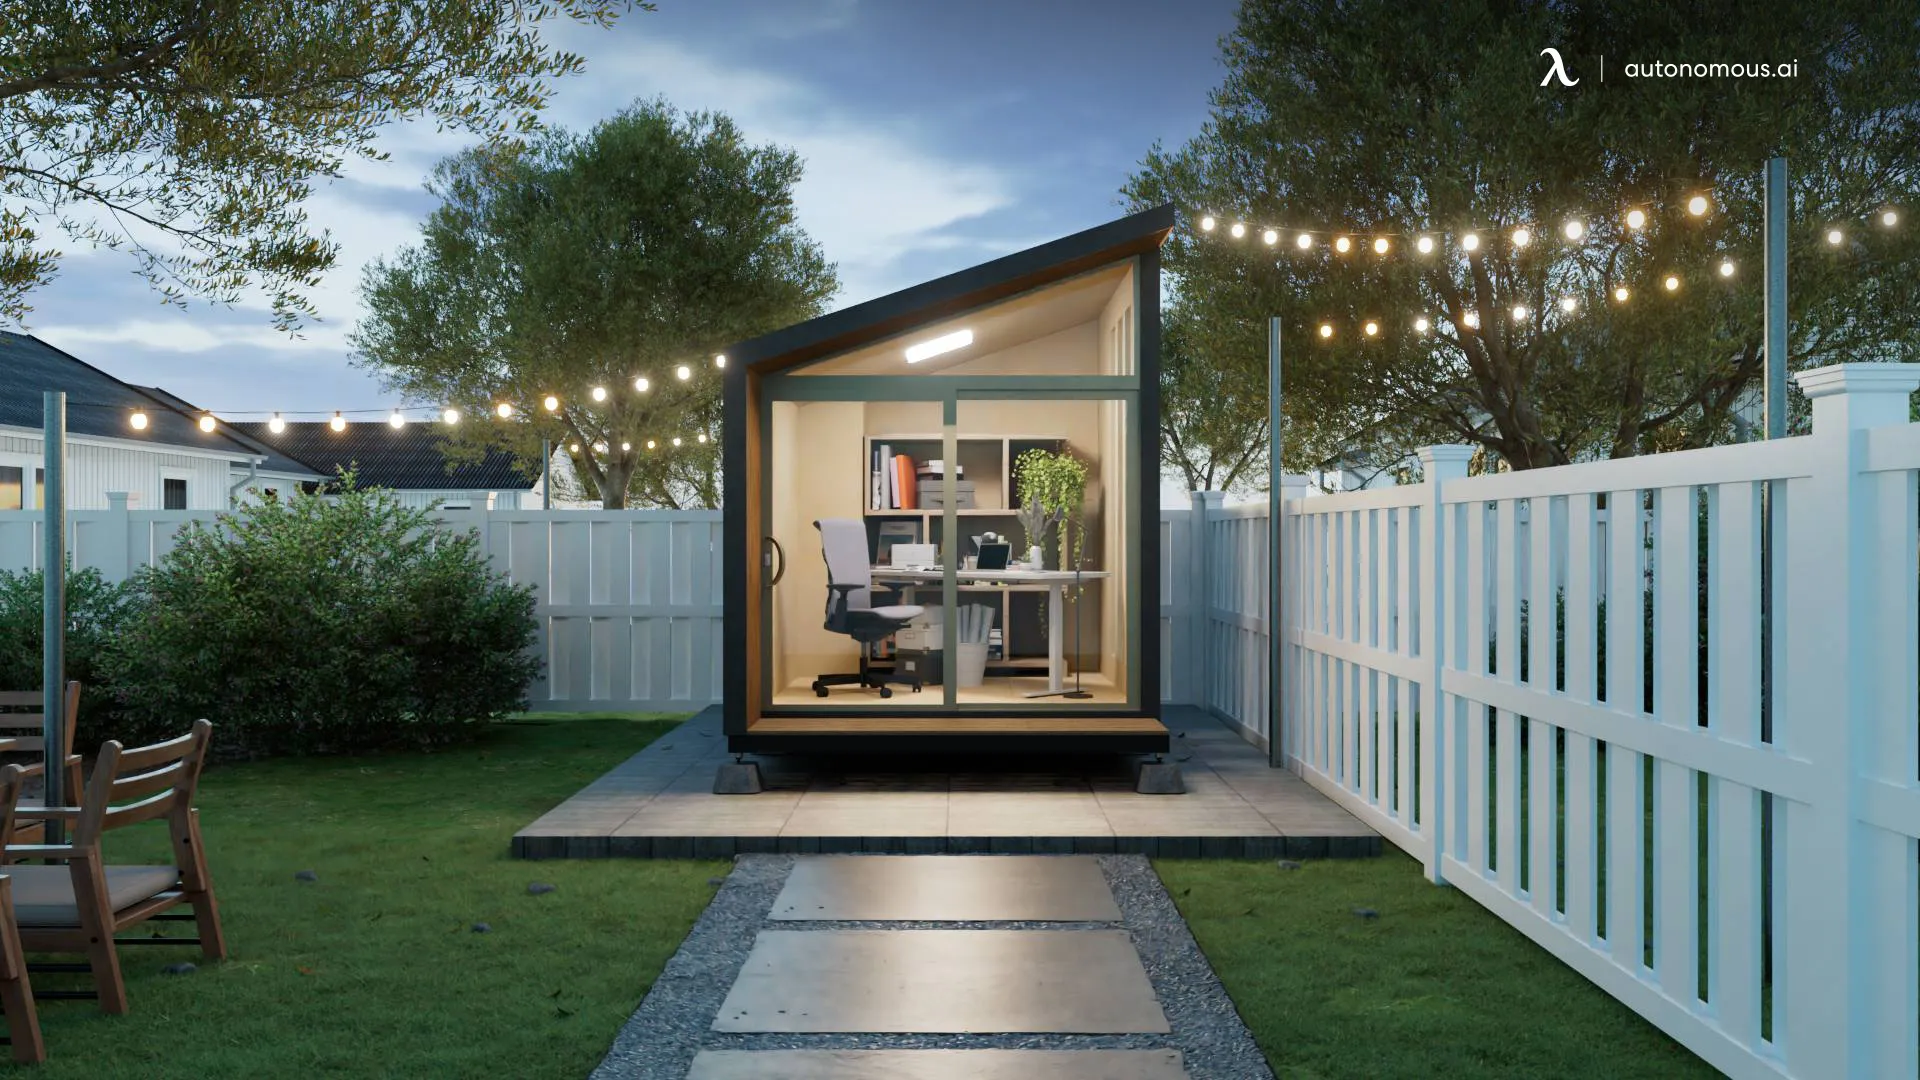
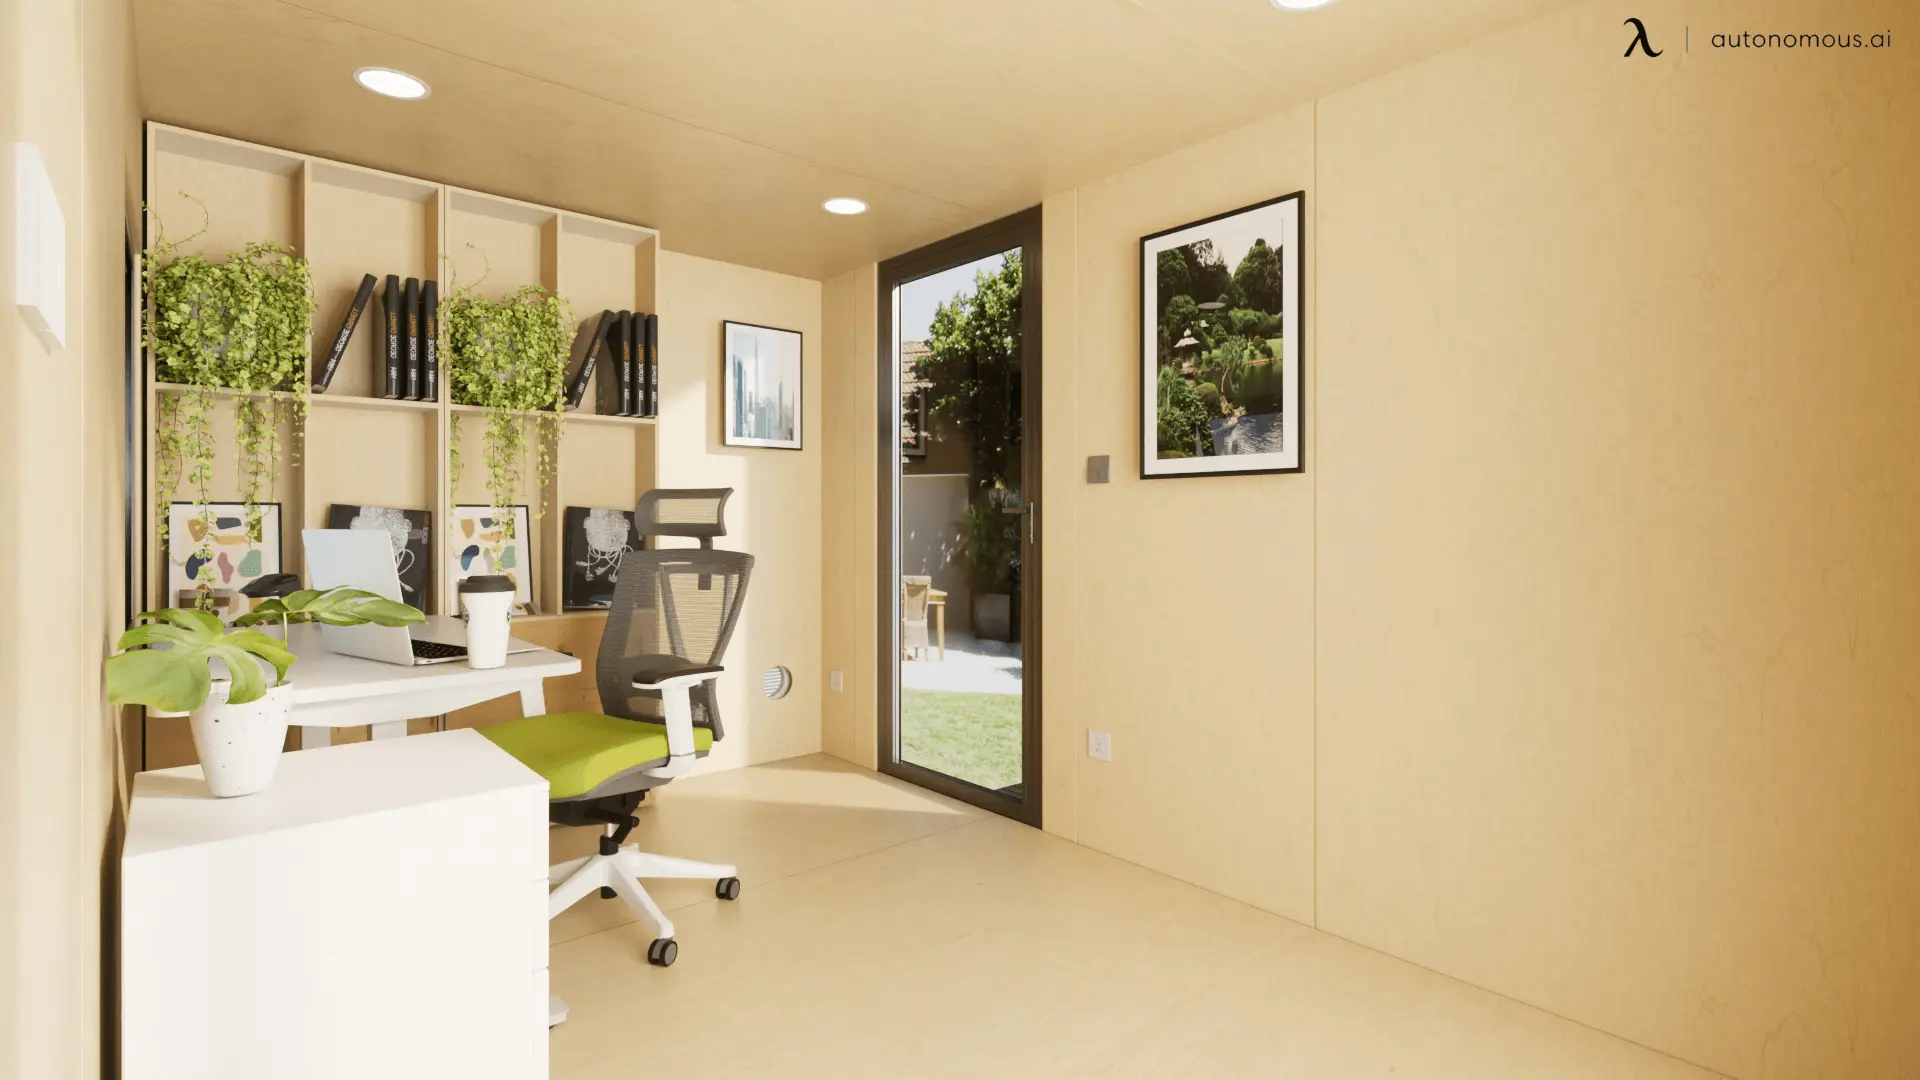
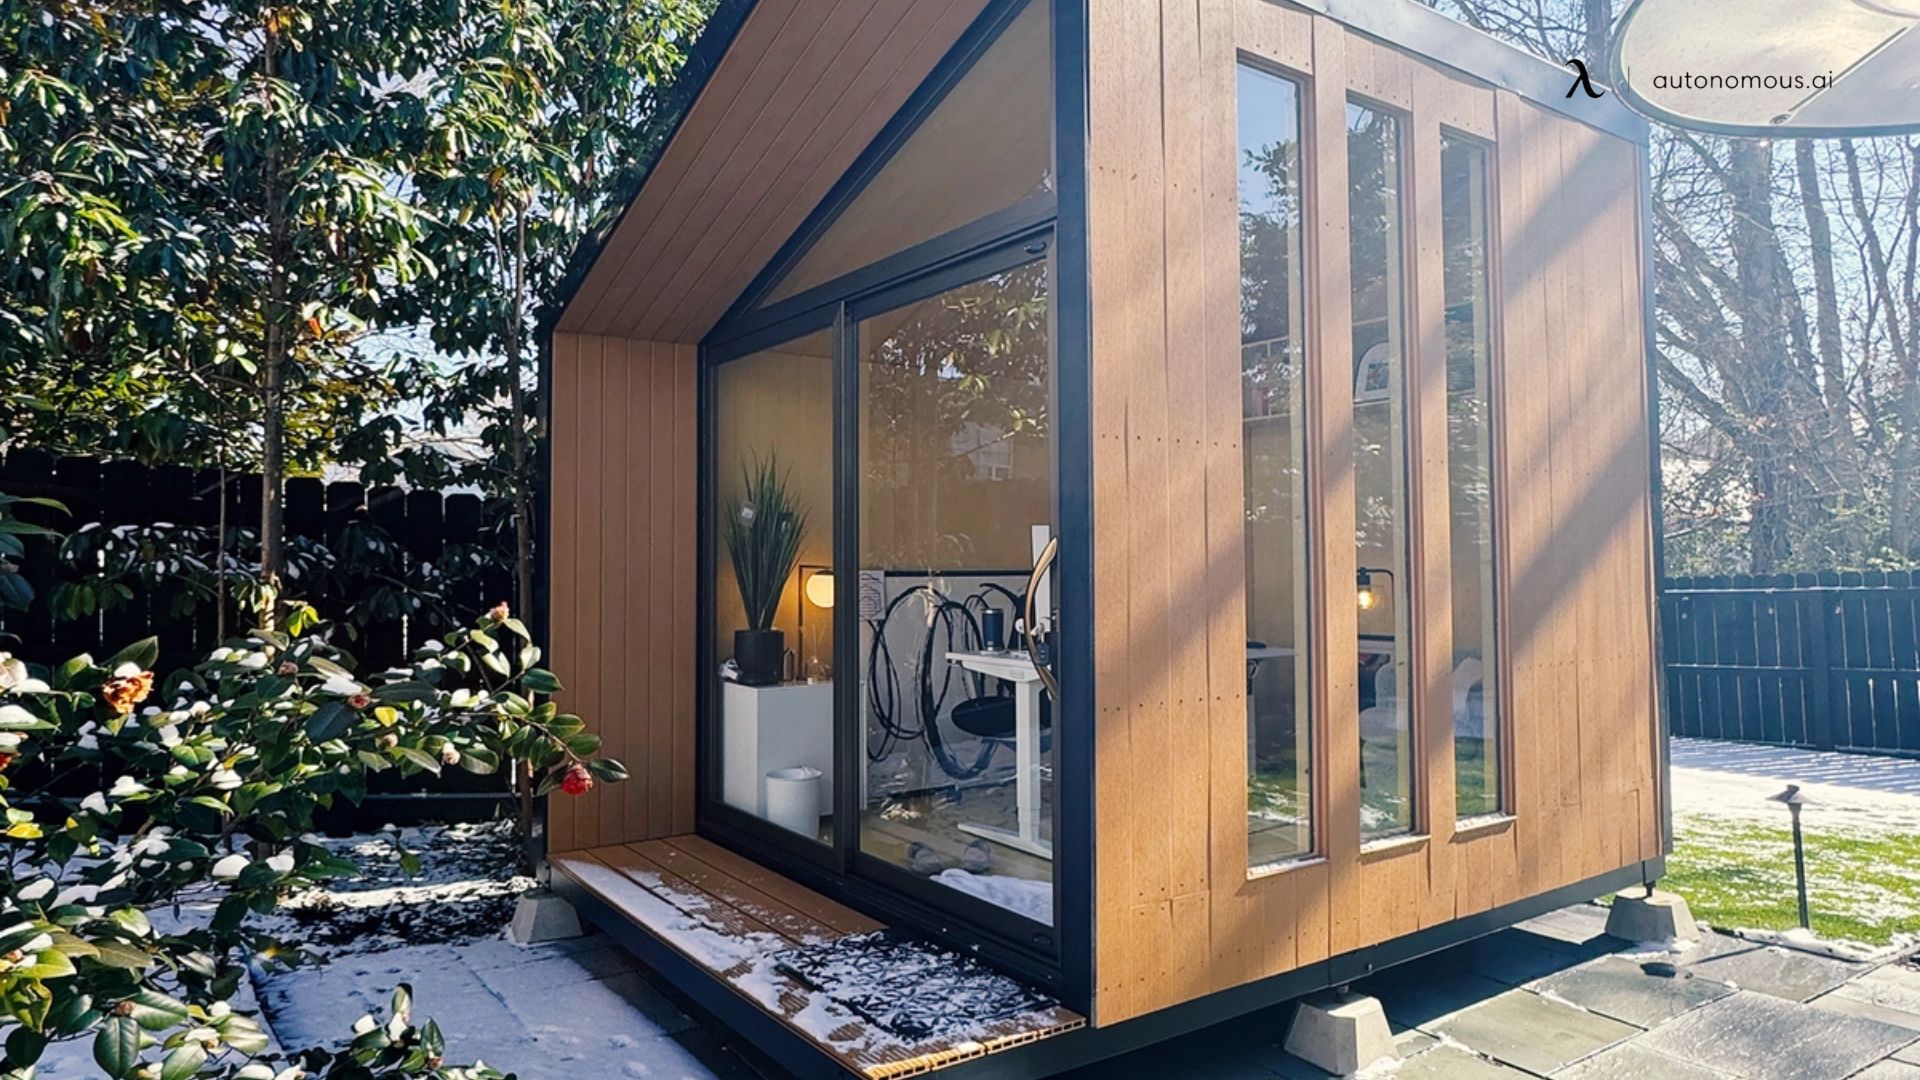
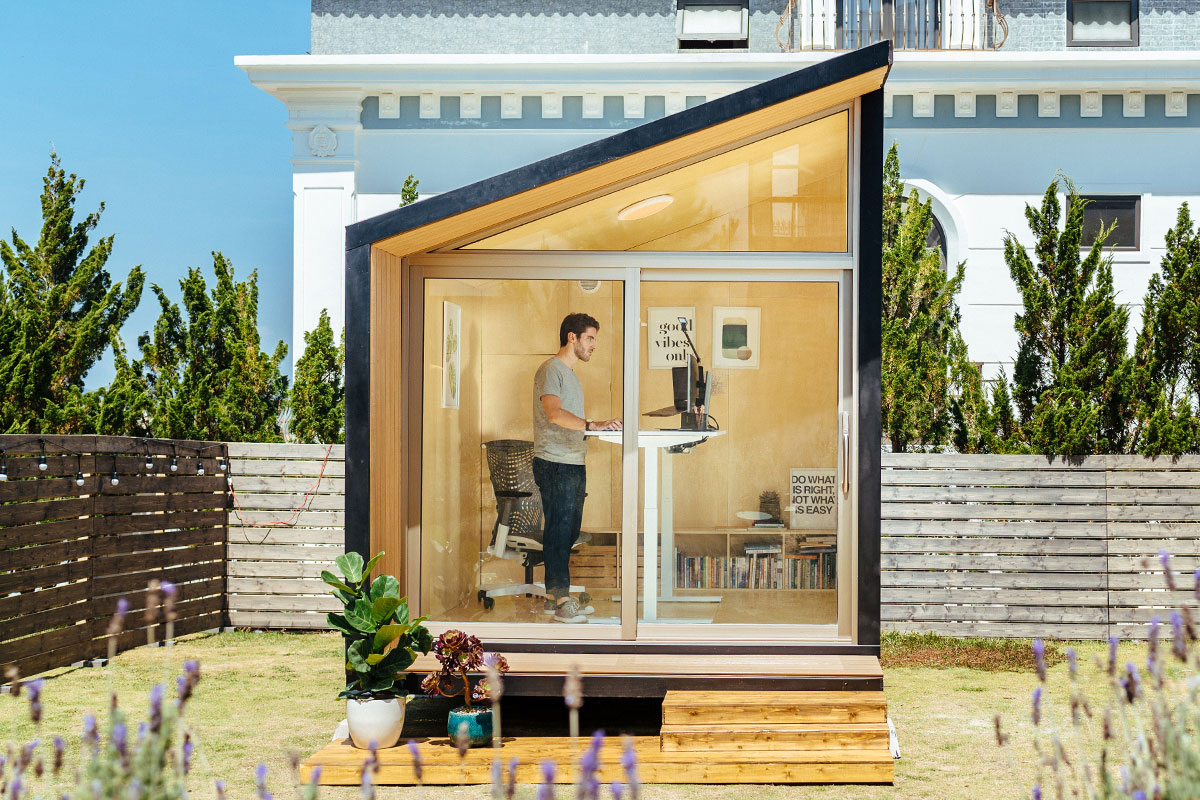
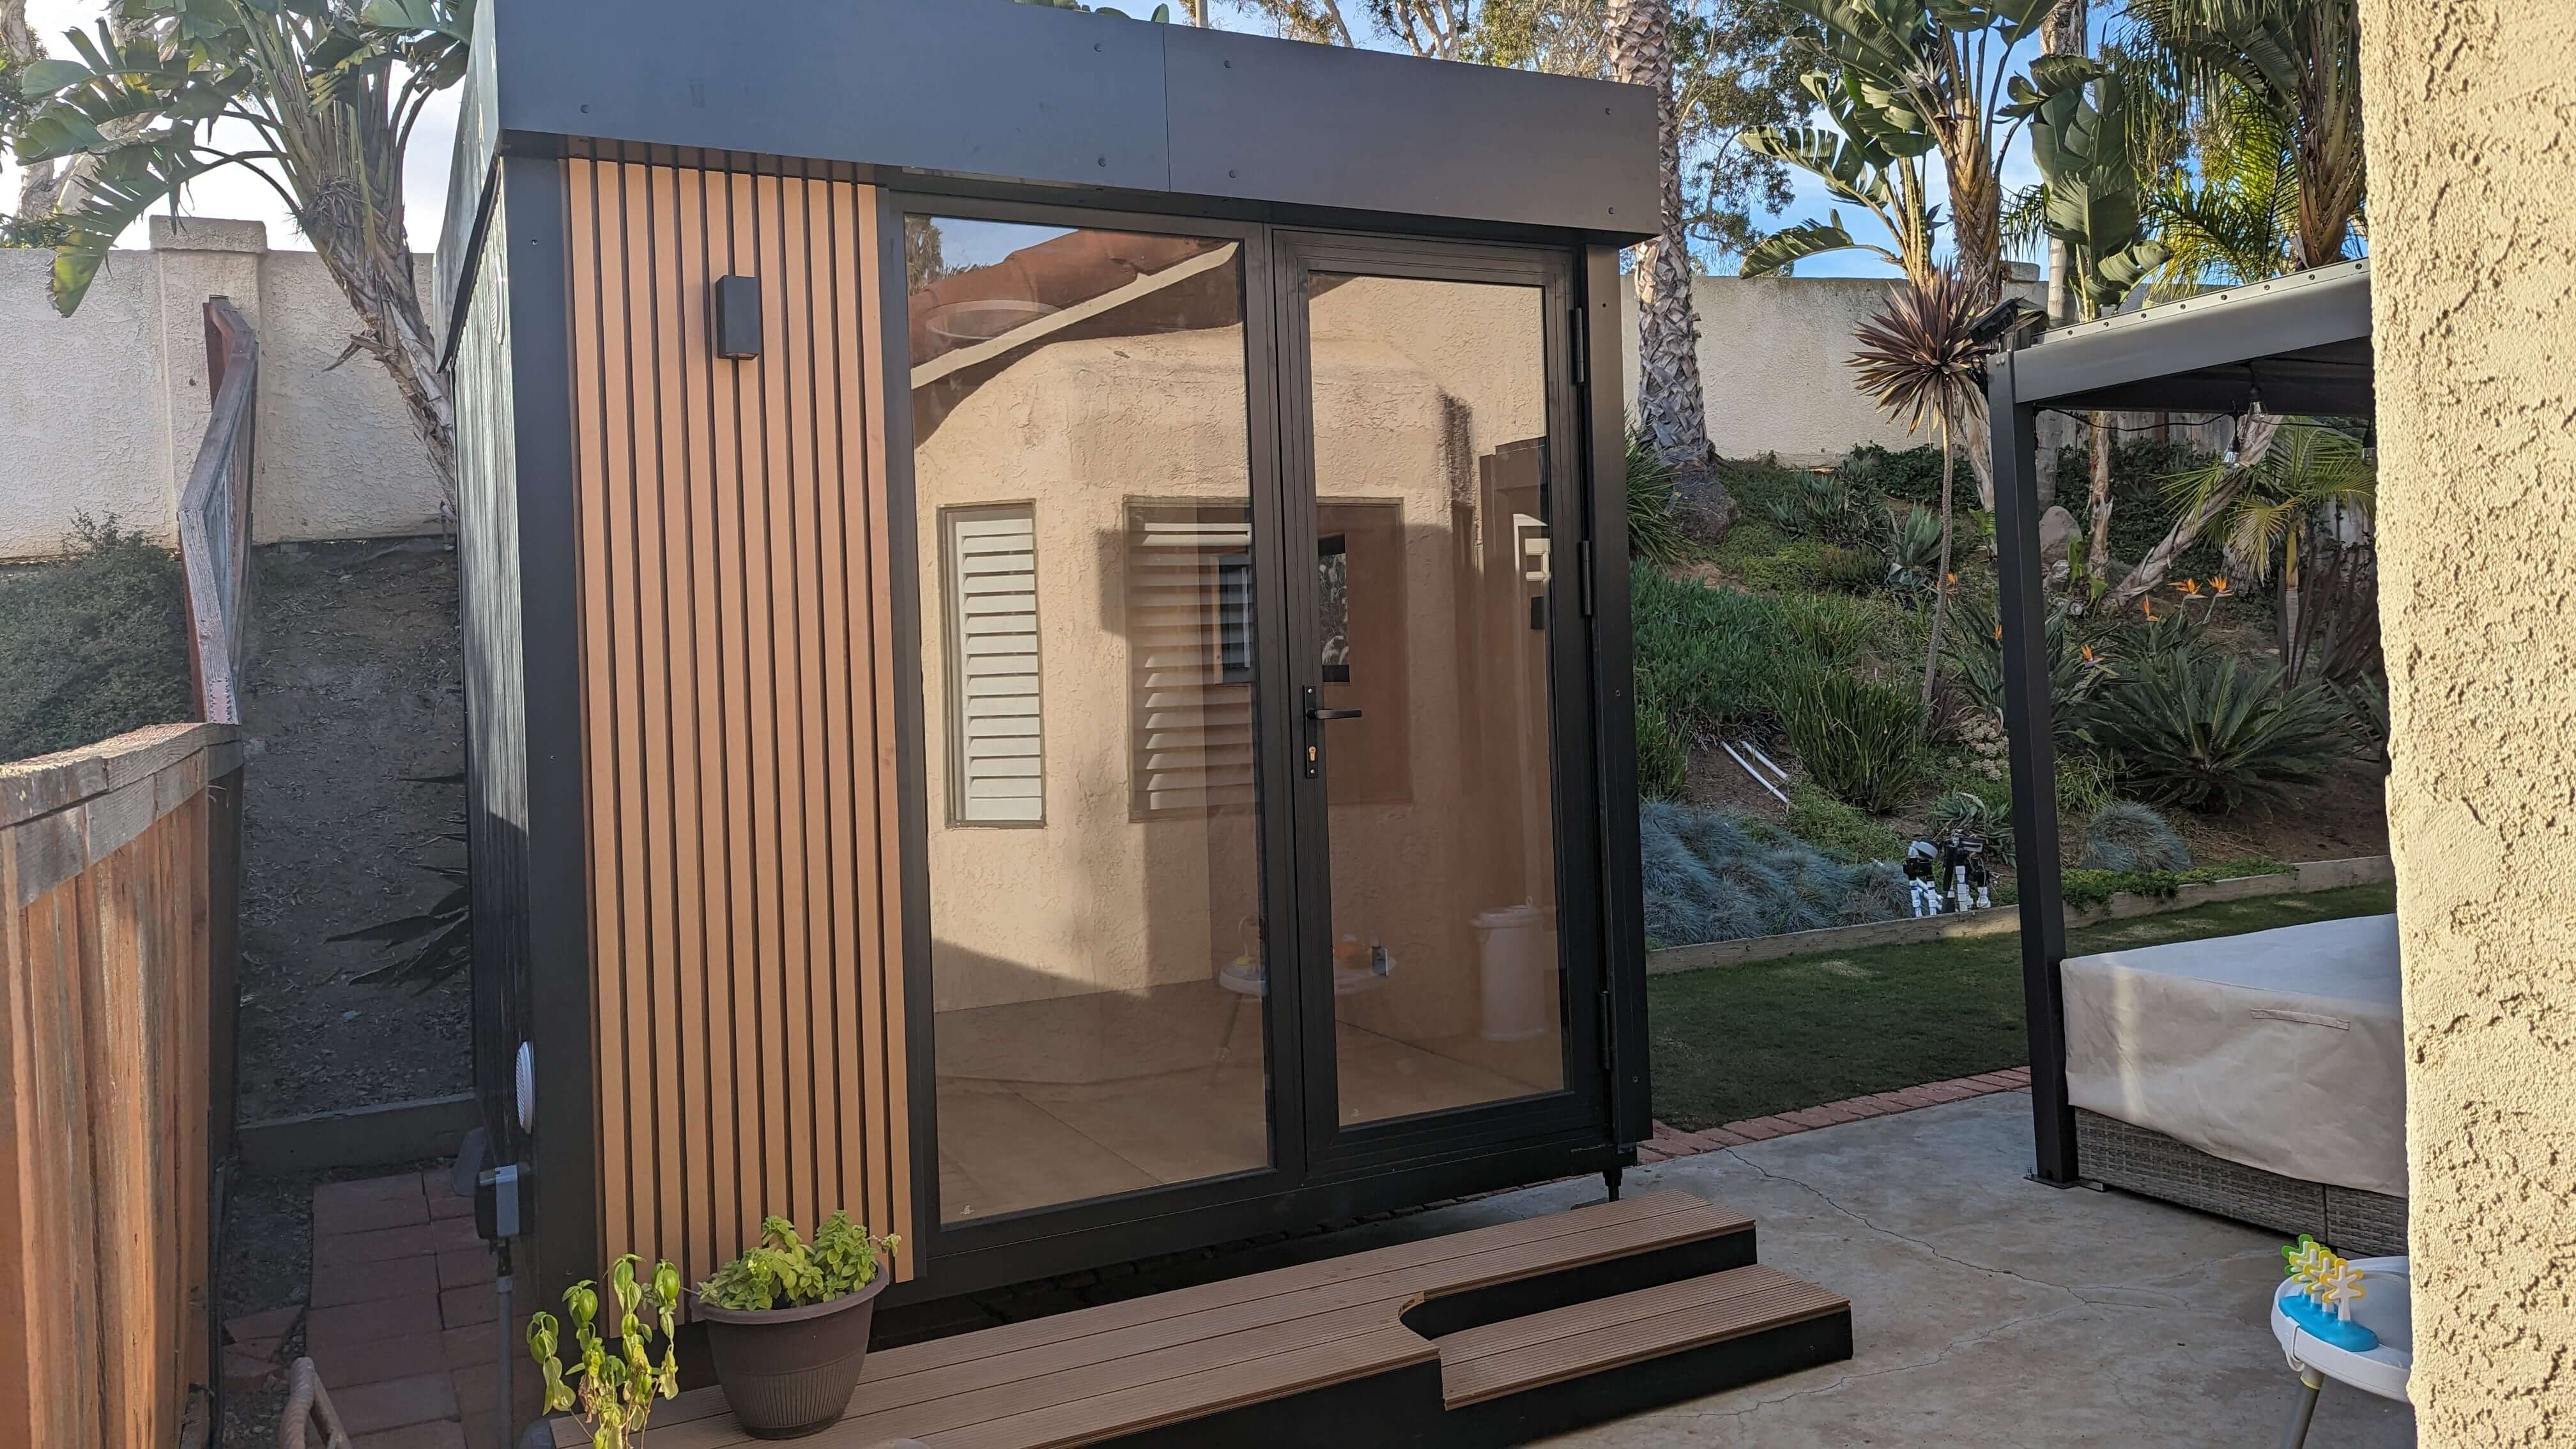
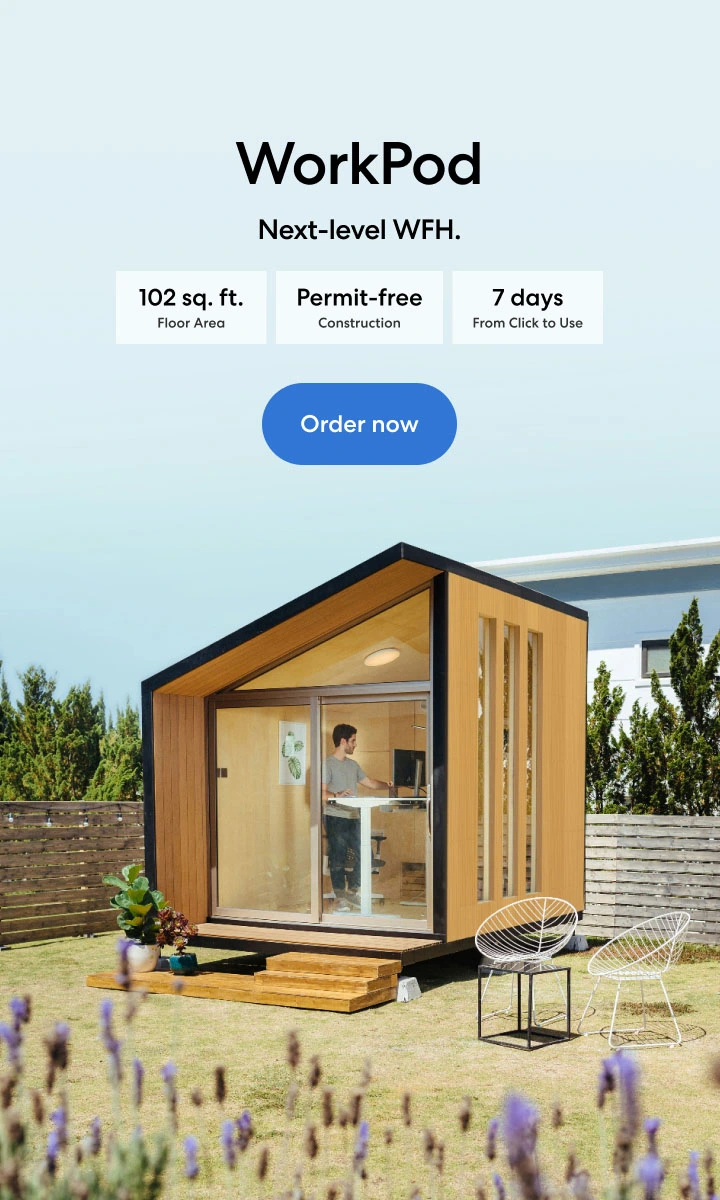
1. WorkPod: A Spacious and Modern Backyard Retreat
The WorkPod is a full-sized, insulated backyard pod designed for remote work, creative pursuits, and focused productivity. This office pod model is ideal for homeowners who need a dedicated workspace that feels like a true extension of their home.
WorkPod
 97 reviews
| Overall size | 8.5’W x 12’L x 11’H |
| Floorspace | 102 square feet |
| Ceiling height | 6.8’ to 9.3’ |
| Weight capacity | 2.9 tons |
| Door & Window dimensions, material (include glass) | Main door: 7.5’W x 6.8'H 3 windows: 1.1’W x 7.9’H Window material: Wooden frame, 5/16” tempered glass, composite wood cover Door material: Anodized aluminum frame, 5/16” tempered glass |
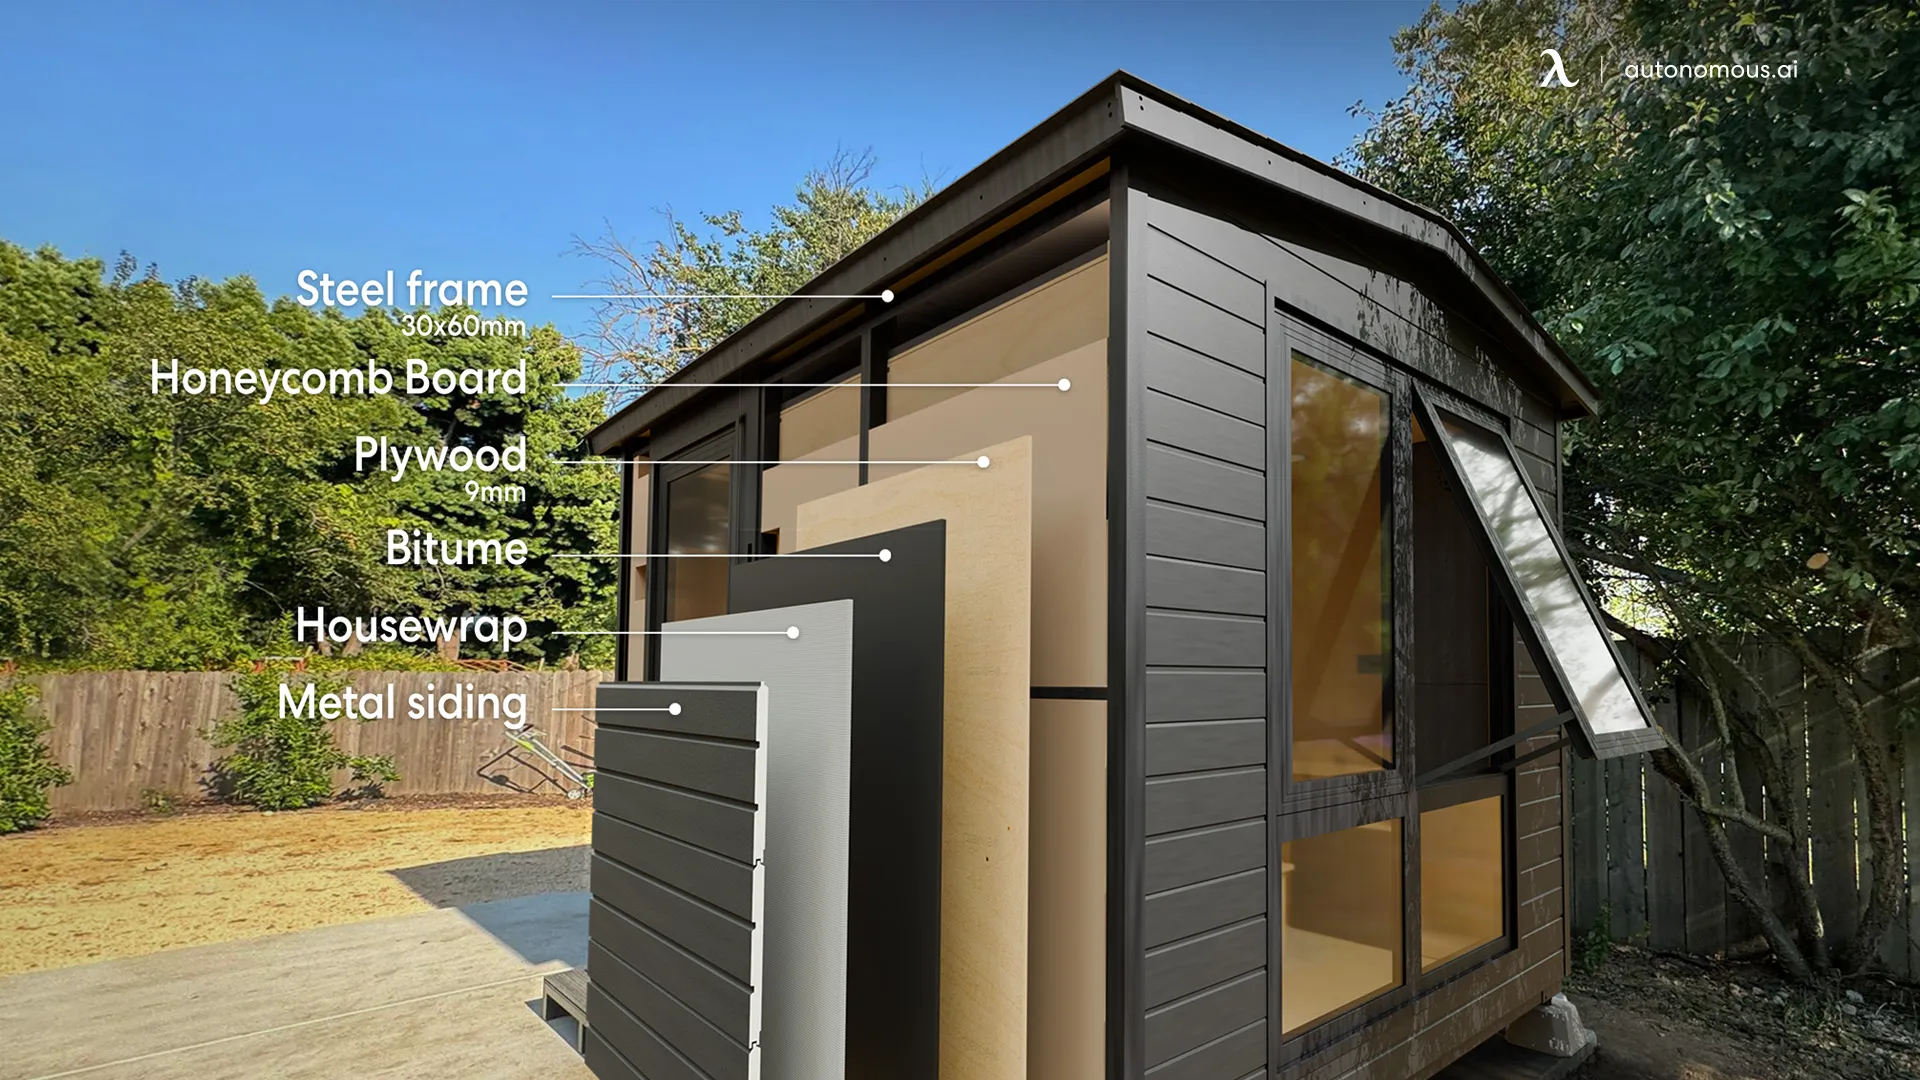
| Siding, roof, floor & balcony material | Siding: Plywood 1/2”, wooden frame, honeycomb paper, plywood 3/8”, bitume, housewrap, vinyl siding Roof: Roof shingles Floor: Plywood Balcony: Composite wood |
| Electrical devices | 1 RCB (Residual current breaker) 3 Wall outlet (Universal wall sockets) 1 Ceiling light switch 1 Ceiling light 1 Ventilator switch 1 Ventilator 66ft power cable with 2 connectors |
| Power input | Maximum voltage: 110V AC (US standard) Maximum current: 25A Maximum power dissipation: 2750W |
| Interior furniture | Unfurnished option: 1 Bookshelf, 1 Electrical Cabinet Furnished option: 1 SmartDesk Connect, 1 Autonomous Chair Ultra, 1 Monitor Arm, 1 Cable Tray, 1 Filing Cabinet, 1 Anti-Fatigue Mat, 1 Bookshelf, 1 Electrical Cabinet |
| Compatible with | Portable air conditioner: A/C units with dimensions smaller than 22” L x 20” W x 88” H and a 5.9” vent hole diameter will fit well. Heater: A small personal heater is more than sufficient. |
Key Features:
- Spacious interior that comfortably fits a desk, chair, and accessories.
- Soundproof walls for enhanced privacy and focus.
- Fully insulated for year-round comfort—warm in the winter, cool in the summer.
- Tempered glass doors for natural light and an open feel.
- Pre-wired electrical setup for easy plug-and-play functionality.
 "I did a lot of research before contacting the sales team. The representative was incredibly helpful, which led me to decide to make the purchase. The process from order to delivery was extremely fast. The assembly was also easy, with the WorkPod being completed in just 3 days by their contractors. I love the result and can't wait to move my office in there!" - Rachael T.
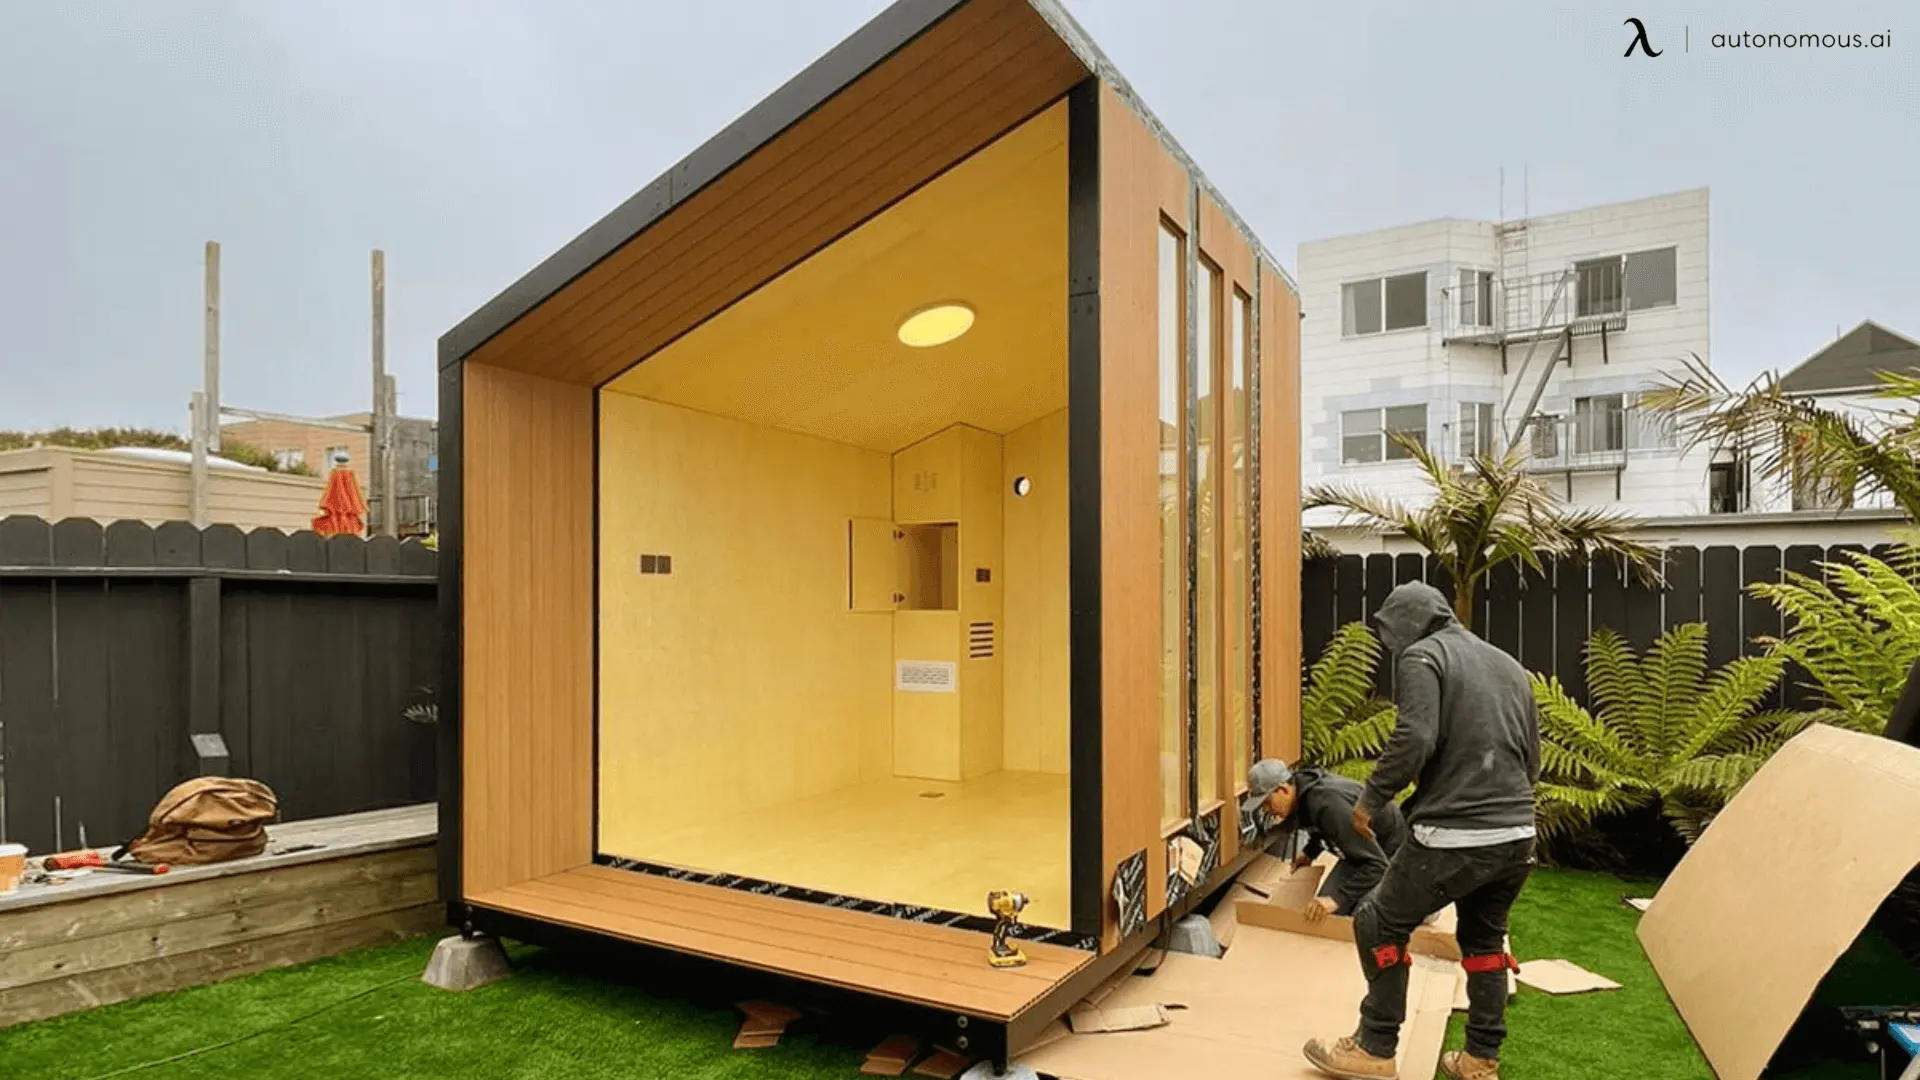 "I'm impressed by the WorkPod's design and functionality." - William H.
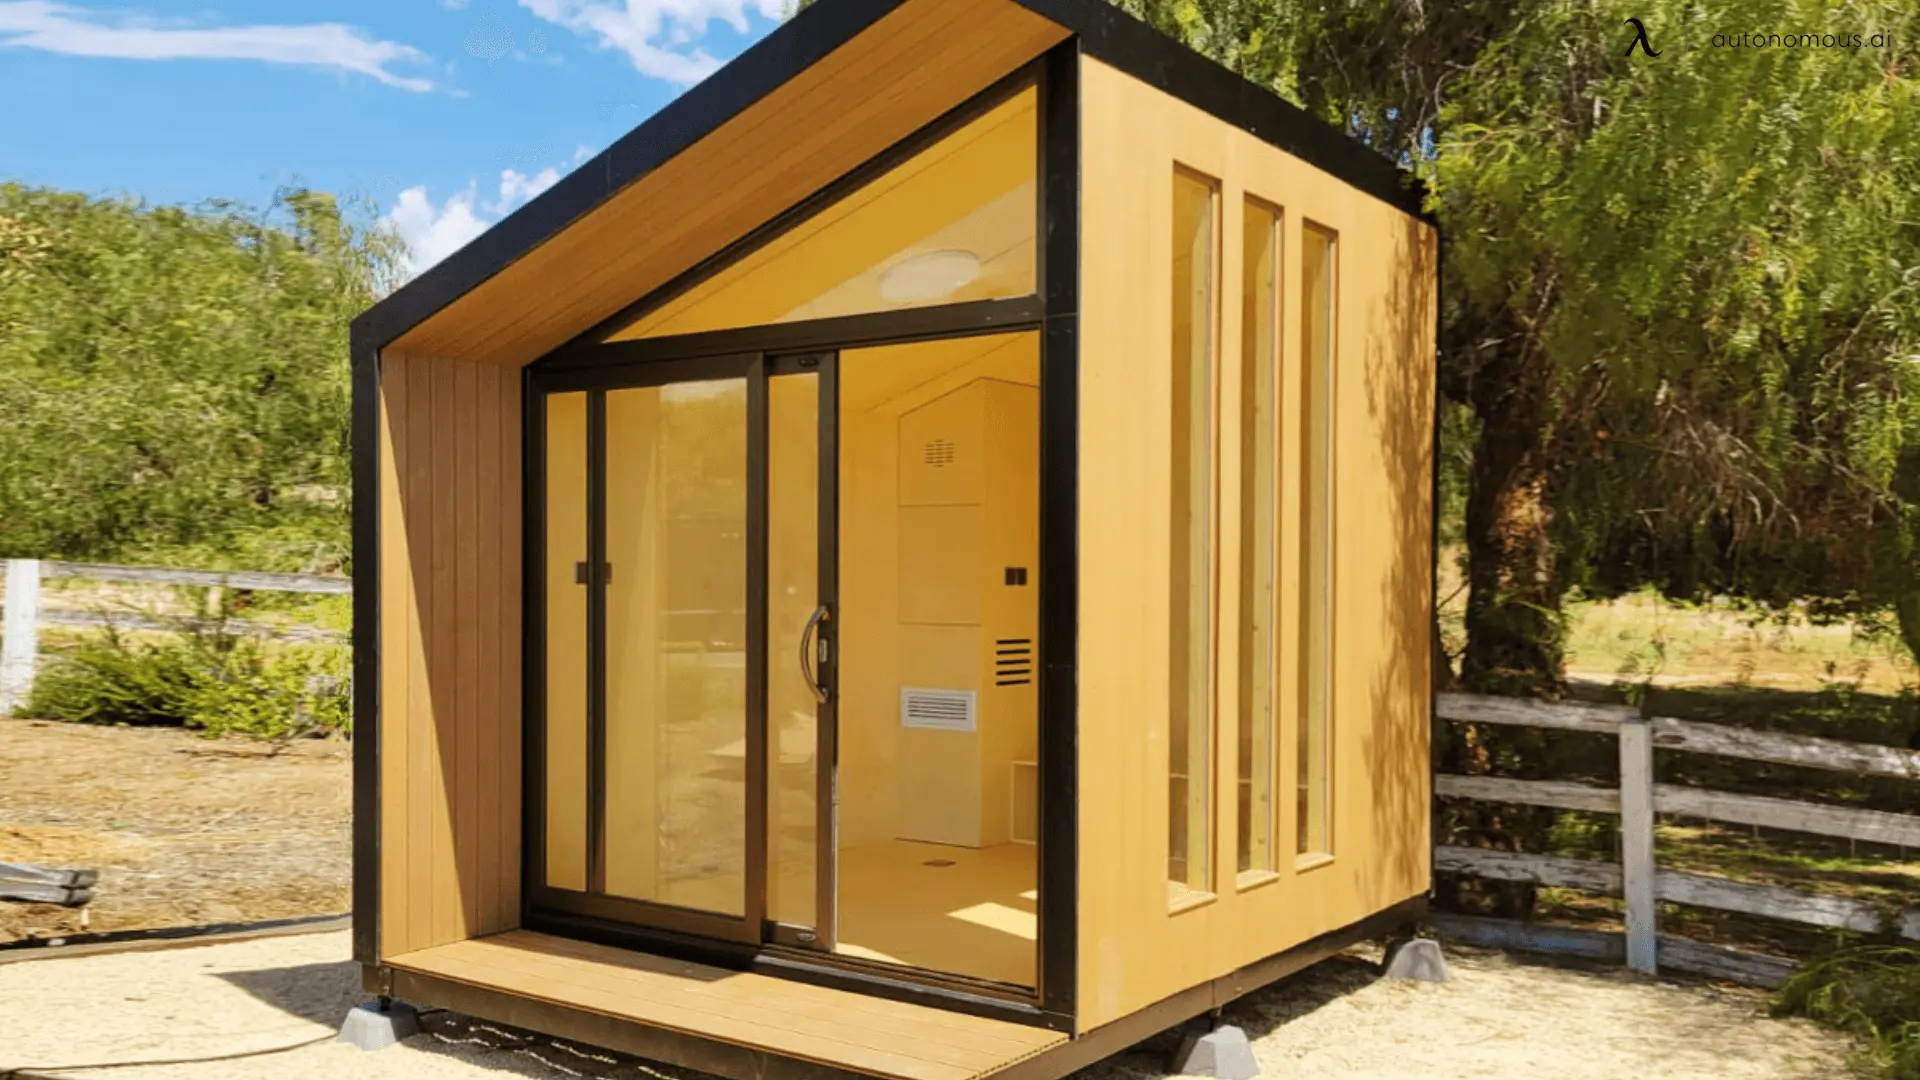 "The WorkPod's privacy features make it easy to take important calls or have virtual meetings without interruptions."- Ben D.
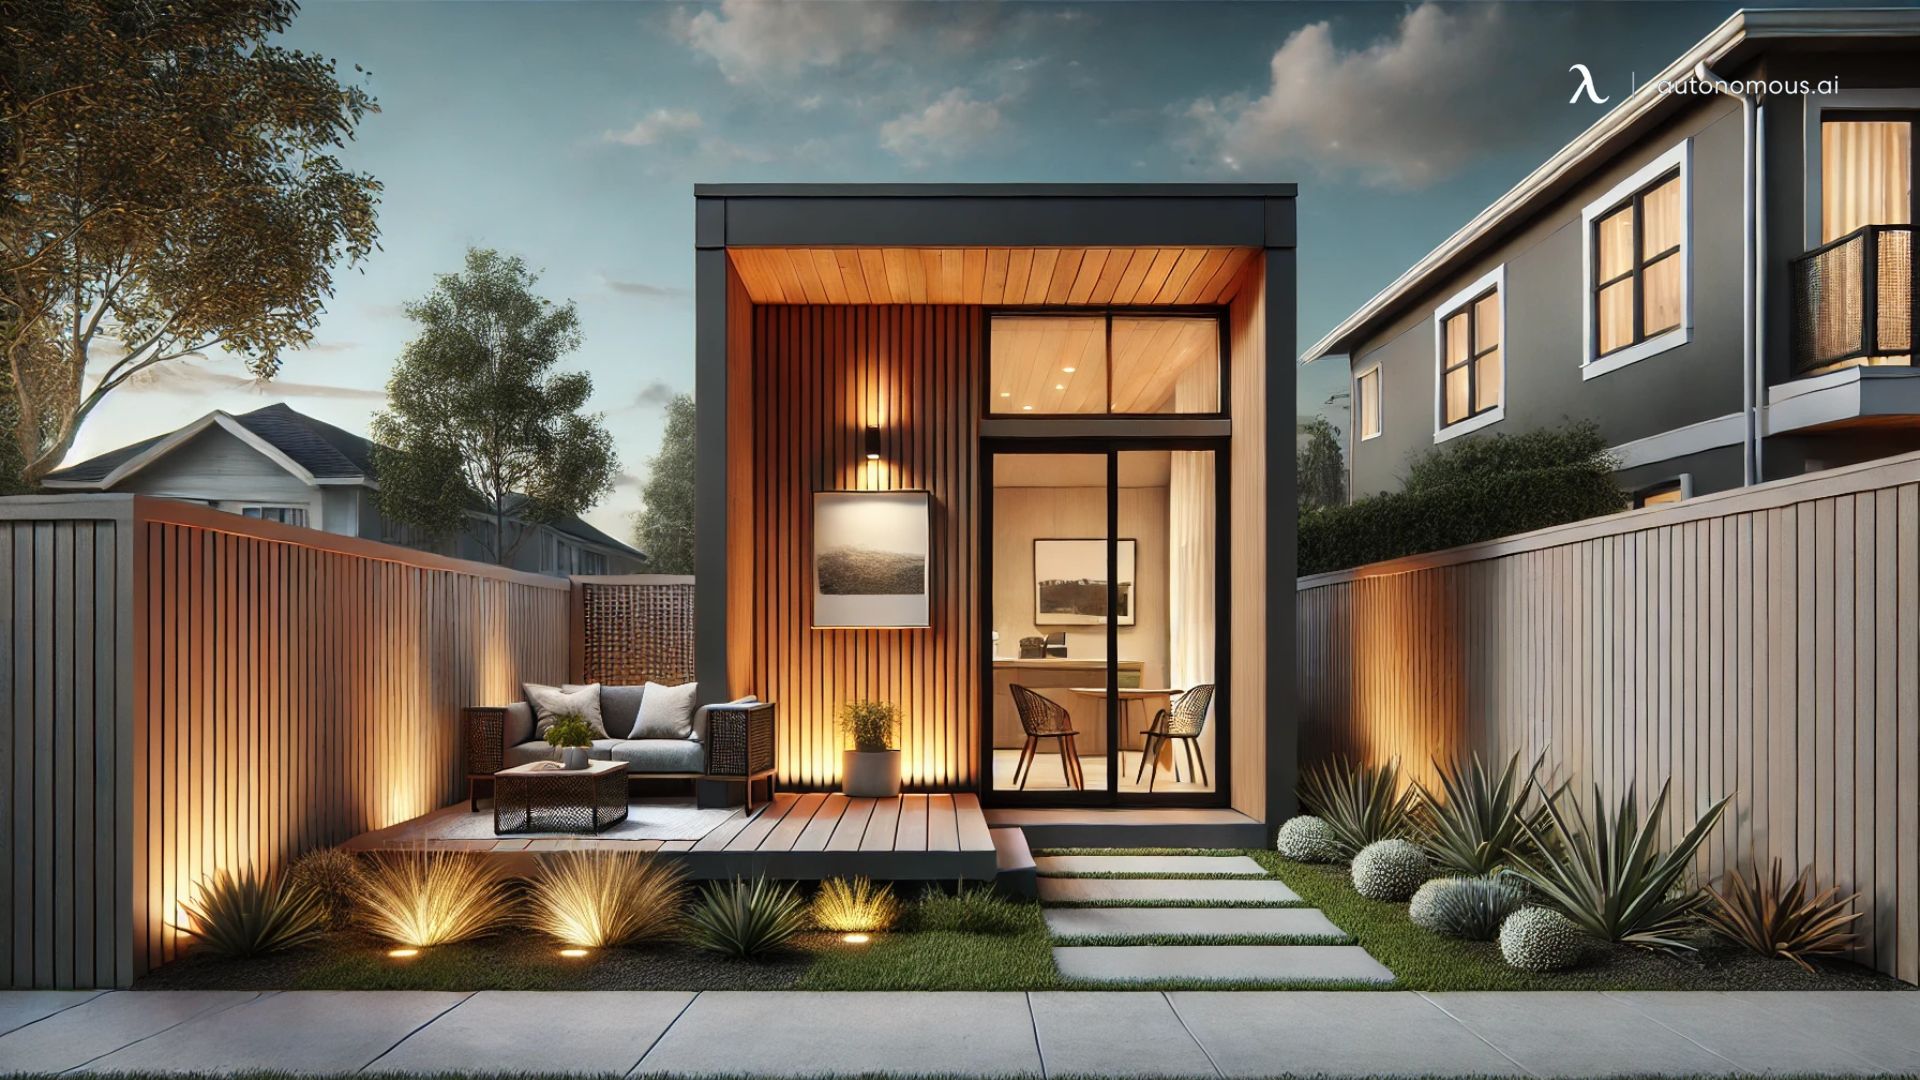
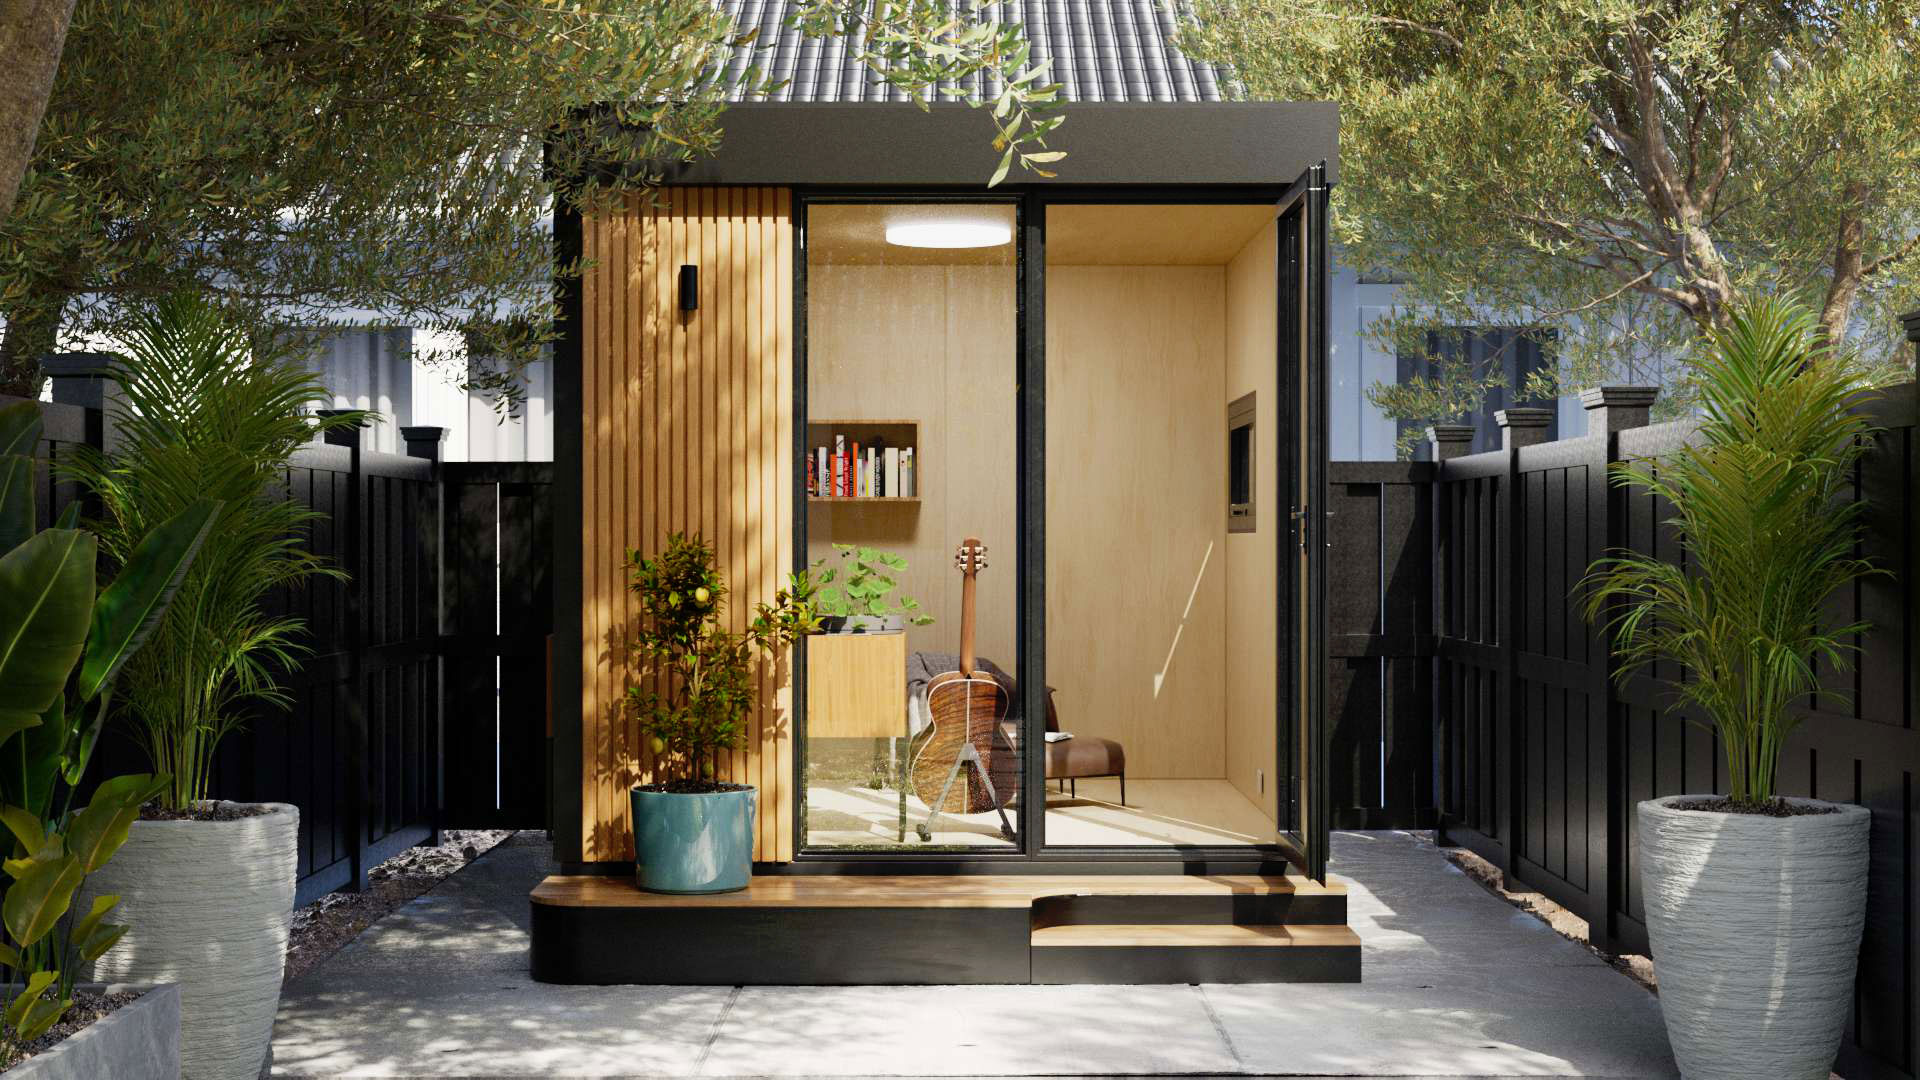
2. WorkPod Versatile: A Multi-Purpose Backyard Unit
The WorkPod Versatile takes the classic WorkPod design and expands its usability beyond office work. This studio pod model is great for homeowners who want an adaptable space that can serve multiple purposes over time.
/https://storage.googleapis.com/s3-autonomous-upgrade-3/production/ecm/241028/12.jpg)
WorkPod Versatile
54 reviews| Overall size | 8’4”W x 12’6”L x 9’10”H |
| Floorspace | 105 square feet |
| Ceiling height | 7’3” |
| Weight capacity | 2.9 tons |
| Pedestal | 18”W x 43”L x 7”H |
| Door & Window dimensions, material (include glass) | Main door: 39”W x 89”H Large window: 59”W x 81”H Small window: 39”W x 39”H Window & door material: Powder coated aluminum, 5/16” tempered glass |
| Siding, roof, floor & balcony material | Siding: Plywood 1/2”, steel frame, honeycomb paper, plywood 3/8”, bitume, housewrap, vinyl siding Roof: Roof shingles Floor: Plywood Pedestal: Steel frame & wood plastic composite |
| Electrical devices | 1 RCB (Residual current breaker) |
| Power input | Maximum voltage: 110V AC (US standard) Maximum current: 25A Maximum power dissipation: 2750W |
| Furniture (optional) | Cabinet, Desk, Small & Big Bookshelf, TV Shelf, Foldable Sofa Table & Electrical Cabinet* (*Electrical Cabinet always included) |
Key Features:
- Extra storage features built into the design.
- Premium wood exterior for durability and a modern aesthetic.
- Quick installation with a prefabricated structure.
 "The StudioPod has been a remarkable addition to my backyard. Its design and functionality create an inspiring workspace that's truly a game-changer."- Keith H.
 "What I really love about the StudioPod is it's multi-purpose. You can use it for work, it has a good desk, plenty of storage space. You can use it for playing video games, watching games, being noisy without disturbing family life. You can also extend it and use for having people sleeping over!" - Jaime H.
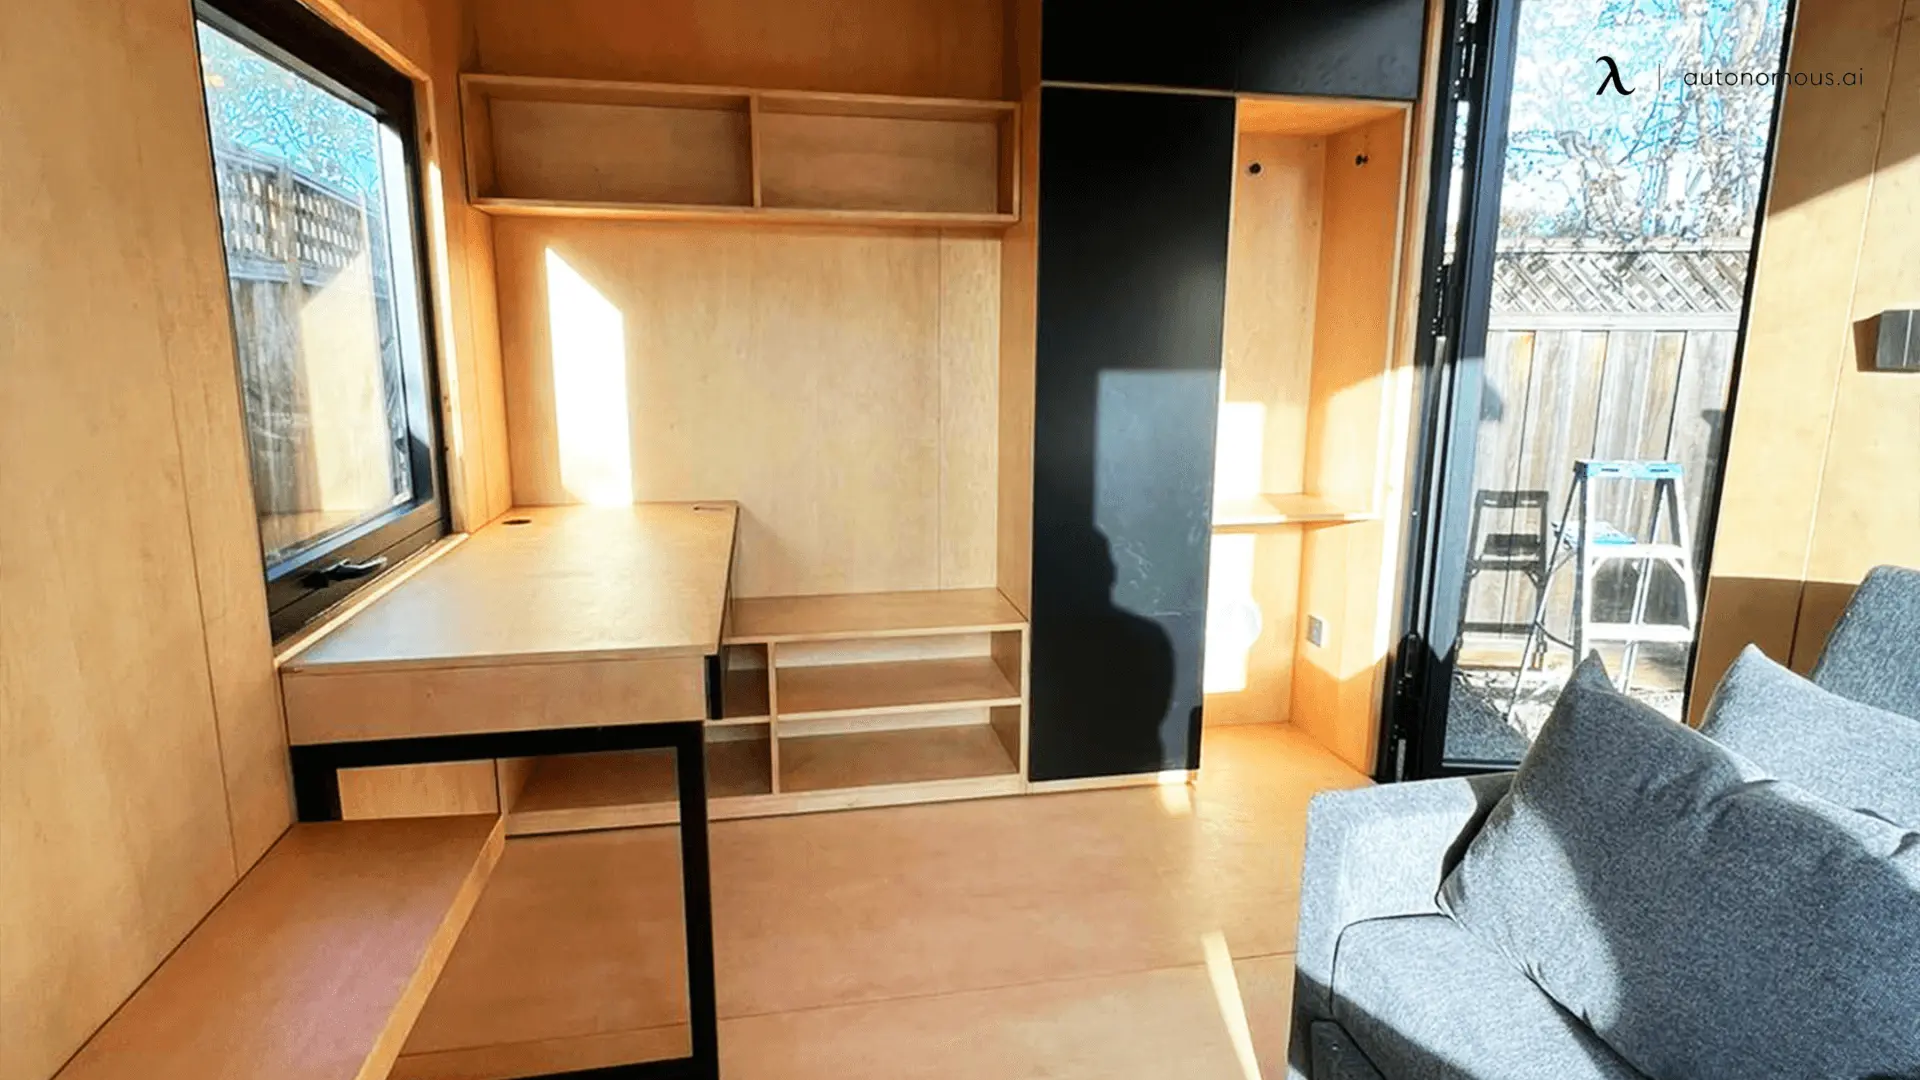 "Excellent customer service for StudioPod. Quick responses."- Matthew C.
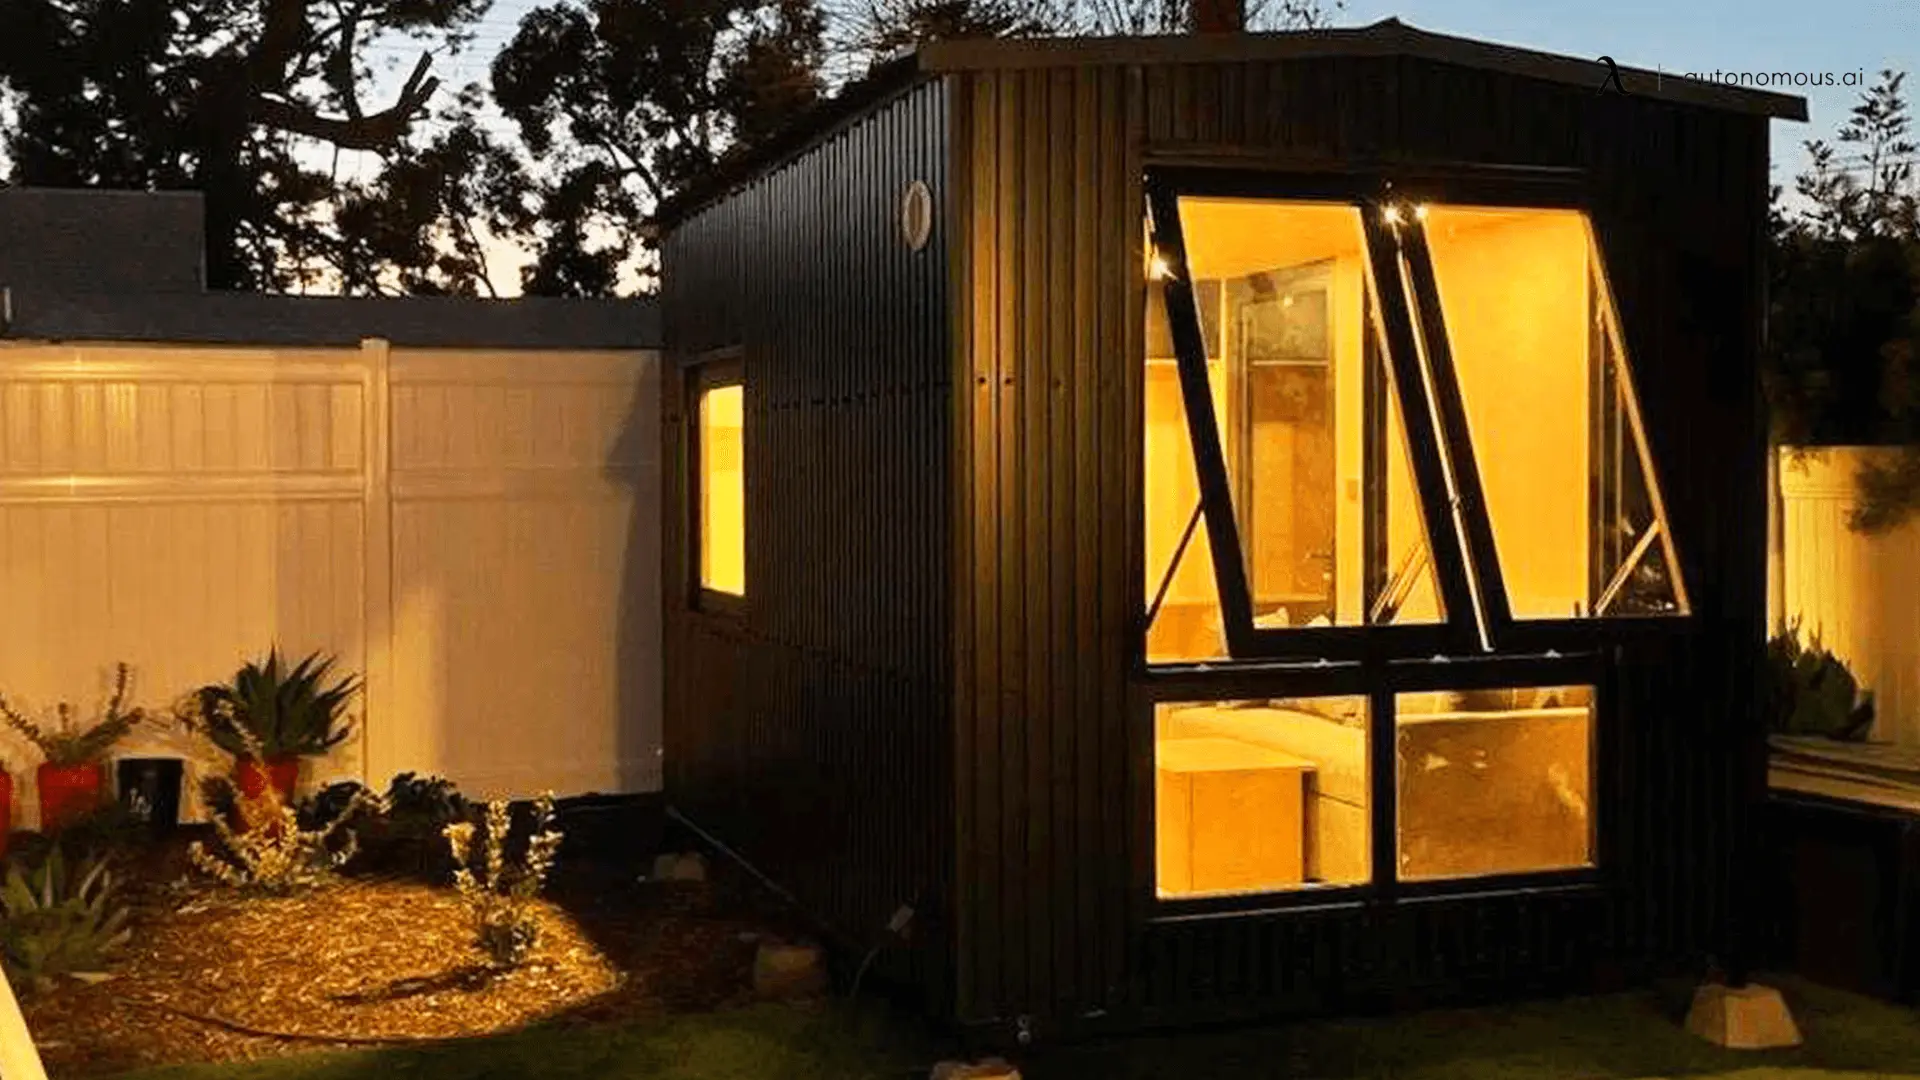 "The StudioPod's ergonomic chair provides excellent support for long hours of work."- Marcus D.
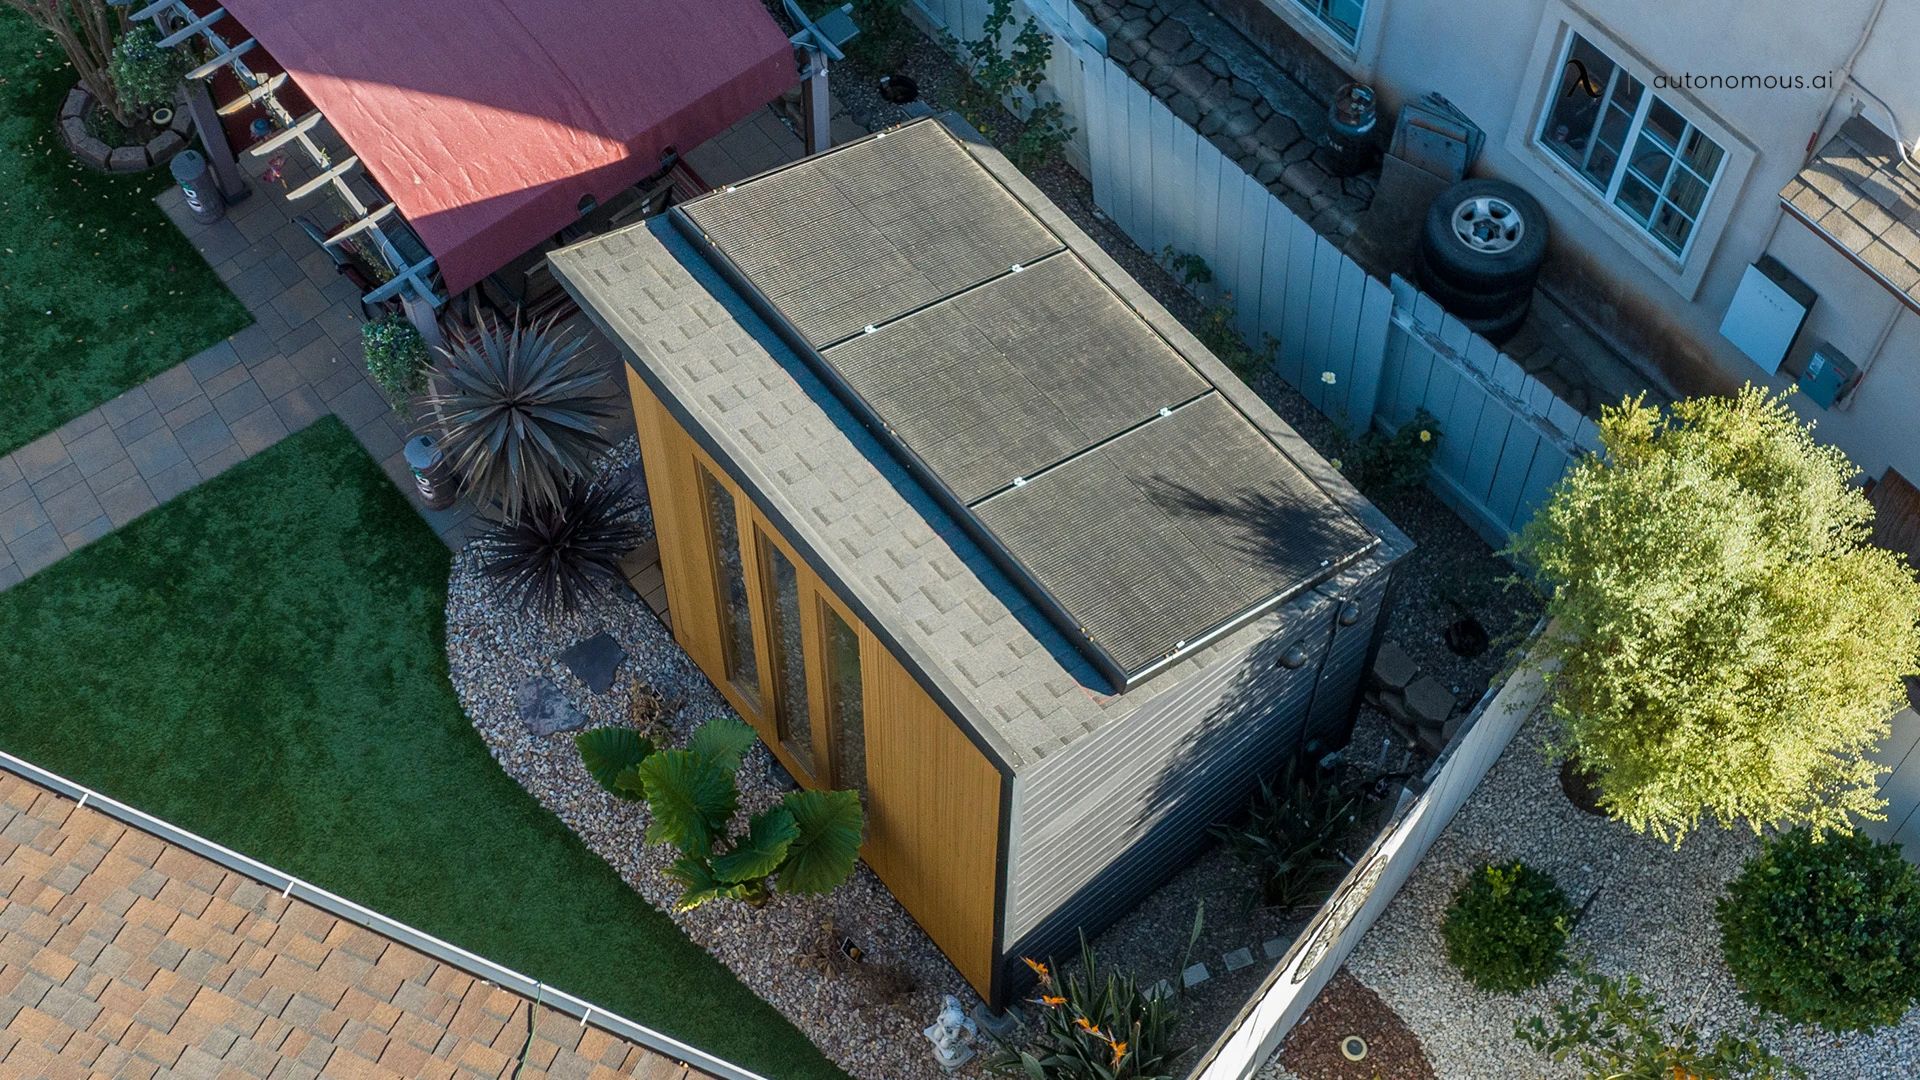
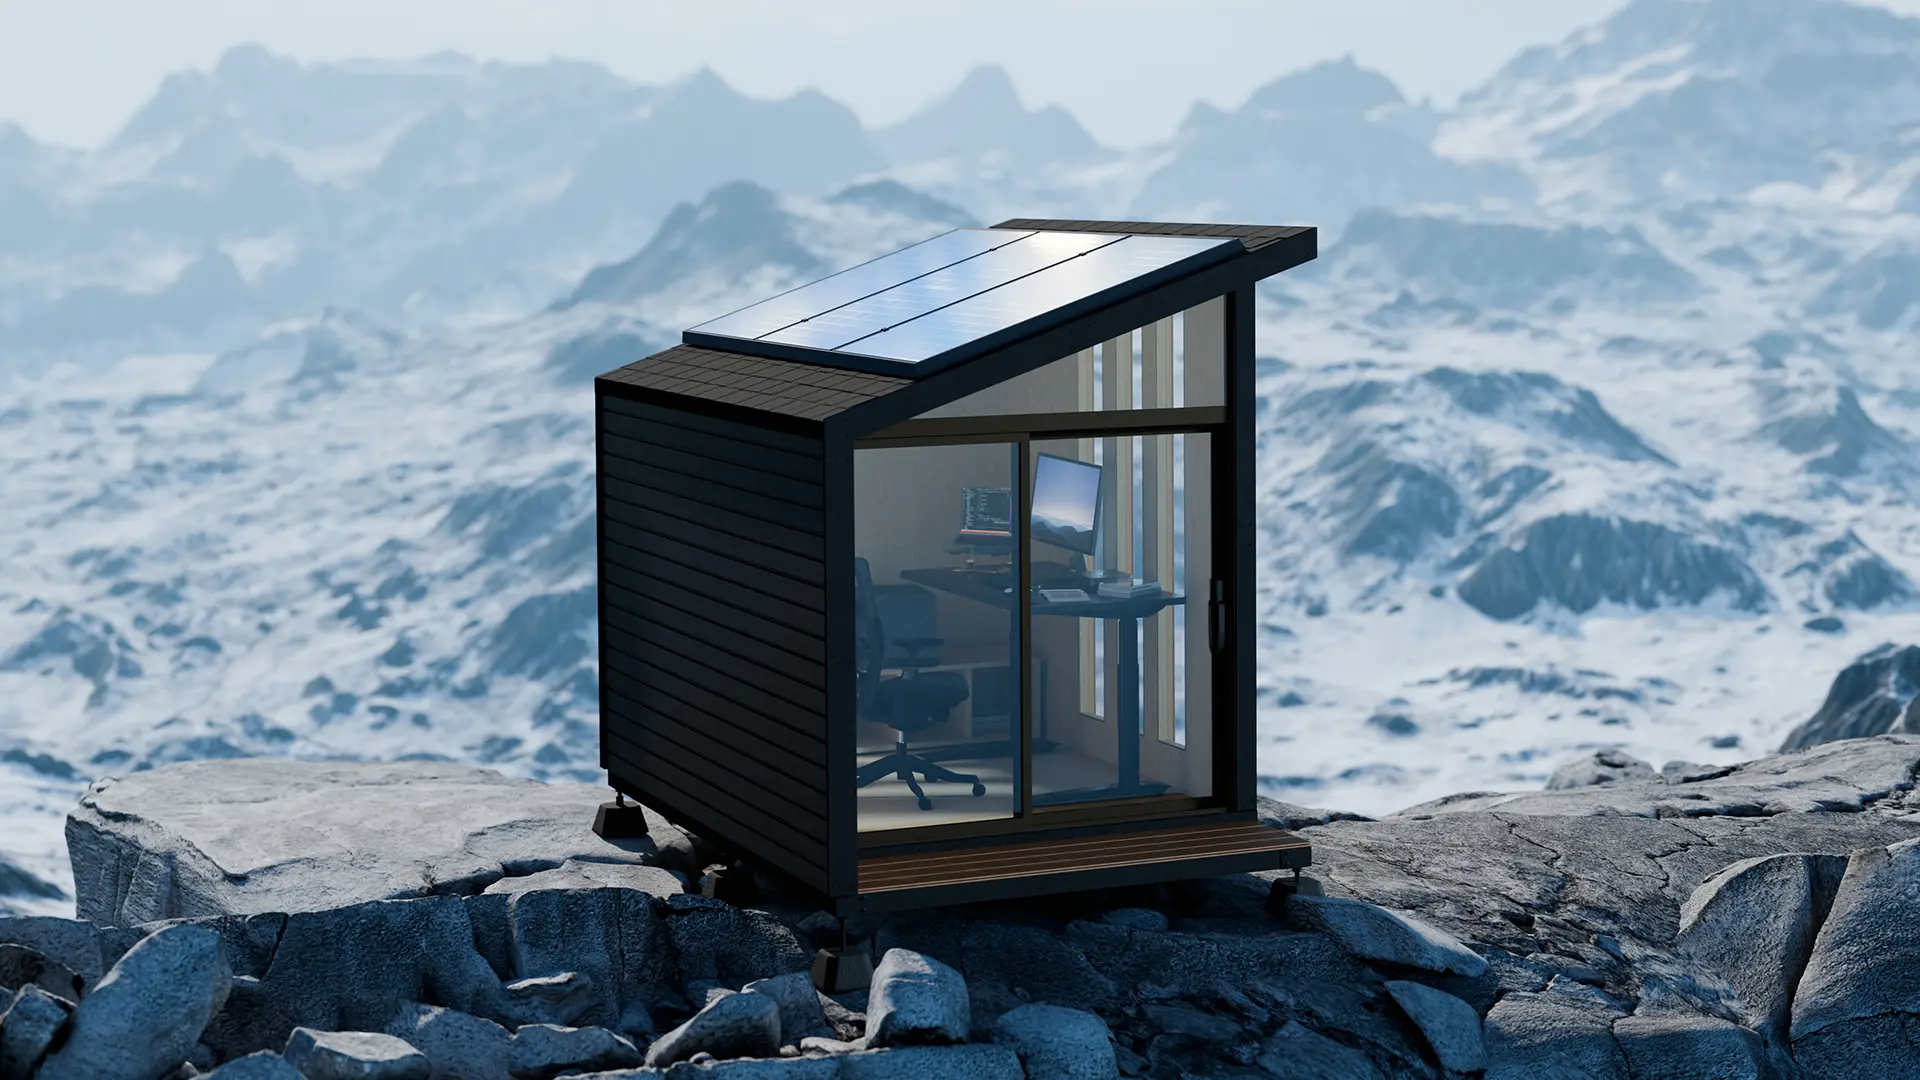
3. WorkPod Solar: The Off-Grid, Energy-Efficient Solution
For those who prioritize sustainability and energy efficiency, the WorkPod Solar offers an eco-friendly backyard retreat powered by solar energy. This model is perfect for those who want an independent workspace that reduces their carbon footprint while avoiding additional electrical permit requirements.
WorkPod Solar
118 reviews| Solar panel | System size: 70.7" x 138.5" x 4.7"~5.5" Number of solar panels: 3pcs Solar panel size: 67.8" × 44.6" × 1.18" Solar panel weight: 46.7lbs Solar Cell: 108pcs Maximum Rating Power: 430W Module Efficiency: 0.22 Operating Temperature: −40 °F to +185 °F |
| Inverter | Inverter size: 17.9" x 13.8" x 5.1" Inverter weight: 25.4lbs Maximum Rating Power: 3000W Maximum Efficiency: 0.93 AC output: 120V Output frequency: 50/60Hz Operating Temperature: 32 °F to +132 °F |
| Battery Cabinet | Battery cabinet size: 15.8" x 23.7" x 21.7" Number of Battery: 2pcs Battery size (1pc): 5.6" x 18.5" x 17.2" Battery weight (1pc): 99lbs Battery capacity: 10.2kWh Voltage: 48V Cell type: LiFePo4 Internal resistance: ≤ 40mΩ Operating Temperature: −4 °F to +140 °F |
| Dimension | Overall size: 8.5’W x 12’L x 11’H Gross floor area - GFA (Including external walls): 102 square feet Ceiling height: 6.8’ to 9.3’ Weight capacity: 2.9 tons |
| Door & Window dimensions, material (include glass) | Main door: 7.5’W x 6.8'H 3 Windows: 1.1’W x 7.9’H Window material: wooden frame, 5/16” tempered glass, composite wood cover Door material: anodized aluminum frame, 5/16” tempered glass |
| Siding, roof, floor & balcony material | Siding: plywood 1/2”, wooden frame, honeycomb paper, plywood 3/8”, bitume, housewrap, vinyl siding Roof: roof shingles Floor: plywood Balcony: composite wood |
| Electrical devices | 1 RCB (Residual current breaker) 3 (Universal wall sockets) Wall outlet 1 Ceiling light switch 1 Ceiling light 1 Ventilator switch 1 Ventilator 66ft power cable with 2 connectors |
| Power input | Maximum voltage: 110V AC (US standard) Maximum current: 25A Maximum power dissipation: 2750W |
| Interior furniture | Unfurnished option: 1 Bookshelf 1 Electrical Cabinet Furnished option: 1 SmartDesk 5 1 ErgoChair Ultra 2 1 Monitor Arm 1 Cable Tray 1 Filing Cabinet 1 Anti-Fatigue Mat 1 Bookshelf 1 Electrical Cabinet |
| Compatible with | Dreo Portable Air Conditioner: The best choice for WorkPod with: 12000 BTU fast cooling 16 feet long-range cooling 35-80° wide-angle auto swing 65-85°F cool 30%-80% humidity setting 4 levels of fan 46 dB quiet working Drainage-free in cool mode 3-in-1 mode with cool, fan, and dehumidifier Large LED display Touchpad/APP/Voice/Remote control Works with Alexa & Google Assistant White color Heater: A small personal heater is more than sufficient. |
Key Features:
- Solar panel system for off-grid power capabilities.
- Energy-efficient insulation to minimize heating and cooling costs.
- Built with environmentally sustainable materials.
- Ideal for remote locations where electrical connections are limited.
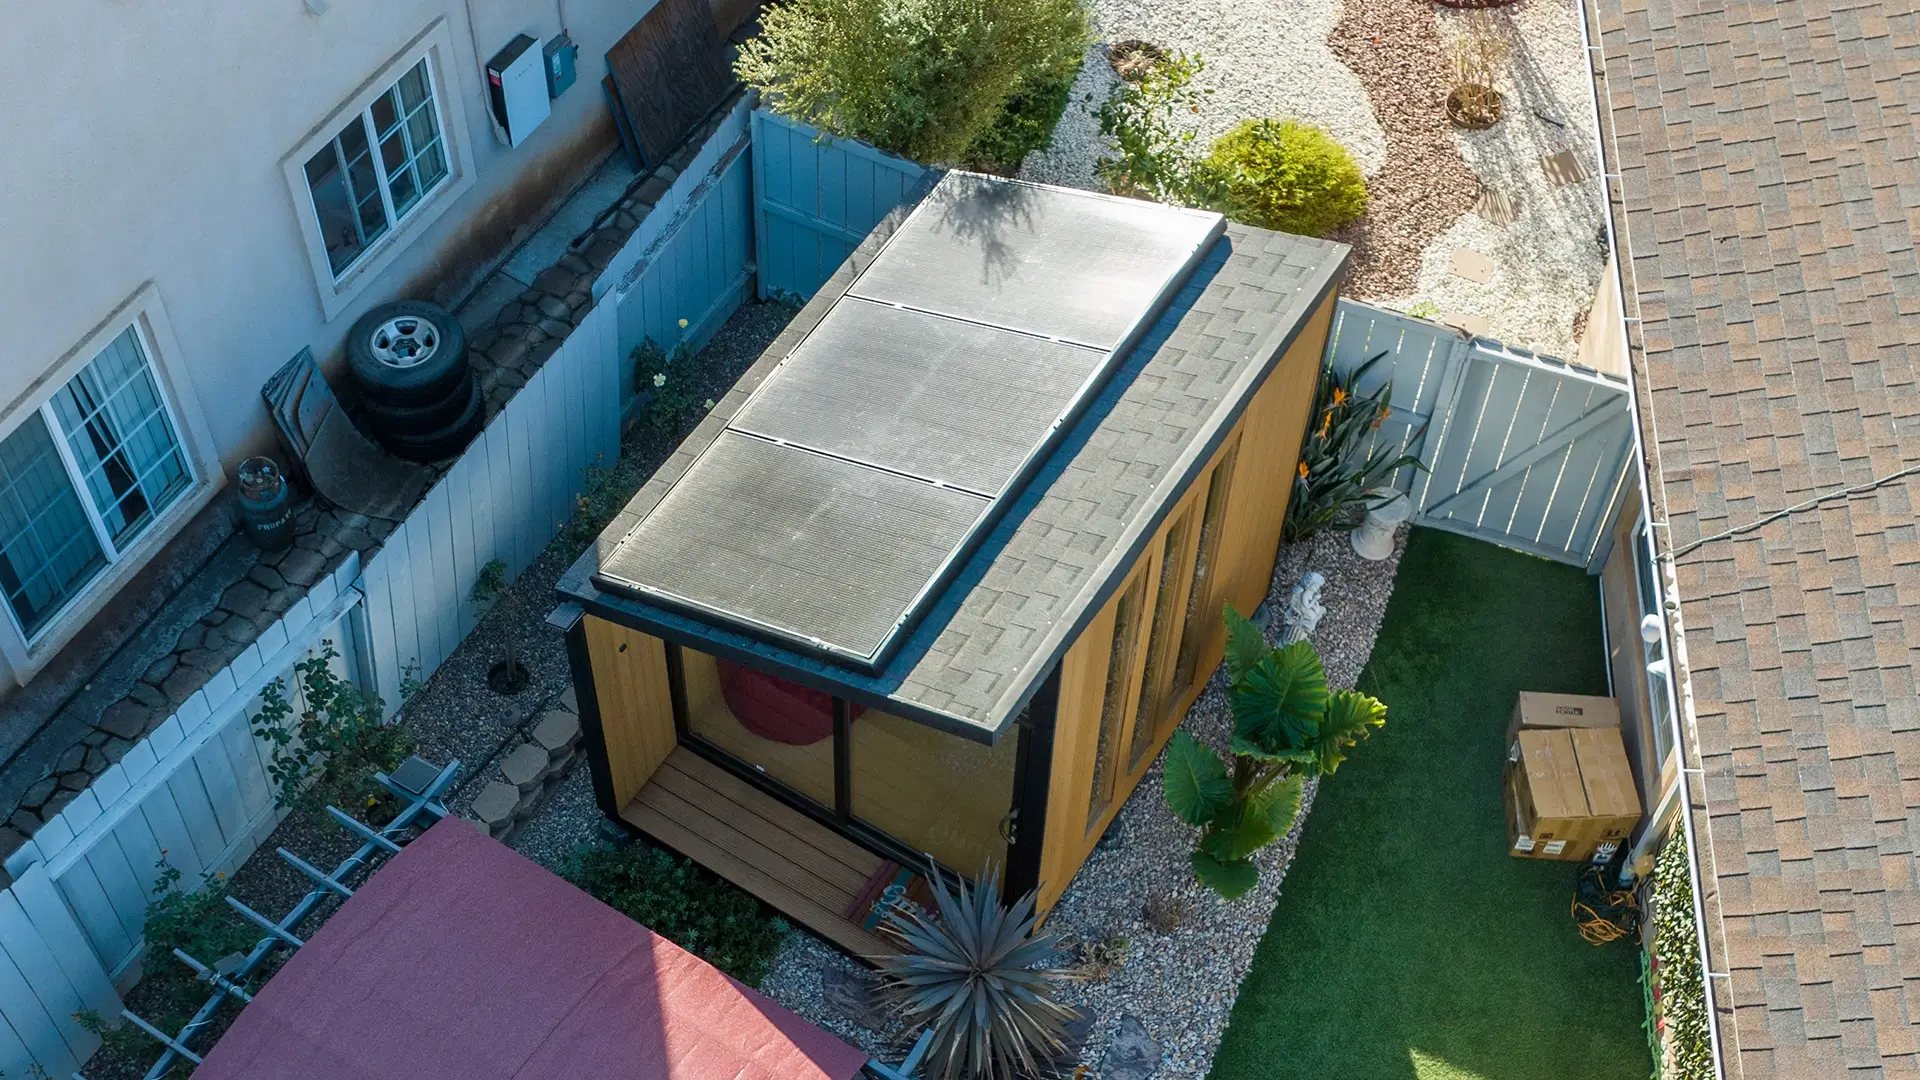 Optimize every square foot of your 102 sq. ft. WorkPod Solar for maximum productivity and comfort.
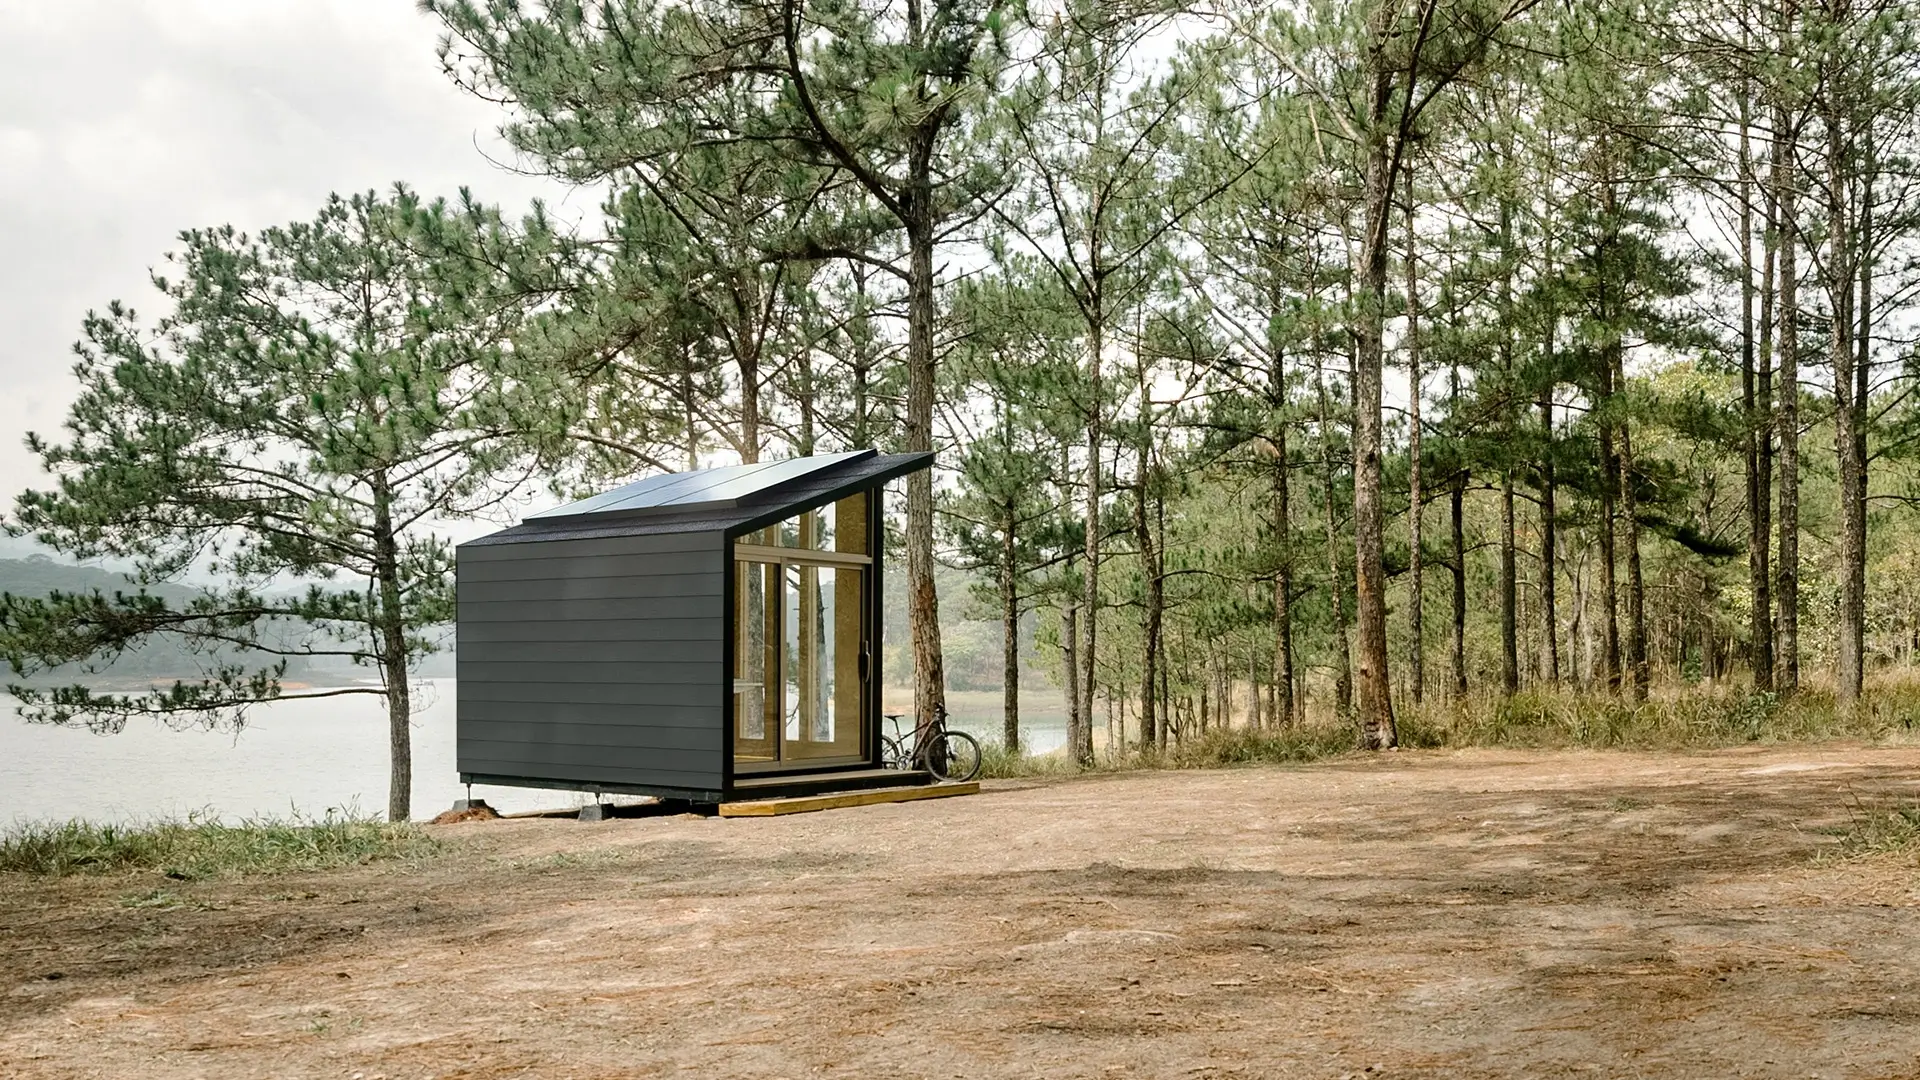 Go green and achieve more with a workspace that works as hard as you do—all powered by the sun.
 Ergonomic design meets functional innovation. Feel at ease and focused in your personal office.
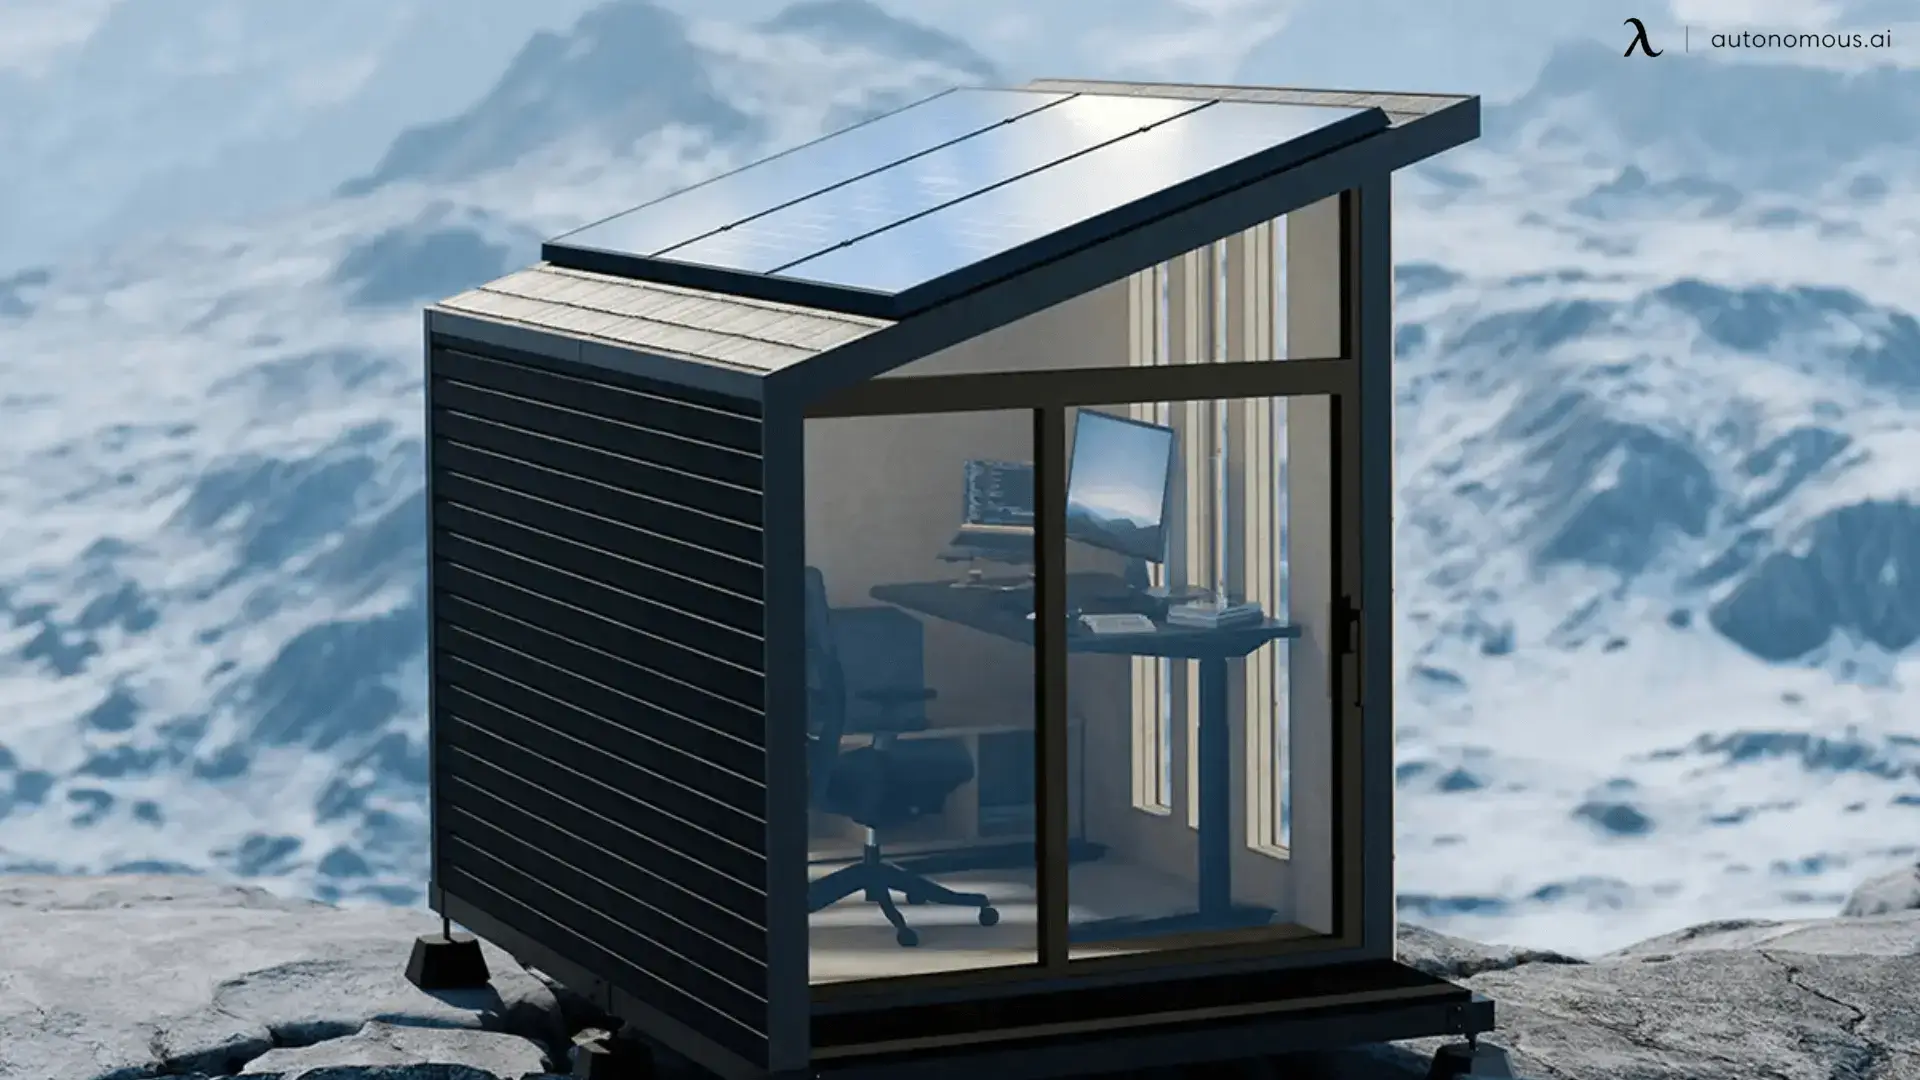 From energy systems to installation, WorkPod Solar is designed to let you focus on what you do best.
4. WorkPod mini: Compact and Space-Saving
For those with limited backyard space, the WorkPod mini provides a smaller, more affordable alternative without sacrificing functionality. This small pod model is ideal for homeowners who need a simple yet functional backyard workspace without requiring significant property modifications.
WorkPod mini
8 reviews| Dimension | Overall size: 8’7"W x 9’L x 9’3"H Floorspace: 80 square feet Ceiling height: 7’3" Weight capacity: 2.3 tons (including Pod body) Pedestal: 24"W x 103"L x 9"H |
| Door & Window dimensions, material (include glass) | Main door: 37"W x 89"H (open side) & 33"W x 89"H (fixed side) Window: 43"W x 20"H Window & door material: Powder coated aluminum, 5/16" tempered glass |
| Siding, roof, floor & balcony material | Siding: Plywood 1/2" , steel frame, honeycomb paper, plywood 3/8", bitume, housewrap, vinyl siding Roof: Metal roofing Floor: Plywood Balcony & Pedestal: Steel frame & wood plastic composite |
| Electrical devices | 1 RCB (Residual current breaker) 2 Wall outlet (Universal wall sockets) 1 Ceiling light switch 1 Ceiling light 1 Wall light 1 Ethernet wall port 66ft power cable with 2 connectors |
| Power input | Maximum voltage: 110V AC (US standard) Maximum current: 25A Maximum power dissipation: 2750W |
Key Features:
- Compact design for small backyard areas.
- Pre-fabricated structure for quick setup.
- Minimalist interior designed for focused productivity.
- Great for solo work, meditation, or personal retreat spaces.
 "Would prefer it. Love the way it fits right into my backyard space. Actually the material & design looks better than my expectation. Would prefer it to my network."- Alejandro B.
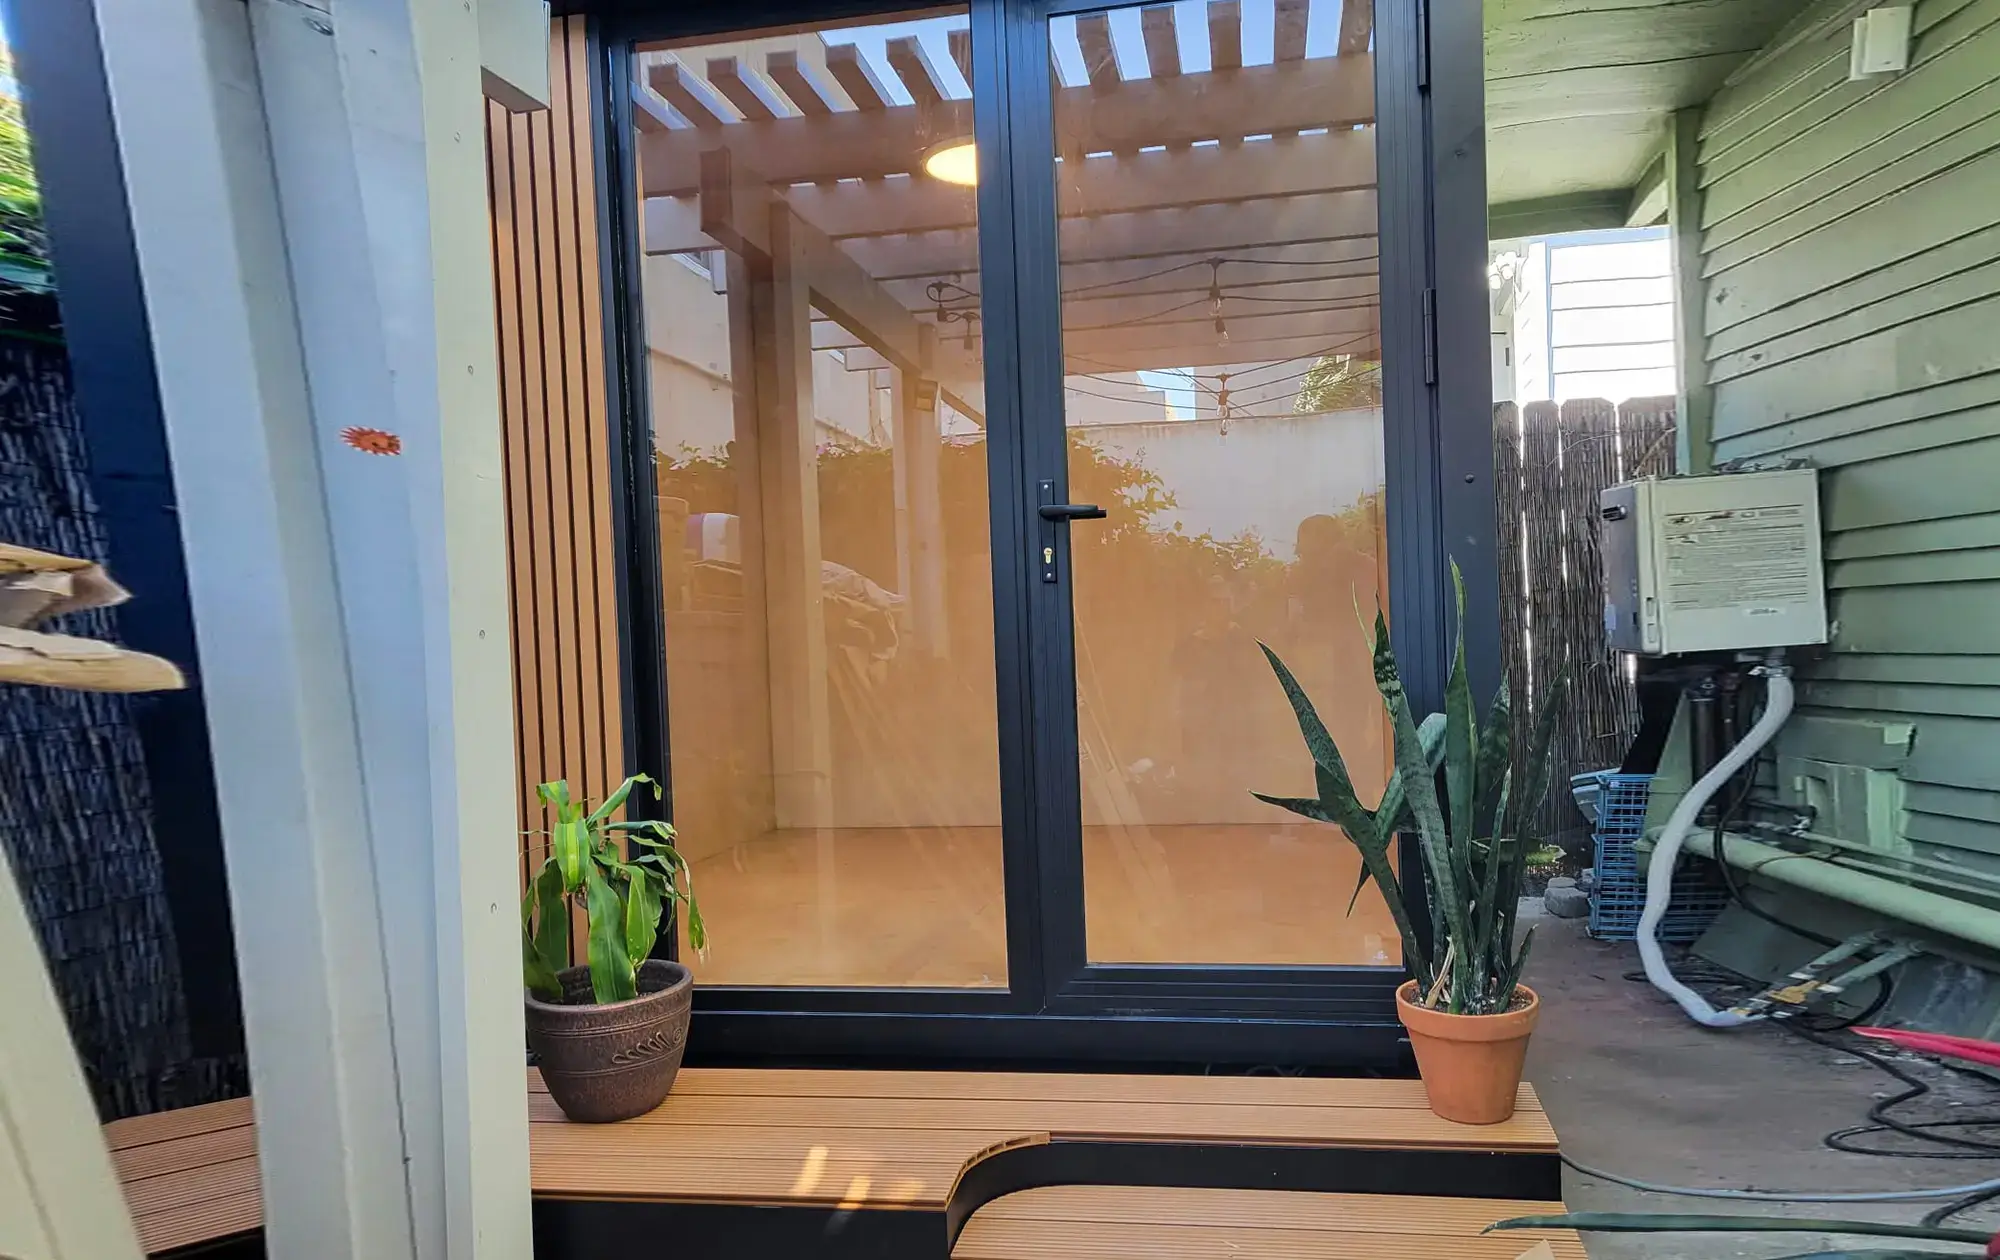 "A perfect fit for our tight backyard space. We love how this allowed us to get extra space without the headache of going through permits or renovation costs. The Pod Lite is small enough to not be considered an ADU that requires permitting and clearance from the city, which is amazing. Such an innovative solution, especially as more people are working from home now. It’s going to be our new office space!" - Katie S.
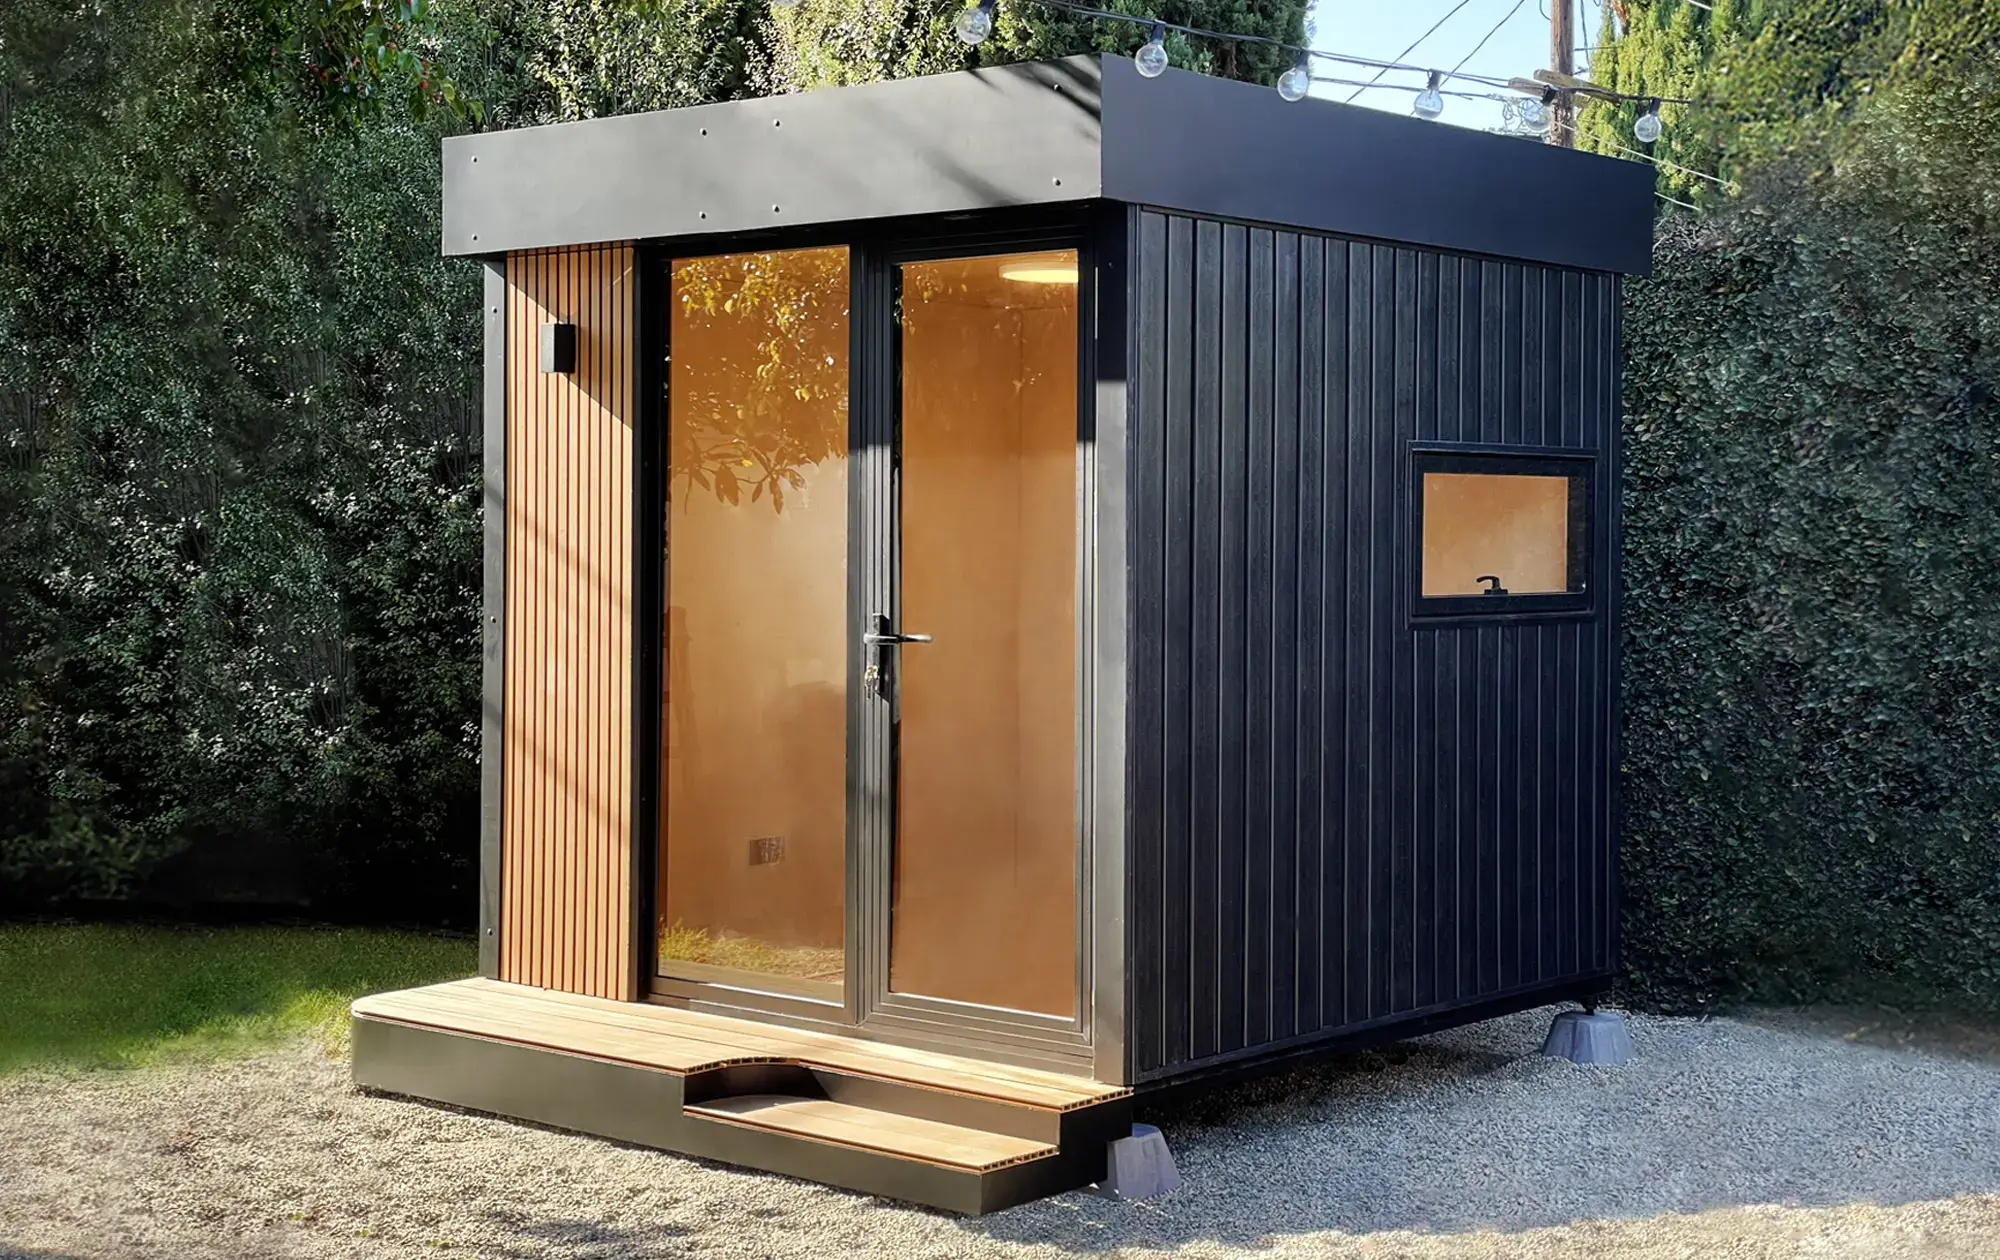 "Very worth it. The WorkPod Lite surpassed my expectations with its faithful resemblance to the website's depiction. Its design is not only visually consistent but also surprisingly spacious. The material is also very sturdy and weather resistance."- Hee-Sang L.
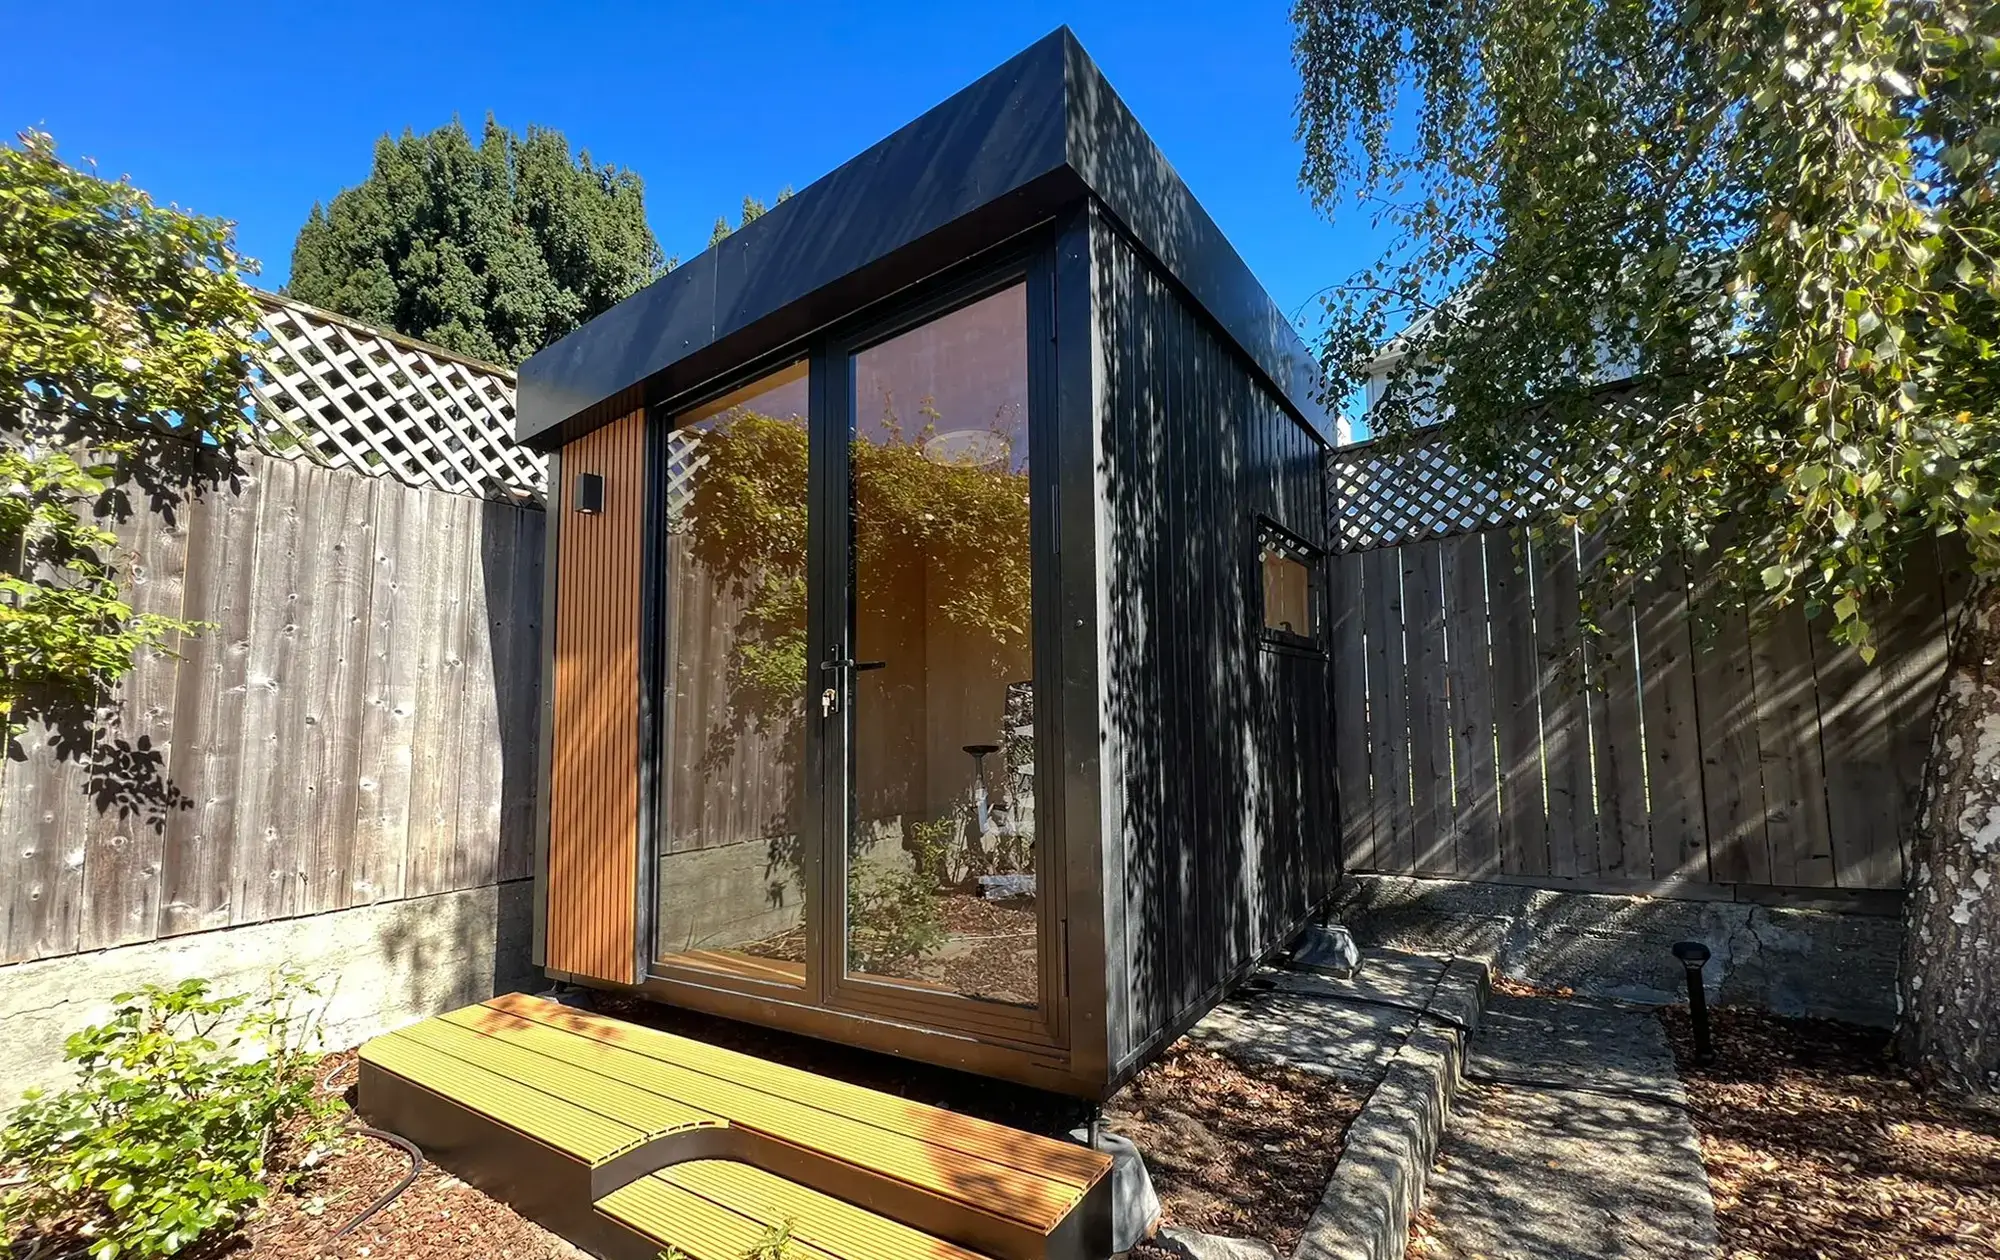 "The WorkPod Lite is a fantastic buy! Despite a slightly delayed delivery, it effortlessly nestled into my compact backyard. Quick assembly had it up and running within days. Highly recommended!"- Meredith H.
FAQs
1. How to get an ADU permit?
To obtain an ADU permit, start by researching your local regulations, consulting with professionals if needed, gathering required documents, completing the application, paying the fee, and submitting it to your local building department. The specifics may vary depending on your location.
2. How much do ADU permits cost?
The cost of ADU permits varies based on your location and the complexity of your project. It can range from a few hundred to several thousand dollars. Check with your local building department for accurate pricing.
3. How long does it take to get an ADU permit?
The timeline for ADU permit approval varies by location and project complexity. It can take anywhere from a few weeks to several months. Be prepared for potential delays during the review and inspection process.
4. Do you need a permit for an ADU?
In most areas, yes, you need a permit for an ADU. Permits ensure compliance with local zoning and building codes, safety standards, and environmental regulations. Check with your local authorities to determine specific requirements.
5. What is an ADU permit?
An ADU permit is an official authorization from your local building department that allows you to construct or modify an Accessory Dwelling Unit (ADU) on your property. It confirms that your project complies with local regulations and is safe for occupancy.
Conclusion
In your journey to explore the world of ADU permits and prefab ADUs in San Francisco, it's essential to arm yourself with knowledge and follow the necessary steps. It is essential to know the process for obtaining an ADU permit, the associated fees, and the time frame involved. Remember that your ADU project's legality, safety, and success depend on your compliance with local rules and your getting the necessary licenses. These basics are essential in San Francisco, whether you're thinking about a conventional or prefab ADU.
/https://storage.googleapis.com/s3-autonomous-upgrade-3/production/ecm/230914/bulk-order-sep-2023-720x1200-CTA-min.jpg)
Stay connected with us!
Subscribe to our weekly updates to stay in the loop about our latest innovations and community news!
Interested in a Link Placement?
Spread the word
/https://storage.googleapis.com/s3-autonomous-upgrade-3/production/ecm/230824/image_tMoN47-V_1692155358869_raw-93ed49d8-7424-464e-bdfe-20ab3586d993.jpg)